
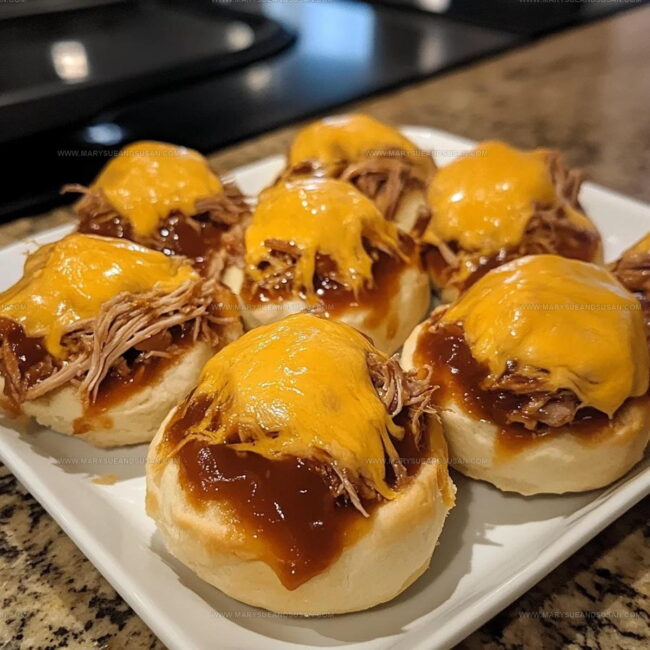
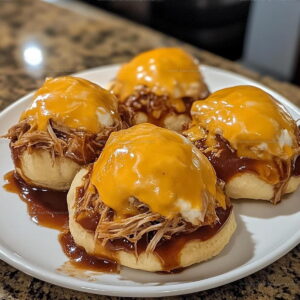
BBQ Pulled Pork Cheese Bombs Recipe That Packs Bold Flavor
Succulent bbq pulled pork cheese bombs promise pure comfort food excitement that everyone craves.
Hearty southern-style flavor meets portable handheld deliciousness in one incredible appetizer sensation.
Crispy exterior shells conceal molten cheese and tender meat waiting to surprise hungry guests.
Perfect for game day gatherings, potlucks, or casual weekend snacking, these delectable bites pack serious flavor punch.
Crowd-pleasing recipes like these transform ordinary moments into memorable culinary experiences that spark conversation and delight taste buds.
Savory, melty, and totally irresistible, these morsels represent comfort eating at its finest.
What Makes Bbq Pulled Pork Cheese Bombs So Snackable
Full Ingredient List for BBQ Pulled Pork Cheese Bombs
Main Protein:Cheese Blend:Flavor Enhancers:Dough Wrapper:Supporting Ingredients:Tools to Have Ready for Bbq Pulled Pork Cheese Bombs
Straightforward Cooking Method for BBQ Pulled Pork Cheese Bombs
Warm Up the Oven
Fire up your oven to exactly 375°F so it’s ready for some delicious cooking action. Grab a baking sheet and give it a quick spray with cooking spray to prevent any sticking.
Mix the Tasty Filling
Grab a big mixing bowl and get ready to create something awesome. Here’s how you’ll combine the ingredients:
Stir everything together until the cheeses and pork are perfectly mixed and looking delicious.
Prepare the Dough
Pop open that can of refrigerated biscuit dough and separate each biscuit. Use your fingers to gently flatten each one into a small circle about the size of your palm.
Create the Cheese Bombs
Scoop a hearty spoonful of your pork and cheese mixture right into the center of each biscuit circle. Carefully fold the edges over and pinch them closed, making sure no filling can escape.
Season and Arrange
Sprinkle these little flavor bombs with your seasoning blend:
Place each bomb seam-side down on your prepared baking sheet, giving them a little space between each one.
Bake to Golden Perfection
Slide the baking sheet into your preheated oven and bake for 15-18 minutes. Watch for that beautiful golden-brown color that tells you they’re perfectly cooked.
Finish and Serve
Pull those hot cheese bombs out of the oven and let them cool just a bit. If you’re feeling fancy, sprinkle some chopped parsley on top. Serve them up while they’re warm and watch everyone dig in!
What Helps Bbq Pulled Pork Cheese Bombs Turn Out Well
What Are BBQ Pulled Pork Cheese Bombs Variations
How To Serve Bbq Pulled Pork Cheese Bombs
Practical Storage Notes For BBQ Pulled Pork Cheese Bombs
Bbq Pulled Pork Cheese Bombs Frequently Asked Questions
Can I make these ahead of time?
Absolutely! Prepare the cheese bombs and store them unbaked in the refrigerator for up to 24 hours. When ready to serve, bake directly from the fridge.
What if my biscuit dough tears while filling?
No worries. Gently patch the hole with extra dough or pinch the edges firmly to seal the filling inside.
Can I freeze these pulled pork cheese bombs?
Definitely! After assembling, freeze unbaked bombs on a baking sheet. Once frozen, transfer to a freezer bag. Bake directly from frozen, adding 5-7 extra minutes to cooking time.
Do I need a specific type of pulled pork?
Not really. Homemade or store-bought pulled pork works perfectly. Just ensure it’s not too wet to prevent soggy bombs.
Can I swap the cheese?
Sure! Swap mozzarella and cheddar for pepper jack, provolone, or your favorite melting cheese blend.
What if I don’t have biscuit dough?
Crescent roll dough makes an excellent substitute and works just as well for these cheese bombs.
BBQ Pulled Pork Cheese Bombs Recipe
- Total Time: 30-33 minutes
- Yield: 8 1x
Description
Pulled Pork Cheese Bombs bring melty, cheesy goodness wrapped in golden, crispy dough that makes your taste buds dance with pure comfort. Packed with tender pulled pork and gooey cheese, these little bombs are perfect for game day snacking or satisfying your serious comfort food cravings.
Ingredients
Protein:
- 1 lb pulled pork, cooked and shredded
Cheeses:
- 1 cup shredded mozzarella cheese
- 1 cup shredded cheddar cheese
Base and Supporting Ingredients:
- 1 can refrigerated biscuit dough
- 1 cup BBQ sauce
- ½ teaspoon garlic powder
- ½ teaspoon onion powder
- ¼ teaspoon black pepper
- Cooking spray
- Chopped parsley
Instructions
- Warm your oven to exactly 375°F, ensuring precise temperature for perfect cooking.
- Blend 1 cup pulled pork with ½ cup BBQ sauce in a mixing bowl. Incorporate ½ cup mozzarella and ½ cup cheddar cheese thoroughly.
- Carefully unroll refrigerated biscuit dough and gently flatten each piece into a thin circular shape.
- Scoop 2 tablespoons of pork-cheese mixture into the center of each biscuit round. Carefully fold edges toward center, sealing tightly with fingertips.
- Dust each bomb with ¼ teaspoon garlic powder, ¼ teaspoon onion powder, and a pinch of black pepper.
- Spray baking sheet with cooking spray. Position bombs seam-side down, leaving space between each.
- Slide sheet into preheated oven and bake precisely 16 minutes until tops turn golden brown.
- Remove from oven and let bombs rest 3-4 minutes. Sprinkle chopped parsley across surface for fresh color and flavor.
- Transfer bombs to serving plate, ensuring they remain intact during movement.
Notes
- Seal the edges of the biscuit dough carefully to prevent the filling from leaking during baking.
- For a gluten-free version, swap refrigerated biscuit dough with a gluten-free biscuit or pastry alternative.
- Make sure your pulled pork is warm and not too wet when mixing with cheese to avoid soggy dough.
- If your cheese bombs are browning too quickly, cover loosely with aluminum foil to prevent burning while ensuring the inside cooks thoroughly.
- Prep Time: 15 minutes
- Cook Time: 15-18 minutes
- Category: Pork
- Method: Baking
- Cuisine: American
Nutrition
- Serving Size: 8
- Calories: 364 kcal
- Sugar: 7 g
- Sodium: 710 mg
- Fat: 21 g
- Saturated Fat: 9 g
- Unsaturated Fat: 10 g
- Trans Fat: 0.5 g
- Carbohydrates: 22 g
- Fiber: 1 g
- Protein: 24 g
- Cholesterol: 70 mg
Mary Sue
Founder & Creative Recipe Developer
Expertise
Comfort Food Twists, Seasonal Cooking, Creative Flavor Pairings, Easy Weeknight Dinners, Flexible Pantry Cooking
Education
Mary Sue is the playful, creative recipe mind behind Mary Sue & Susan, known for big flavor ideas, warm storytelling, and dishes that feel both comforting and a little unexpected. She has a talent for taking familiar meals and giving them just enough personality to make them memorable.