
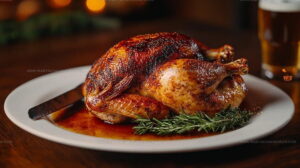
Beer Can Chicken Recipe That Creates Juicy Tender Meat
Succulent beer can chicken promises a juicy and flavorful twist on traditional roasted poultry.
Grilling enthusiasts and home cooks adore this playful technique that infuses meat with rich, complex tastes.
Moisture-packed and impossibly tender, the method guarantees a show-stopping centerpiece for backyard gatherings or weekend cookouts.
Crispy skin and perfectly seasoned meat make this dish a crowd-pleasing favorite that impresses without complicated preparation.
Simple yet sophisticated, the technique transforms an ordinary chicken into something extraordinary with minimal effort.
Professional chefs and weekend grill masters alike appreciate how seamlessly this approach delivers maximum flavor and minimal fuss.
Why Beer Can Chicken Is A Go-To
Ingredients Breakdown For Beer Can Chicken
Main Chicken:Rub And Seasoning:Supporting Seasonings:Kitchen Tools Needed for Beer Can Chicken
How to Make Beer Can Chicken

Chicken Prep
Pull that chicken out of the fridge about 30 minutes before cooking. This helps the meat cook evenly and lets the seasonings really sink in.
Dry Surface
Grab some paper towels and pat the entire chicken down until it’s completely dry. This trick helps the spices stick like they’re supposed to.
Spice Blend Creation
Mix your dry rub ingredients in a small bowl. Here’s what goes in:
Oil Massage
Drizzle 2 tablespoons olive oil all over the chicken, making sure every single inch gets a nice coating.
Seasoning Application
Sprinkle that spice blend generously across the entire chicken. Press gently to help those seasonings really grab onto the meat.
Beer Can Prep
Crack open a 12-ounce beer and take a quick swig or pour out about a quarter of the liquid. This makes room for the chicken.
Can Modification
Use a can opener to punch 2-3 extra holes in the top of the beer can.
Heat Setup
Fire up your grill or oven to 375°F. You’ll want to use indirect heat for this cooking method.
Chicken Positioning
Place the beer can on a stable surface and carefully lower the chicken’s cavity right over the can.
Cooking Placement
Set the chicken-beer can combo on the cooler side of the grill or in a roasting pan if using the oven.
Roasting Time
Cook for about 75 minutes. Keep an eye out until the internal temperature hits exactly 165°F at the thickest part of the thigh.
Resting Period
Take the chicken off the heat and let it chill for 10-15 minutes before cutting. This helps keep all those delicious juices inside.
Little Things That Help With Beer Can Chicken
Flavor Variations for Beer Can Chicken
How To Present Beer Can Chicken
Storing Beer Can Chicken Properly
Beer Can Chicken Common Questions
Can I use an aluminum can instead of beer?
Absolutely no! Beer cans work best because they’re the right size and provide steam. Aluminum beverage cans might have coatings that could release harmful chemicals when heated.
How do I know if the chicken is balanced correctly on the can?
Steady the chicken by using its legs as a tripod. The beer can and two legs should create a stable base, allowing the chicken to sit upright without tipping over.
Should the beer be cold or room temperature?
Room temperature beer works perfectly. Cold beer can slow down the cooking process and reduce the steam effect that helps keep your chicken tender and juicy.
What happens if the beer can is too full?
Your beer needs about ¼ of the liquid removed to prevent overflow and create space for steam. Too much liquid can cause flare-ups or uneven cooking.
Can vegetarians try this cooking method?
Vegetable alternatives like a bell pepper or sturdy zucchini could work as a replacement “can” for those avoiding meat, though the technique won’t be exactly the same.
Is a vertical chicken roaster a good substitute for a beer can?
Definitely. A vertical roaster provides similar support and allows even heat circulation, making it an excellent alternative if beer cans aren’t available.
Beer Can Chicken Recipe
- Total Time: 1 hour 45 minutes
- Yield: 4 1x
Description
Sizzling Beer Can Chicken brings backyard grilling magic right to your plate, where tender, juicy meat meets crispy, golden skin for a seriously delicious summer feast that’ll have neighbors peeking over the fence.
Ingredients
Main Ingredients:
- 1 whole chicken (4–5 pounds), giblets removed
- 1 can (12 oz) beer (lager or ale recommended)
Rub/Seasoning Ingredients:
- 2 tablespoons olive oil or melted butter
- 1 tablespoon salt
- 1 tablespoon paprika
- 2 tablespoons brown sugar
Supporting Ingredients:
- 3 cloves garlic, minced
- 2 teaspoons black pepper
- 1 teaspoon onion powder
- 1 teaspoon garlic powder
- 1 teaspoon dried thyme
- ½ teaspoon cayenne pepper
Instructions
- Pull the chicken from the refrigerator 30 minutes prior to ensure even cooking and help it absorb seasoning more effectively.
- Pat the entire chicken surface completely dry using paper towels to help the spice blend adhere perfectly.
- Create a robust dry rub by combining 2 tablespoons brown sugar, 1 tablespoon paprika, 1 tablespoon salt, and other spices in a small mixing bowl.
- Massage 2 tablespoons olive oil across the chicken’s entire exterior, ensuring complete and smooth coverage.
- Sprinkle the prepared dry rub generously over every surface of the chicken, pressing gently to make the seasonings stick.
- Open a 12-ounce beer and carefully drink or discard ¼ of the liquid to make room for chicken placement.
- Punch 2-3 additional ventilation holes into the top of the beer can using a church key or can opener.
- Preheat your grill or oven to 375°F, preparing for indirect heat cooking method.
- Position the beer can on a sturdy surface and slowly lower the chicken’s cavity directly over the can.
- Place the chicken-beer can setup on the grill’s cooler side or in a roasting pan for oven cooking.
- Roast for approximately 75 minutes, monitoring until the internal temperature precisely reaches 165°F at the thickest part of the thigh.
- Remove from heat and let the chicken rest for 10-15 minutes before carving to preserve its juiciness.
Notes
- Patting the chicken completely dry helps the dry rub stick better and creates a crispier skin that seals in moisture.
- Preparing the grill or oven with indirect heat prevents burning and ensures even cooking throughout the chicken.
- Let the chicken rest for 10-15 minutes after cooking to allow juices to redistribute, which keeps the meat tender and flavorful.
- For a lighter version, swap regular beer for a low-calorie or non-alcoholic option, or use chicken broth as an alternative liquid.
- Prep Time: 30 minutes
- Cook Time: 1 hour 15 minutes
- Category: Chicken
- Method: Roasting
- Cuisine: American
Nutrition
- Serving Size: 4
- Calories: 410 kcal
- Sugar: 5 g
- Sodium: 1200 mg
- Fat: 18 g
- Saturated Fat: 4 g
- Unsaturated Fat: 14 g
- Trans Fat: 0 g
- Carbohydrates: 8 g
- Fiber: 1.5 g
- Protein: 48 g
- Cholesterol: 130 mg
Susan Whitaker
Content Specialist & Home Cooking Guide
Expertise
Family-friendly Meals, Simple Healthy Cooking, Ingredient Substitutions, Beginner-friendly Recipes, Flexible Meal Prep
Education
Susan is the steady, practical guide at Mary Sue & Susan, bringing clarity, structure, and a warm sense of encouragement to every recipe she touches. Susan joined the site with a simple goal: help people cook with more confidence and less guesswork.