Broiled Melt In Your Mouth Chicken Recipe

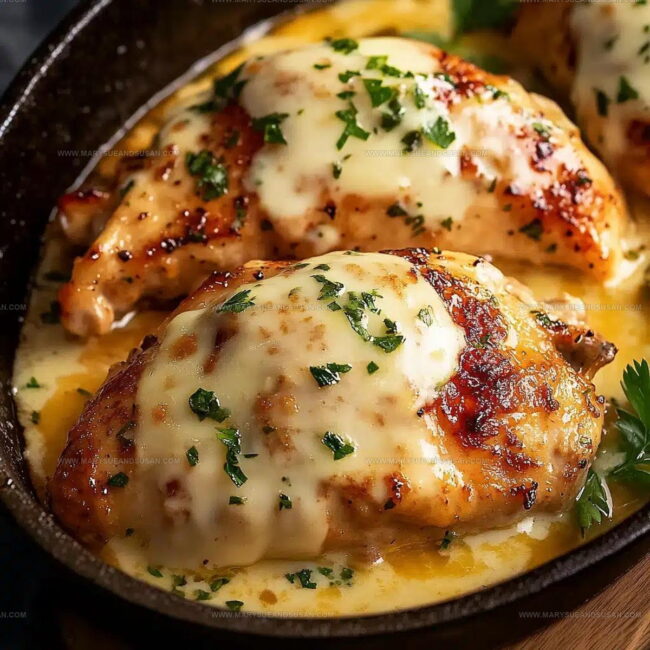
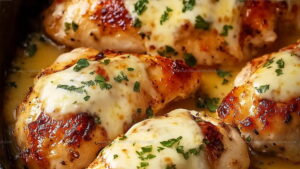
Tender Chicken Recipe That Falls Apart With Every Bite

Succulent melt-in-your-mouth chicken promises a dining experience that transcends ordinary weeknight meals.

Comfort meets pure satisfaction in this remarkably tender dish that speaks directly to hungry souls.

Minimal effort produces maximum flavor, making this recipe a true kitchen champion for busy home cooks.

Sophisticated yet approachable, the technique guarantees juicy meat with an incredibly smooth texture that melts effortlessly on your palate.

Seasoned chefs and kitchen novices alike will appreciate how simple ingredients can create such remarkable results.

Perfectly balanced and universally appealing, this chicken preparation transforms an everyday protein into something extraordinary.

What Makes Melt-In-Your-Mouth Chicken So Special

  • Super Simple Cooking: This chicken recipe feels like a total kitchen win when you need something delicious without complicated steps or tons of ingredients.
  • Family Crowd-Pleaser: The creamy Parmesan coating makes this dish so tasty that even picky eaters will clean their plates without complaining.
  • Minimal Cleanup Magic: By using parchment paper and just a few mixing bowls, your kitchen stays neat and cleanup becomes a breeze after preparing this tender chicken.
  • Protein Power Meal: Perfect for anyone wanting a protein-packed dinner that doesn’t sacrifice flavor or require complicated culinary skills.

Ingredients For Melt In Your Mouth Chicken

Main Chicken Ingredients:
  • Boneless Skinless Chicken Breasts (4): Lean protein that creates the base of this delicious dish. Pounding them to an even thickness helps guarantee consistent cooking.
  • Mayonnaise (1 cup): Creamy base that helps seal moisture into your chicken while creating a rich coating.
  • Grated Parmesan Cheese (1/2 cup): Adds a salty, tangy flavor and helps create a deliciously golden crust on your chicken.
Seasoning Ingredients:
  • Garlic Powder (1 tsp): Provides a warm, aromatic background flavor that enhances the entire dish.
  • Onion Powder (1 tsp): Delivers a subtle, savory depth to complement the chicken’s natural taste.
  • Paprika (1/2 tsp): Offers a mild, slightly sweet warmth and beautiful golden color to your coating.
  • Salt and Pepper (To Taste): Essential seasonings that bring out the chicken’s natural flavors and balance the overall taste.
Optional Garnish Ingredients:
  • Fresh Parsley (Chopped): Adds a bright, fresh finish to your beautifully baked chicken.
  • Lemon Wedges (For Serving): Provides a zesty, tangy accent that can be squeezed over the chicken for extra brightness.

Standard Cooking Tools for Melt In Your Mouth Chicken

  • 9×13-inch Baking Dish: Grab a spacious dish where your chicken breasts can spread out in a single layer without crowding. Parchment paper or a light grease helps with easier cleanup.
  • Mixing Bowl (Medium): Select a bowl big enough to blend your creamy Parmesan coating smoothly without splattering ingredients everywhere.
  • Measuring Spoons: Precise spoons help you nail the right amount of garlic powder, onion powder, and paprika for consistent seasoning.
  • Meat Mallet or Rolling Pin: Flatten your chicken breasts to an even thickness, ensuring each bite cooks perfectly and stays tender.
  • Cheese Grater: Fresh Parmesan straight from a block delivers way more flavor than pre-grated options. Your taste buds will thank you.
  • Paper Towels: Keep these handy to pat your chicken breasts completely dry before seasoning, which helps the coating stick better.
  • Sharp Knife: Use for slicing fresh parsley and cutting lemon wedges as a bright, fresh garnish for serving.
  • Instant-Read Thermometer: Check that your chicken reaches a safe 165°F internal temperature without guesswork.
  • Broiler-Safe Baking Dish: Ensures you can get that perfect golden, crispy top during the final broiling stage.

Classic Method for Melt-In-Your-Mouth Chicken

Classic Method for Melt-In-Your-Mouth Chicken
1

Prepare the Oven

Set your oven to 375°F. Grab a 9×13 inch baking dish and lightly spray it with cooking spray to prevent sticking.

2

Ready the Chicken

Pat 4 boneless skinless chicken breasts completely dry with paper towels. Sprinkle both sides with salt and pepper. Arrange the chicken in a single layer in your prepared baking dish.

3

Create the Creamy Coating

Grab a medium bowl and mix together the coating ingredients:

  • 1 cup mayonnaise
  • 1/2 cup grated Parmesan cheese
  • 1 tsp garlic powder
  • 1 tsp onion powder
  • 1/2 tsp paprika

Stir everything until it becomes a smooth, creamy mixture.

4

Cover the Chicken

Spread the creamy mixture generously over each chicken breast. Make sure the coating covers the entire surface evenly.

5

Bake to Perfection

Slide the baking dish into the preheated 375°F oven. Bake for 25-30 minutes until the chicken reaches an internal temperature of 165°F.

6

Add a Golden Crunch

Switch your oven to broil. Watch carefully and broil for 2-3 minutes to create a beautiful golden top. Keep your eyes on the dish to prevent burning.

7

Rest and Serve

Pull the chicken from the oven and let it rest for 5 minutes. This helps keep the meat super juicy. If you want, sprinkle some chopped fresh parsley on top and serve with lemon wedges for an extra pop of flavor.

8

Pro Tip for Even Cooking

For the most tender results, take a moment to pound the chicken breasts to an even thickness before starting. This helps the chicken cook uniformly and stay moist throughout.

Smart Notes for Melt-In-Your-Mouth Chicken

  • Pound chicken breasts to the same thickness so every bite cooks perfectly and stays tender.
  • Grate cheese directly from a block for deeper, richer flavor that store-bought shredded cheese can’t match.
  • Watch carefully during those final minutes under the broiler to achieve a gorgeous golden crust without burning.
  • Let the chicken sit for 5 minutes after baking so the juices redistribute and make each bite super moist.
  • Spread the mayo mixture generously to create a creamy, flavorful coating that locks in moisture and adds incredible taste.

Flavor Twists For Melt In Your Mouth Chicken

  • Dairy-Free Delight: Replace Parmesan with nutritional yeast or dairy-free cheese alternative, using equal amounts for a creamy coating that keeps the chicken moist and flavorful.
  • Herb-Infused Version: Swap garlic and onion powder with fresh chopped herbs like thyme, rosemary, and basil, adding a tablespoon of each for a vibrant, fresh herb profile.
  • Spicy Kick Variation: Mix in red pepper flakes or cayenne pepper (1/2 teaspoon) with the coating to create a zesty, warming sensation that transforms the classic recipe.
  • Gluten-Free Option: Ensure all ingredients are certified gluten-free, especially checking the Parmesan cheese and mayonnaise labels for any hidden gluten components.

Best Serving Options For Melt-In-Your-Mouth Chicken

  • Serve with Roasted Veggies: Grab some crispy roasted broccoli or Brussels sprouts as a perfect side that complements the chicken’s creamy texture and adds nice color to your plate.
  • Wine Pairing Pick: Grab a crisp white wine like Sauvignon Blanc or Pinot Grigio that cuts through the rich Parmesan coating and balances the dish’s creamy profile.
  • Fresh Herb Finish: Sprinkle chopped fresh parsley or chives right before serving to brighten the flavors and add a pop of green that makes the dish look restaurant-worthy.
  • Smart Plate Combo: Serve alongside simple garlic rice or buttered egg noodles which soak up the delicious pan juices and create a complete meal that feels totally satisfying.

Storage Tips For Melt-In-Your-Mouth Chicken

  • Refrigerate leftover chicken in an airtight container within two hours of cooking, keeping everything sealed tight so moisture stays locked inside your dish.
  • Freeze individual portions wrapped carefully in plastic wrap and then placed in freezer bags, which lets your meal stay fresh for up to three months without losing quality.
  • Store chilled chicken in the refrigerator for 3-4 days maximum, making sure to keep the container sealed and placed toward the back where temperatures remain most consistent.
  • When reheating, warm the chicken in an oven at 350°F to preserve its original texture and prevent drying out, which helps maintain that delicious crispy coating.

Melt-In-Your-Mouth Chicken Questions Readers Often Ask

FAQ

Can I use chicken thighs instead of breasts?

Chicken thighs work great! They’re often more forgiving and stay extra moist. Just adjust cooking time slightly since thighs might need a few extra minutes.

FAQ

How do I know the chicken is fully cooked?

Use a meat thermometer to check the internal temperature reaches 165°F at the thickest part. No pink meat should remain, and juices should run clear.

FAQ

Is there a substitute for mayonnaise?

Greek yogurt or sour cream can replace mayonnaise with similar creamy results. The coating might be slightly tangier but will still taste delicious.

FAQ

Can I prepare this dish ahead of time?

Absolutely! Assemble the chicken with coating and refrigerate for up to 24 hours before baking. Just add a few extra minutes to cooking time if going straight from cold.

FAQ

What makes this chicken so tender?

The mayonnaise coating helps seal moisture, while evenly pounded chicken ensures consistent cooking. The Parmesan cheese creates a delectable golden crust that locks in flavor.

Print
clock clock iconcutlery cutlery iconflag flag iconfolder folder iconinstagram instagram iconpinterest pinterest iconfacebook facebook iconprint print iconsquares squares iconheart heart iconheart solid heart solid icon
Broiled Melt In Your Mouth Chicken Recipe

Broiled Melt In Your Mouth Chicken Recipe


5 Stars 4 Stars 3 Stars 2 Stars 1 Star

4.7 from 26 reviews

  • Total Time: 40 minutes
  • Yield: 4 1x

Description

Melt in Your Mouth Chicken delivers pure comfort with tender, succulent meat that comes together faster than your favorite takeout. Weeknight dinners just got simpler with this foolproof recipe that guarantees a delicious meal your whole family will devour.


Ingredients

Scale

Chicken:

  • 4 boneless skinless chicken breasts

Creamy Coating:

  • 1 cup mayonnaise
  • ½ cup grated Parmesan cheese

Seasonings:

  • 1 teaspoon garlic powder
  • 1 teaspoon onion powder
  • ½ teaspoon paprika
  • Salt
  • Pepper

Garnish:

  • Fresh parsley
  • Lemon wedges

Instructions

  1. Grab a 9×13 inch baking dish and prepare it with a light coating of cooking spray or parchment paper.
  2. Pat your 4 chicken breasts completely dry using paper towels, then season each side with a pinch of salt and pepper.
  3. In a medium mixing bowl, whisk together 1 cup mayonnaise, ½ cup grated Parmesan cheese, 1 tsp garlic powder, 1 tsp onion powder, and ½ tsp paprika until the mixture becomes smooth and creamy.
  4. Spread the mayo-Parmesan mixture generously over each chicken breast, ensuring complete and even coverage.
  5. Place the baking dish in an oven preheated to 375°F and bake for precisely 25-30 minutes, monitoring the internal chicken temperature until it reaches 165°F.
  6. Switch your oven to broil for the final 2-3 minutes to achieve a golden, crispy surface – watch carefully to prevent burning.
  7. Remove the dish from the oven and let the chicken rest for 5 minutes, allowing the juices to redistribute and enhance tenderness.
  8. Sprinkle chopped fresh parsley over the chicken and serve with optional lemon wedges for an extra burst of flavor.

Notes

  • Ensure chicken breasts are of uniform thickness by gently pounding them before seasoning for even cooking and maximum tenderness.
  • Freshly grated Parmesan cheese delivers a richer, more authentic flavor compared to pre-packaged grated cheese.
  • When broiling, watch the chicken closely to achieve a beautiful golden crust without burning the delicate mayonnaise coating.
  • Letting the chicken rest for a few minutes after baking helps redistribute juices, resulting in a more succulent and flavorful dish.
  • Prep Time: 10 minutes
  • Cook Time: 30 minutes
  • Category: Chicken
  • Method: Baking
  • Cuisine: American

Nutrition

  • Serving Size: 4
  • Calories: 455 kcal
  • Sugar: 0 g
  • Sodium: 460 mg
  • Fat: 37 g
  • Saturated Fat: 8 g
  • Unsaturated Fat: 28 g
  • Trans Fat: 0 g
  • Carbohydrates: 2 g
  • Fiber: 0 g
  • Protein: 30 g
  • Cholesterol: 115 mg
Susan Whitaker

Susan Whitaker

Content Specialist & Home Cooking Guide

Expertise

Family-friendly Meals, Simple Healthy Cooking, Ingredient Substitutions, Beginner-friendly Recipes, Flexible Meal Prep

Education

Saint Paul College
  • Program: Culinary Arts Diploma
  • Focus: Trained in a hands-on professional kitchen environment with coursework spanning core culinary technique, pastry, butchery, charcuterie, food safety, sanitation, restaurant operations, and the nutritional side of healthy cooking, with real-world practice tied to the college’s student-run restaurant.

Susan is the steady, practical guide at Mary Sue & Susan, bringing clarity, structure, and a warm sense of encouragement to every recipe she touches. Susan joined the site with a simple goal: help people cook with more confidence and less guesswork.

Leave a Reply

Your email address will not be published. Required fields are marked *

Recipe rating 5 Stars 4 Stars 3 Stars 2 Stars 1 Star