Crispy Chicken Kiev Recipe For Golden Breaded Perfection
Succulent chicken kiev represents pure comfort food magic that transcends generations of home cooking.
Crispy golden exteriors conceal rich, herb-infused centers waiting to surprise passionate food enthusiasts.
Russian-inspired elegance meets hearty satisfaction in this classic dinner favorite that promises delightful flavor explosions.
Sophisticated yet approachable, chicken kiev transforms ordinary meals into memorable dining experiences with its dramatic presentation.
Precise techniques create sensational results that impress dinner guests without requiring professional chef skills.
Perfectly executed, this dish bridges rustic home cooking and elegant restaurant traditions with remarkable simplicity.
Professional chefs and weekend warriors alike can master this delectable recipe that guarantees mouthwatering results every single time.
Why Chicken Kiev Deserves A Spot On Your Table

Essential Ingredients for Chicken Kiev
Main Ingredients:What Tools Do You Need for Chicken Kiev
Cooking Method for Chicken Kiev
Prepare Garlic Butter
Create a flavor-packed butter mixture that’ll make your chicken amazing. Grab a bowl and combine these ingredients:
Mix everything until smooth. Shape the butter into a neat log using plastic wrap and pop it in the freezer for 30 minutes to firm up completely.
Create Chicken Pockets
Take your 4 chicken breasts and carefully slice a deep pocket into the thickest part. Season both the inside and outside with salt and pepper, making sure to get some flavor everywhere.
Stuff the Chicken
Grab your frozen butter log and cut it into 4 equal pieces. Tuck one butter piece inside each chicken pocket. Use toothpicks to seal the opening if needed – we don’t want that delicious butter escaping!
Coat the Chicken
Set up a breading station with three shallow dishes. First, dust each chicken breast in 1/2 cup of all-purpose flour. Next, dip into 2 beaten eggs. Then coat with 1 1/4 cups of panko breadcrumbs. For extra crispiness, repeat the egg and breadcrumb step one more time.
Fry to Golden Perfection
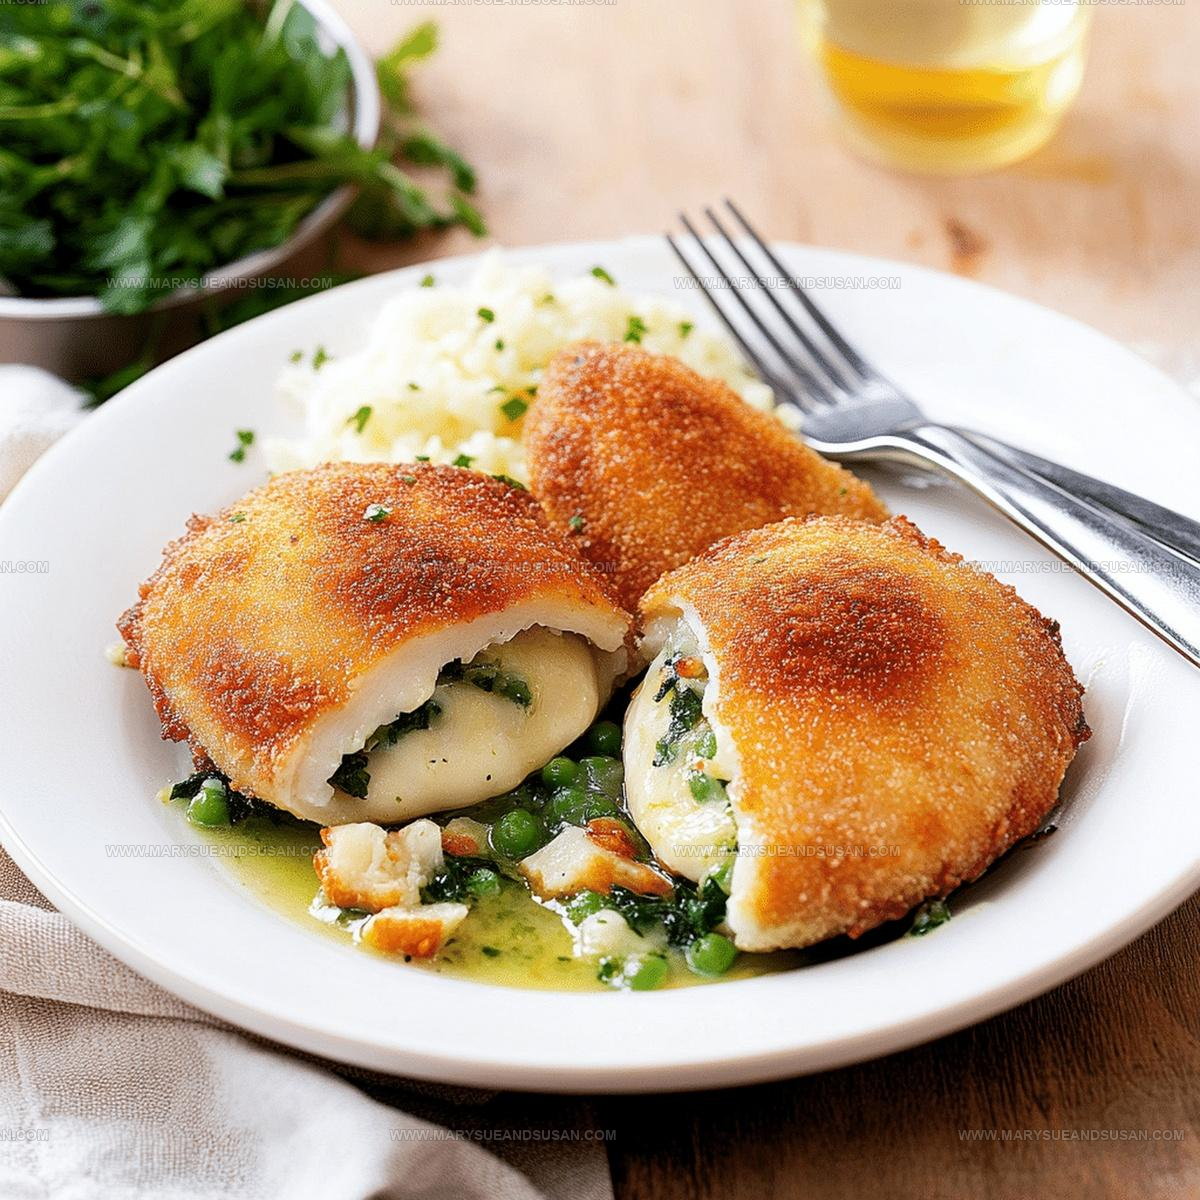
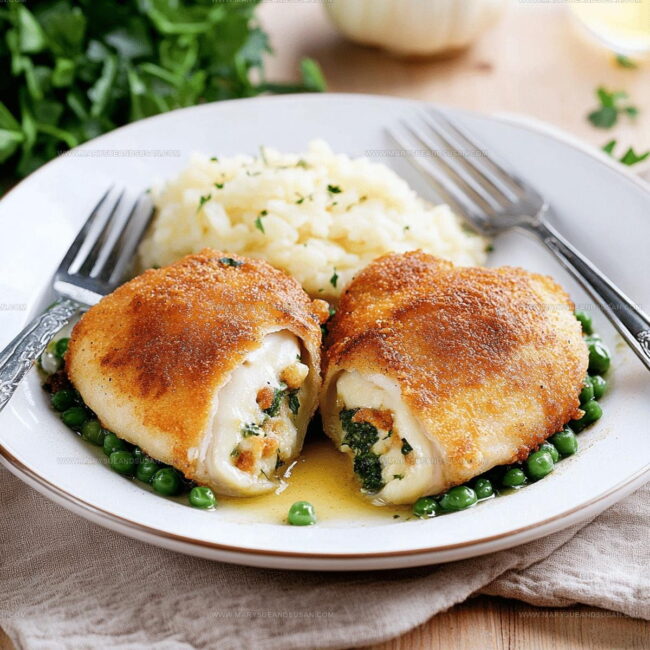
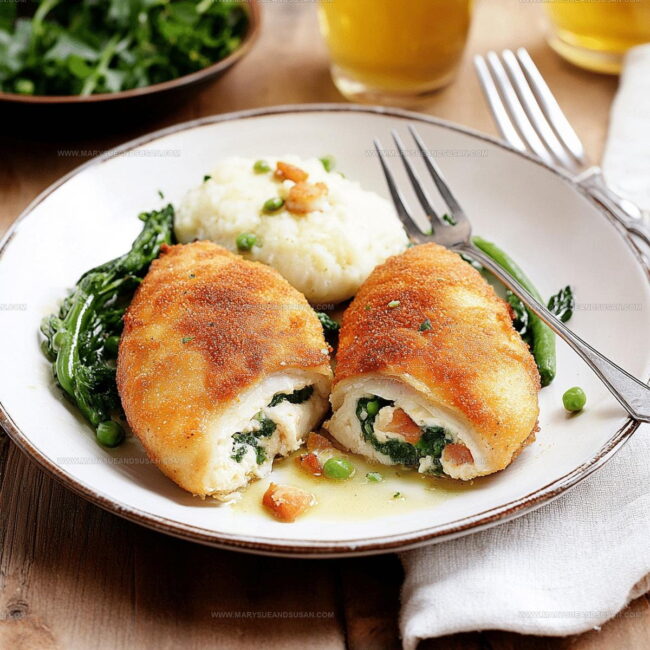
Heat oil in a deep skillet. Carefully place each breaded chicken breast into the hot oil. Fry for 3-4 minutes on each side until they turn a beautiful golden brown. If you prefer baking, pop them in a preheated oven at 400°F for 18-22 minutes. Check that the internal temperature reaches 165°F to ensure they’re fully cooked.
Rest and Serve
Remove the chicken from the heat and let it rest for a few minutes. This helps keep the juices inside and prevents the butter from immediately leaking out. Serve hot and watch as the melted garlic butter oozes out with the first cut.
Helpful Cooking Notes For Chicken Kiev
Different Takes On Chicken Kiev
Classic Plate Pairings For Chicken Kiev
How To Store Chicken Kiev
Popular Questions Answered About Chicken Kiev
Can I make the garlic butter ahead of time?
The butter log can be prepared several days in advance and stored in the freezer. Just wrap it tightly in plastic wrap and place in a freezer bag to keep fresh.
What chicken cuts work best for this recipe?
Boneless, skinless chicken breasts that are evenly thick and around 68 ounces are perfect. Smaller or uneven breasts can make stuffing challenging.
How can I prevent the butter from leaking during cooking?
Freeze the butter log completely solid before stuffing, and seal the chicken pocket carefully with toothpicks to minimize potential butter escape.
Are there alternatives to deep frying?
Absolutely! Baking works wonderfully. Place the breaded chicken on a wire rack over a baking sheet and cook until golden and the internal temperature reaches 74C (165F).
What should I do if my butter leaks during cooking?
Some butter leakage is normal. To minimize this, ensure the butter is frozen solid and the chicken pocket is sealed tightly before breading.

Butter-Filled Chicken Kiev Recipe
- Total Time: 1 hour 4 minutes
- Yield: 4 1x
Description
Chicken Kiev brings together tender chicken stuffed with herbed butter that melts beautifully when baked. Crispy golden breadcrumbs and rich garlic-herb filling make this classic Russian dish a delightful dinner that your family will savor completely.
Ingredients
Main Ingredients:
- 4 chicken breasts
- 1.5 cups breadcrumbs
- ½ cup all-purpose flour
Supporting Ingredients:
- 2 eggs
Flavor Enhancers:
- 100g unsalted butter
- 2 garlic cloves
- 2 tablespoons fresh parsley
- 1 teaspoon lemon juice
- Salt
- Black pepper
Instructions
- Craft a zesty garlic butter by thoroughly blending 7 tablespoons softened unsalted butter with 2 minced garlic cloves, 2 tablespoons chopped parsley, 1 teaspoon lemon juice, salt, and pepper. Roll the mixture into a tight log using plastic wrap and freeze for 30 minutes until completely solid.
- Carefully slice a deep pocket into the thickest section of each chicken breast, ensuring you do not cut through the entire piece. Season the interior and exterior surfaces generously with salt and pepper.
- Remove the frozen butter log from the freezer and cut into four precise segments. Insert one butter piece inside each chicken breast pocket, ensuring it sits snugly. Secure the opening with toothpicks if necessary to prevent leakage during cooking.
- Prepare three shallow dishes: one with ½ cup all-purpose flour, another with 2 beaten eggs, and the third with 1 ¼ cups breadcrumbs. Carefully coat each stuffed chicken breast first in flour, then dip thoroughly in egg, and finally cover completely with breadcrumbs. Repeat the egg and breadcrumb coating for an extra crispy exterior.
- Heat oil in a large skillet to 350°F. Carefully place each breaded chicken breast into the hot oil, cooking for 3-4 minutes per side until the exterior turns a deep golden brown. Alternatively, preheat your oven to 400°F and bake the breaded chicken for 18-22 minutes, ensuring the internal temperature reaches 165°F for safe consumption.
- Remove the chicken from oil or oven and let rest on a wire rack for 3-5 minutes. This allows the internal temperature to stabilize and prevents the butter from immediately leaking when cut.
Notes
- Butter Freezing is Key: Freeze the garlic butter completely to prevent leakage during cooking and create that classic molten center when you slice into the chicken.
- Pocket Technique Matters: Cut the chicken breast pocket carefully and gently to keep the butter seal intact, which prevents butter from escaping during cooking.
- Breadcrumb Double-Dipping: The extra layer of egg and breadcrumbs creates a crispier, more golden exterior that adds amazing texture to your Chicken Kiev.
- Temperature Control: Use a meat thermometer to ensure your chicken reaches the safe internal temperature without overcooking, which keeps the meat juicy and tender.
- Prep Time: 30 minutes
- Cook Time: 34 minutes (frying) or 18-22 minutes (baking)
- Category: Chicken
- Method: Frying
- Cuisine: Ukrainian
Nutrition
- Serving Size: 4
- Calories: 556 kcal
- Sugar: 0.3 g
- Sodium: 210 mg
- Fat: 36 g
- Saturated Fat: 17 g
- Unsaturated Fat: 19 g
- Trans Fat: 0.2 g
- Carbohydrates: 27 g
- Fiber: 1.5 g
- Protein: 38 g
- Cholesterol: 145 mg
Mary Sue
Founder & Creative Recipe Developer
Expertise
Comfort Food Twists, Seasonal Cooking, Creative Flavor Pairings, Easy Weeknight Dinners, Flexible Pantry Cooking
Education
Mary Sue is the playful, creative recipe mind behind Mary Sue & Susan, known for big flavor ideas, warm storytelling, and dishes that feel both comforting and a little unexpected. She has a talent for taking familiar meals and giving them just enough personality to make them memorable.