
Crispy Japanese Chicken Katsu Recipe
Chicken katsu has become a beloved comfort food that satisfies cravings for something crispy, hearty, and downright delicious.
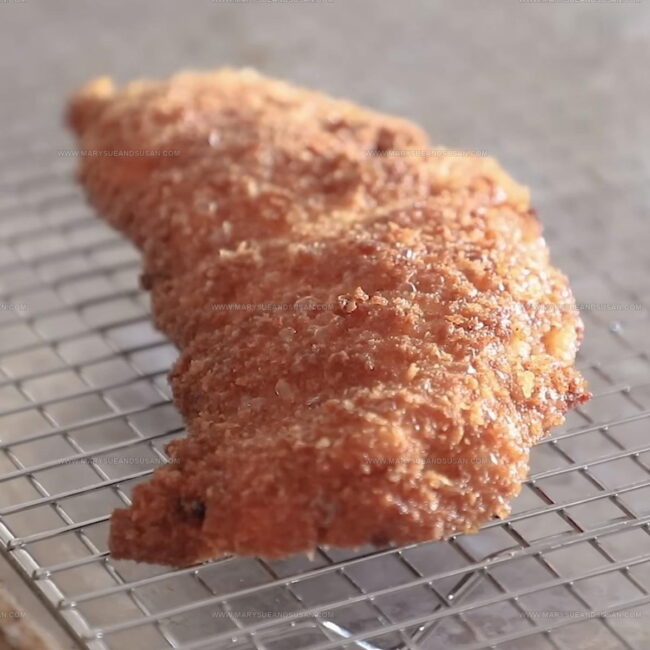
Golden, crunchy perfection on the outside meets tender, juicy goodness on the inside, making every bite utterly satisfying.
Popular in Japanese cuisine but adored worldwide, it's a dish that feels both special and approachingly simple to prepare at home.
Serving it up for weeknight dinners or casual gatherings always gets everyone excited to sit down and eat.
You can count on it to please picky eaters and adventurous palates alike, which makes it a reliable go-to meal.
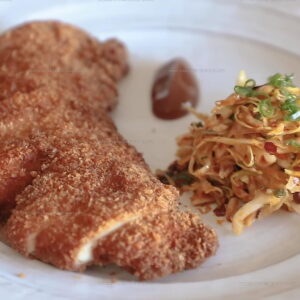
Paired with rice and a simple salad, it turns into a complete, balanced plate that feels filling without being heavy.
The crispy coating and savory flavor profile make it one meal you'll want to add to regular rotation.
Why Chicken Katsu Stands Out

Core Ingredients in Chicken Katsu
Practical Prep Tools for Chicken Katsu
Classic Way to Make Chicken Katsu
Prep the Chicken
Grab those 4 chicken breast halves and pound them down to a slim 1/2 inch thickness. Sprinkle a generous pinch of salt and pepper across both sides, making sure every inch gets some seasoning love.
Set Up Your Breading Station
Create three separate shallow dishes on your counter. In the first, spread out 2 tablespoons of all-purpose flour. In the second, crack and whisk 1 whole egg until smooth. In the third, pour 1 cup of panko bread crumbs.
Coat Each Chicken Piece
Take each seasoned chicken piece and roll it through your breading lineup:
Heat the Cooking Oil
Pour 1 cup of oil into a skillet and heat over medium-high heat until it reaches 350°F. The oil should shimmer but not smoke.
Fry to Golden Perfection
Carefully slide the breaded chicken into the hot oil. Cook for 3-4 minutes on each side until the exterior turns a gorgeous golden brown and the internal temperature hits 165°F.
Drain and Rest
Transfer the fried chicken onto paper towels to absorb any extra oil. Let the pieces rest for a couple minutes before serving to help the crust set perfectly.
Tried And True Notes for Chicken Katsu
Ways To Change It Up for Chicken Katsu
Best Serving Options for Chicken Katsu
Storage And Reheating Notes For Chicken Katsu
Chicken Katsu Q&A
Can I use chicken thighs instead of breasts?
Chicken thighs work great! They’re often more tender and flavorful. Just trim excess fat and pound them to an even thickness before coating.
How do I keep the panko coating crispy?
Press the panko firmly onto the chicken and make sure your oil is hot enough before frying. Let each side get a deep golden color without burning.
What if my panko doesn’t stick well?
Pat the chicken dry before coating and use a light dusting of flour first. The flour helps the egg adhere, which then helps the panko stick perfectly.
Can I bake this chicken instead of frying?
Absolutely. Preheat your oven to 425°F and place the coated chicken on a wire rack over a baking sheet. Spray with cooking spray for extra crispness.
Is it okay to reuse the oil after frying?
Strain the oil through a fine-mesh sieve after it cools. You can reuse it 2-3 times for similar dishes if you store it properly in the refrigerator.
How thick should I pound the chicken?
Aim for about 1/2 inch thick. This ensures even cooking and helps the chicken stay juicy while getting a perfect crispy exterior.
Chicken Katsu Recipe
- Total Time: 18 minutes
- Yield: 4 1x
Description
Chicken Katsu brings crispy Japanese comfort right to your dinner table with golden-brown breaded chicken that crackles perfectly when you slice into it. Tender chicken coated in crunchy panko breadcrumbs makes this classic dish a total crowd-pleaser that delivers serious flavor in minutes.
Ingredients
Proteins:
- 4 skinless boneless chicken breast halves
Dry Ingredients:
- 2 tablespoons all-purpose flour
- 1 cup panko bread crumbs
- 1 salt (to taste)
- 1 pepper (to taste)
Liquid Ingredients:
- 1 egg
- 1 cup oil for frying
Instructions
- Tap each chicken breast with salt and pepper to create a seasoned foundation for maximum flavor absorption.
- Arrange three shallow dishes: one with 2 tablespoons flour, another with 1 beaten egg, and the third with 1 cup panko bread crumbs.
- Dust each chicken piece completely with flour, creating a thin, even coating that helps egg adhere perfectly.
- Dip floured chicken into beaten egg, allowing excess to drip off, ensuring a smooth surface for crumb attachment.
- Press each egg-coated chicken piece firmly into panko crumbs, rotating and patting to create a thick, crunchy exterior that fully covers the meat.
- Pour 1 cup oil into a large skillet, heating to 350°F over medium-high temperature until surface shimmers slightly.
- Carefully lower breaded chicken into hot oil, maintaining steady 350°F heat to prevent burning or undercooking.
- Fry chicken for exactly 3-4 minutes per side, watching for a deep golden-brown crust that signals perfect crispy texture.
- Transfer chicken onto layered paper towels, allowing excess oil to drain and preserve the crisp coating’s integrity.
Notes
- Pounding chicken breasts to an even 1/2-inch thickness ensures consistent, crispy coating and prevents uneven cooking.
- Use fresh panko breadcrumbs for maximum crunchiness and avoid storing them near moisture, which can make them soggy.
- Test oil temperature by dropping a breadcrumb into the skillet – it should sizzle immediately but not burn, indicating perfect frying heat.
- For a gluten-free version, swap wheat flour with rice flour or cornstarch and use gluten-free panko breadcrumbs to maintain the classic crispy texture.
- Prep Time: 10 minutes
- Cook Time: 8 minutes
- Category: Chicken
- Method: Frying
- Cuisine: Japanese
Nutrition
- Serving Size: 4
- Calories: 410 kcal
- Sugar: 1 g
- Sodium: 350 mg
- Fat: 22 g
- Saturated Fat: 4.5 g
- Unsaturated Fat: 15 g
- Trans Fat: 0.2 g
- Carbohydrates: 20 g
- Fiber: 1 g
- Protein: 35 g
- Cholesterol: 85 mg
Susan Whitaker
Content Specialist & Home Cooking Guide
Expertise
Family-friendly Meals, Simple Healthy Cooking, Ingredient Substitutions, Beginner-friendly Recipes, Flexible Meal Prep
Education
Susan is the steady, practical guide at Mary Sue & Susan, bringing clarity, structure, and a warm sense of encouragement to every recipe she touches. Susan joined the site with a simple goal: help people cook with more confidence and less guesswork.