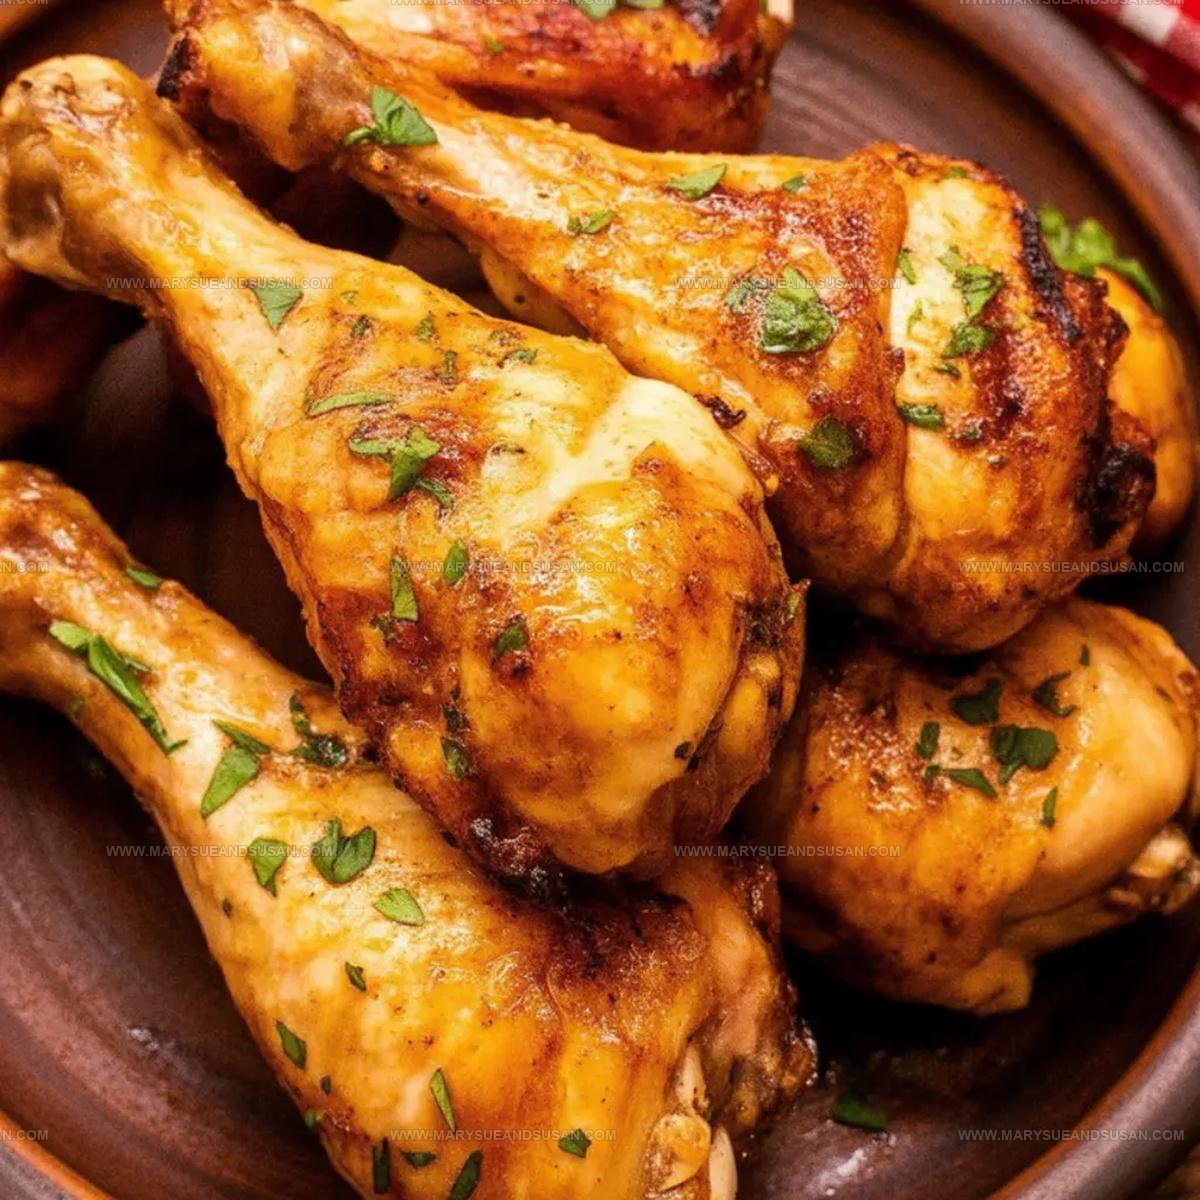
Oven-Baked Chicken Legs Recipe: Juicy Every Time
Chicken legs have become a weeknight favorite for families everywhere because they deliver big flavor without demanding fancy skills or constant attention.
Everyone loves how these cuts stay juicy and tender while developing a beautiful golden exterior that makes dinner feel special.
They work beautifully for casual gatherings, cozy nights at home, or meal prep sessions when you need reliable protein that tastes amazing even as leftovers.
The budget-friendly price point means you can feed a crowd without breaking the bank, and kids absolutely adore them.
Whether you prefer bold seasonings or simple preparations, this protein adapts to whatever mood strikes.
Busy cooks appreciate that minimal hands-on time leads to maximum satisfaction on the plate.
Go ahead and make this recipe tonight, it's bound to become one you reach for again and again.
Why Chicken Legs Are a Budget-Friendly Favorite

Chicken Leg Ingredients Rundown
Main Protein:Main Seasoning Oil:Dry Spice Blend:Optional Heat Element:Optional Garnish:Tools & Roasting Gear for Chicken Legs
How to Prepare Chicken Legs
Prepare Oven Preheat the oven to 425°F (220°C). Line a baking sheet with aluminum foil and place a wire rack on top. Lightly spray or brush the rack with oil to prevent sticking.
Dry Chicken Grab paper towels and thoroughly pat each of your 8 chicken legs (drumsticks) until completely dry. This step helps make the skin super crispy when baking.
Season Chicken In a large mixing bowl, drizzle 2 tablespoons olive oil over the chicken legs. Add the spices:
Toss the chicken until every piece gets an even coating of seasonings.
Arrange on Rack Spread the seasoned chicken legs across the wire rack. Make sure they’re not touching so each leg cooks evenly and gets crisp all around.
First Bake Slide the baking sheet into the preheated oven. Bake for 20 minutes without opening the oven door.
Flip and Continue Carefully turn each chicken leg over. Return to the oven and bake another 15-20 minutes until the skin turns golden brown.
Check Temperature Use a meat thermometer to confirm the internal temperature has reached 165°F (74°C) at the thickest part of the leg.
Rest and Serve Let the chicken rest for 5 minutes before serving. Sprinkle with chopped parsley or serve with lemon wedges if desired.
Pro Tips for Crispy, Juicy Chicken Legs
Chicken Leg Variations Worth Trying
Serving Chicken Legs with Sides
Reheating Chicken Legs Without Losing Moisture
Chicken Legs FAQs You’ll Want to Read
What kind of spices work best on chicken legs?
I always reach for garlic powder, paprika, and onion powder. These give amazing flavor without overwhelming the meat. Salt, pepper, and a tiny bit of cayenne add nice depth.
Do chicken legs need to be marinated first?
Not at all! This recipe works perfectly with a quick seasoning right before cooking. Drizzling olive oil helps the spices stick and creates a gorgeous crispy exterior.
How can I tell if the chicken legs are fully cooked?
Use a meat thermometer to check the internal temperature. It should hit exactly 165°F in the thickest part of the meat. No guesswork needed.
Can chicken legs be made ahead of time?
Absolutely! Season them earlier in the day and store in the refrigerator. They’ll be ready to pop in the oven when dinner time arrives.
What if my chicken legs are different sizes?
Smaller pieces might cook faster, so watch carefully and remove any that finish early. The wire rack helps everything cook evenly.
Are bone-in chicken legs better than boneless?
Bone-in legs have more flavor and stay juicier during cooking. They take a bit longer but taste incredible.

Chicken Legs Recipe
- Total Time: 45-55 minutes
- Yield: 4 1x
Description
When preparing these crispy chicken legs, simple seasonings create maximum flavor without complicated techniques. Salt, pepper, and a dash of garlic powder turn ordinary poultry into a delicious weeknight dinner that everyone appreciates.
Ingredients
Main Ingredients:
- 8 chicken legs
Seasonings:
- 1 teaspoon garlic powder
- 1 teaspoon paprika
- ½ teaspoon onion powder
- ½ teaspoon salt
- ½ teaspoon black pepper
- ¼ teaspoon cayenne pepper
Cooking Components:
- 2 tablespoons olive oil
Garnish:
- Chopped parsley
- Lemon wedges
Instructions
- Prepare your workspace by preheating the oven to 425°F (220°C). Line a baking sheet with aluminum foil and position a wire rack on top, lightly coating it with cooking spray.
- Remove chicken legs from packaging and thoroughly dry each drumstick with paper towels to ensure maximum crispiness.
- Transfer chicken legs to a large mixing bowl, creating space for even seasoning.
- Drizzle 2 tablespoons olive oil over the drumsticks, ensuring complete coverage.
- Sprinkle 1 teaspoon garlic powder, 1 teaspoon paprika, ½ teaspoon onion powder, ½ teaspoon salt, and ½ teaspoon black pepper across the chicken.
- Add optional ¼ teaspoon cayenne pepper for extra heat if you enjoy spicier dishes.
- Massage seasonings into the chicken, guaranteeing each leg is uniformly coated with the spice blend.
- Arrange seasoned chicken legs on the prepared wire rack, spacing them to allow heat circulation.
- Slide the baking sheet into the preheated oven and roast for 35-45 minutes, turning drumsticks midway to promote even browning.
- Check internal temperature reaches 165°F (74°C) using a meat thermometer for safe consumption.
- Remove from oven and let chicken rest for 5 minutes to redistribute juices.
- Garnish with chopped parsley or serve with lemon wedges for a fresh finishing touch.
Notes
- Pat the chicken legs completely dry for the crispiest skin possible, which helps achieve that perfect golden-brown exterior.
- Letting the chicken rest after cooking allows the juices to redistribute, ensuring each bite stays incredibly moist and tender.
- Check the internal temperature with a meat thermometer to guarantee safe cooking and prevent overdrying the meat.
- Experiment with different spice blends like smoked paprika, herbs de Provence, or Cajun seasoning to keep the recipe exciting and personalized.
- Prep Time: 10 minutes
- Cook Time: 35-45 minutes
- Category: Chicken
- Method: Baking
- Cuisine: American
Nutrition
- Serving Size: 4
- Calories: 350 kcal
- Sugar: 0 g
- Sodium: 300 mg
- Fat: 22 g
- Saturated Fat: 5 g
- Unsaturated Fat: 15 g
- Trans Fat: 0 g
- Carbohydrates: 1 g
- Fiber: 0.5 g
- Protein: 30 g
- Cholesterol: 110 mg
Susan Whitaker
Content Specialist & Home Cooking Guide
Expertise
Family-friendly Meals, Simple Healthy Cooking, Ingredient Substitutions, Beginner-friendly Recipes, Flexible Meal Prep
Education
Susan is the steady, practical guide at Mary Sue & Susan, bringing clarity, structure, and a warm sense of encouragement to every recipe she touches. Susan joined the site with a simple goal: help people cook with more confidence and less guesswork.