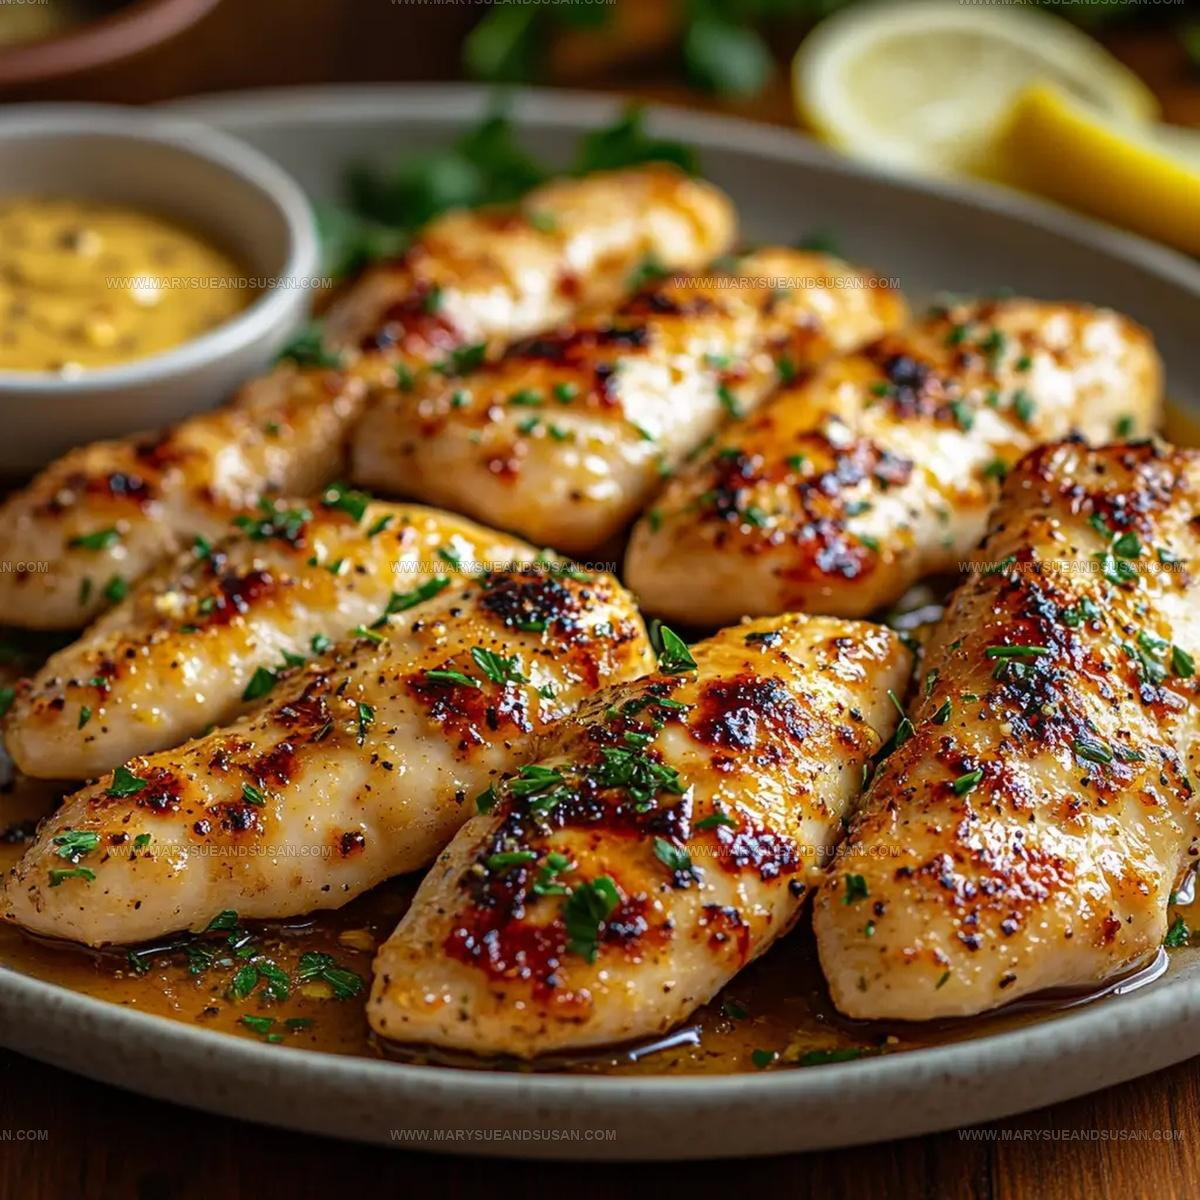
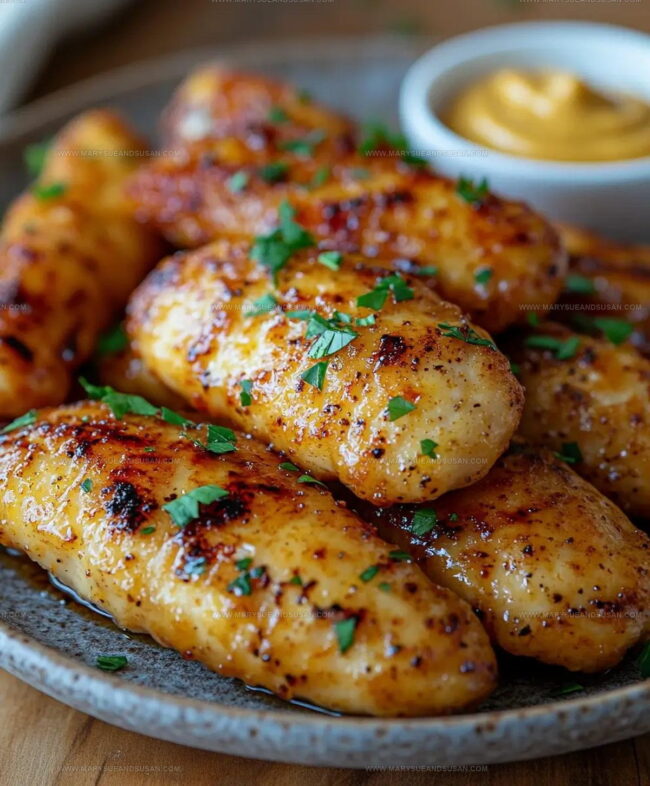
Honey Mustard Chicken Tenderloin Recipe for Weeknight Dinners
Honey mustard chicken tenderloins combine sweet and tangy flavors that spark excitement at any dinner table.
Succulent and tender, these delightful proteins promise a mouthwatering meal everyone craves.
Home cooks adore simple yet impressive dishes that come together quickly and satisfy hunger with minimal effort.
Weeknight cooking becomes effortless when you have a reliable recipe that feels like a restaurant-style experience.
Crispy exterior and juicy interior create a perfect balance of textures that will make your family request this meal repeatedly.
Seasoned and sauced just right, these chicken tenderloins elevate ordinary dinner moments into something special.
Why Chicken Tenderloins with Honey Mustard Work
Ingredients You’ll Need For Honey Mustard Chicken Tenderloins
Main Ingredients:Required Kitchen Tools for Chicken Tenderloin With Honey Mustard
Steps for Making Honey Mustard Chicken Tenderloins
Marinate the Chicken
Grab your chicken tenderloins and pour 1 cup buttermilk over them in a deep container. Seal it up and tuck the container into your refrigerator for 60 minutes. This bath helps the meat get super tender and flavorful.
Prepare Seasoned Flour
Create your flavor-packed coating by mixing the dry ingredients:
Whisk everything together in a shallow dish until well combined.
Coat the Chicken
Pull your tenderloins from the buttermilk, letting the excess liquid drip off. Roll each piece through your seasoned flour mix, pressing gently so the coating sticks perfectly.
Heat the Cooking Oil
Pour 1/2 inch vegetable oil into a large skillet. Warm it up to exactly 350°F – use a cooking thermometer to nail the right temperature.
Fry the First Batch
Carefully lower your flour-covered tenderloins into the hot oil. Let them sizzle for 4-5 minutes on each side until they turn a deep, gorgeous golden brown.
Drain the Crispy Chicken
Move your freshly fried tenderloins onto a paper towel-lined plate. This helps soak up any extra oil. Give them a quick 2-3 minute rest to lock in the juiciness.
Serve and Enjoy
Plate those crispy tenderloins right away while they’re piping hot. Grab your favorite dipping sauce – honey mustard works like a charm – and dig in!
Little Things That Help With Honey Mustard Chicken Tenderloins
Flavor Twists for Honey Mustard Chicken Tenderloins
How To Serve Honey Mustard Chicken Tenderloins
Storing Honey Mustard Chicken Tenderloins Properly
Honey Mustard Chicken Tenderloin FAQ Help
Why buttermilk for chicken tenderloins?
Buttermilk tenderizes the meat and helps create a super crispy coating by breaking down protein fibers and providing a perfect base for flour to stick.
Can different types of flour work?
Stick with all-purpose flour for the best crispy results. Alternative flours might change the texture and crunch of your coating.
How do I know the oil is hot enough?
Use a cooking thermometer to check 350°F. If you don’t have one, drop a pinch of flour into the oil – it should sizzle immediately when ready.
What if my chicken isn’t evenly golden?
Maintain consistent oil temperature and avoid overcrowding the pan. Fry in batches to ensure each tenderloin gets perfectly crisp and golden.
Can I bake instead of frying?
Baking won’t give the same crispy exterior. For that signature crunch, deep frying is the best method to achieve golden, crisp chicken tenderloins.
How thick should the flour coating be?
Gently press seasoned flour onto chicken, creating a thin but complete layer that covers the entire tenderloin surface.

Chicken Tenderloin Recipes With Honey Mustard
- Total Time: 1 hours 8-10 minutes
- Yield: 4 1x
Description
Whipping up chicken tenderloins with honey mustard makes your dinner table shine with tangy, golden goodness. Crispy chicken meets sweet-zingy sauce, creating a quick meal that brings smiles to hungry faces.
Ingredients
Main Ingredients:
- 500g chicken tenderloins
Breading Components:
- 1 cup all-purpose flour
- 1 cup buttermilk
Seasoning:
- 1 tsp garlic powder
- 1 tsp onion powder
- 1 tsp paprika
- Salt and pepper, to taste
- Vegetable oil (for frying)
Instructions
- Pour 1 cup buttermilk over 500g chicken tenderloins in a deep container. Seal and refrigerate for 60 minutes, allowing flavors to penetrate your meat.
- Create a seasoning mixture by whisking 1 cup all-purpose flour with 1 tsp garlic powder, 1 tsp onion powder, 1 tsp paprika, salt, and pepper in a shallow dish.
- Remove chicken from buttermilk, letting excess liquid drip away. Thoroughly coat each tenderloin in the seasoned flour mixture, pressing gently to ensure complete coverage.
- Heat ½ inch vegetable oil in a large skillet to 350°F. Verify temperature using a cooking thermometer for precise frying conditions.
- Gently place flour-coated tenderloins into hot oil, maintaining a consistent pan temperature. Fry for 4-5 minutes per side until exterior turns deep golden brown.
- Transfer crispy tenderloins onto paper towel-lined plate to absorb extra oil. Allow chicken to rest for 2-3 minutes before serving to retain internal moisture.
- Plate your golden tenderloins immediately while they’re hot and crunchy. Pair with honey mustard or your preferred dipping sauce for added flavor.
Notes
- Buttermilk acts as a tenderizer, making the chicken extra soft and helping the coating stick perfectly.
- For a crispier texture, let the coated chicken rest on a wire rack for 10 minutes before frying to help the coating set.
- When checking doneness, use a meat thermometer to ensure the internal temperature reaches 165°F for safe consumption.
- For a healthier version, bake the coated chicken on a wire rack at 425°F for 15-20 minutes, flipping halfway through, instead of deep-frying.
- Prep Time: 1 hour
- Cook Time: 8-10 minutes
- Category: Chicken
- Method: Frying
- Cuisine: American
Nutrition
- Serving Size: 4
- Calories: 335 kcal
- Sugar: 1 g
- Sodium: 370 mg
- Fat: 12 g
- Saturated Fat: 2 g
- Unsaturated Fat: 8 g
- Trans Fat: 0 g
- Carbohydrates: 22 g
- Fiber: 1 g
- Protein: 30 g
- Cholesterol: 85 mg
Mary Sue
Founder & Creative Recipe Developer
Expertise
Comfort Food Twists, Seasonal Cooking, Creative Flavor Pairings, Easy Weeknight Dinners, Flexible Pantry Cooking
Education
Mary Sue is the playful, creative recipe mind behind Mary Sue & Susan, known for big flavor ideas, warm storytelling, and dishes that feel both comforting and a little unexpected. She has a talent for taking familiar meals and giving them just enough personality to make them memorable.