
Chicken Tenders Recipe With Crunchy Golden Coating
Chicken tenders have become a beloved comfort food that brings smiles to faces across all ages and occasions.
Whether you need a quick weeknight dinner or want to serve up something everyone at the table will devour, this recipe delivers every time.
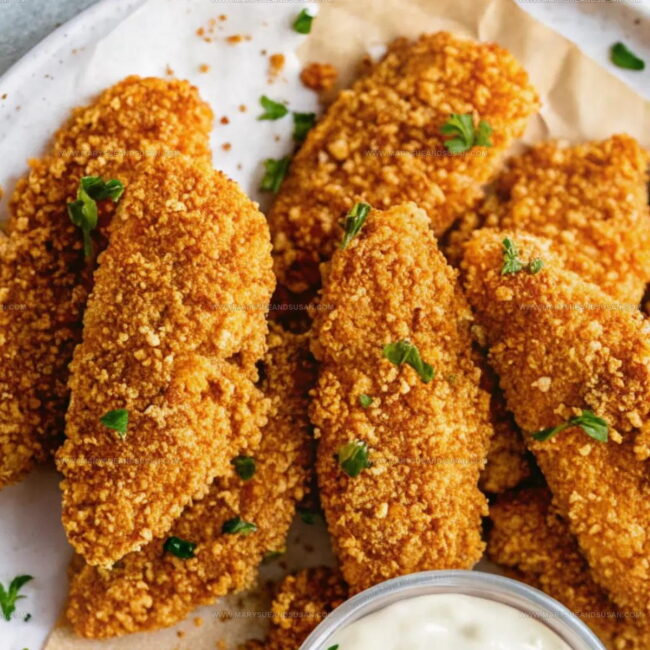
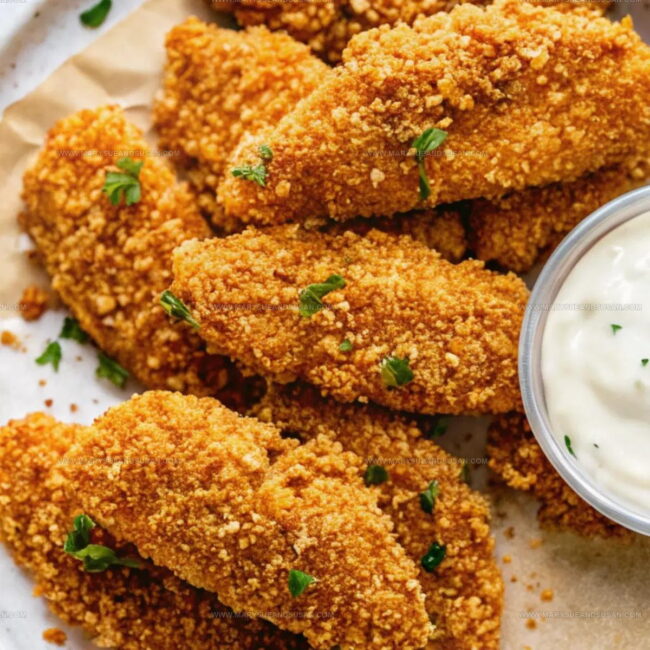
The crispy, golden exterior paired with juicy meat inside makes each bite satisfying and crave-worthy.
Kids absolutely adore them, while adults appreciate how simple they are to prepare without sacrificing flavor.
You can feel good about serving a homemade version that beats any fast-food option by miles.
This dish works perfectly as a main course, party snack, or even tucked into wraps and salads throughout the week.
Why Chicken Tenders Please Everyone
Chicken Tender Ingredients You’ll Need
Main Protein:Breading Components:Liquid Binders:Seasoning Blend:Tools & Coating Gear for Chicken Tenders
Directions for Chicken Tenders
Prep Breading Stations
Set up three shallow bowls on your kitchen counter. Each bowl will play a special role in creating crispy, golden chicken tenders.
Mix Flour Bowl
Pour ½ cup all-purpose flour into the first bowl, creating a simple coating base for your chicken tenders.
Prepare Egg Mixture
Whisk 2 large eggs with 1 tablespoon milk in the second bowl until smooth and well combined.
Create Breadcrumb Coating
In the third bowl, combine 1 cup breadcrumbs with these dry ingredients:
Coat Chicken Tenders
Dredge each chicken tender first in flour, shaking off excess. Dip into egg mixture, then roll thoroughly in seasoned breadcrumb mixture. Press gently to help coating stick.
Bake Chicken
Preheat oven to 425°F (220°C). Line a baking sheet with parchment paper and lightly spray with cooking oil.
Arrange tenders in a single layer and spray tops with oil. Bake 18-20 minutes, flipping halfway through until golden brown.
Alternative Frying Method
Heat ½ inch oil in a skillet over medium-high heat. Carefully fry tenders in batches for 3-4 minutes per side.
Chicken is done when internal temperature reaches 165°F (74°C). Drain on paper towels to remove excess oil.
Air Fryer Option
Preheat air fryer to 400°F (200°C). Lightly spray breaded tenders with oil. Cook in batches for 10-12 minutes, turning halfway through cooking time.
Serve and Enjoy
Plate your crispy chicken tenders hot with favorite dipping sauces like ketchup, honey mustard, or ranch dressing.
Pro Tips for Juicy, Crisp Chicken Tenders
Chicken Tender Variations to Explore
Serving Chicken Tenders with Sauces
Reheating Chicken Tenders Without Drying
Chicken Tenders FAQs to Look Over
Why do I need three separate bowls for breading?
The breading station helps create a crispy, flavorful coating by ensuring each tender gets perfectly coated with flour, egg, and seasoned breadcrumbs.
Can I use regular breadcrumbs instead of panko?
Regular breadcrumbs work fine, but panko creates an extra crispy texture that makes these chicken tenders extra crunchy.
How do I know the chicken is fully cooked?
Use a meat thermometer to check that the internal temperature reaches 165°F (74°C). This ensures the chicken is safe to eat and stays juicy.
What if I don’t have all the spices for the breadcrumb mixture?
No worries! You can use basic salt and pepper, or whatever dried herbs and spices you have on hand.
Do frozen chicken tenders work for this recipe?
Fresh chicken tenders are best, but thawed frozen tenders can work if you pat them completely dry before breading.
How can I make the breading stick better?
Press the breadcrumb mixture gently but firmly onto each tender to help the coating adhere and create a nice crispy crust.

Chicken Tenders Recipe
- Total Time: 28-30 minutes (bake) / 16-18 minutes (fry) / 20-22 minutes (air fry)
- Yield: 4 1x
Description
When dinner calls for something simple, these crispy chicken tenders are my go-to solution for satisfying hungry family members. Seasoned with a perfect blend of spices and coated in a golden, crunchy breading, these tender strips deliver maximum flavor with minimal effort.
Ingredients
Main Proteins:
- 1.5 pounds (680 grams) chicken tenders
Breading and Binding:
- 2 large eggs
- 1 tablespoon milk
- 0.5 cup all-purpose flour
- 1 cup breadcrumbs or panko
- 0.5 cup grated Parmesan cheese
Seasonings:
- 1 teaspoon paprika
- 0.5 teaspoon garlic powder
- 0.5 teaspoon salt
- 0.25 teaspoon black pepper
- Cooking oil or spray
Instructions
- Gather three wide, shallow dishes for creating a breading assembly line on your kitchen counter.
- In the first dish, spread the ½ cup of all-purpose flour evenly across the bottom.
- Crack the 2 large eggs into the second dish, add 1 tablespoon milk, and whisk together until smoothly combined.
- Mix the 1 cup breadcrumbs with the Parmesan cheese, paprika, garlic powder, salt, and pepper in the third dish.
- Pat each chicken tender dry with paper towels to help breading adhere better.
- Roll a chicken tender in the flour, coating completely and shaking off excess.
- Dunk the floured tender into the egg mixture, ensuring full coverage.
- Transfer the egg-coated tender into the seasoned breadcrumb mixture, pressing gently to help crumbs stick thoroughly.
- Place the breaded tender on a clean plate and repeat the coating process with remaining chicken pieces.
- For baking, heat your oven to 425°F (220°C) and line a baking sheet with parchment paper.
- Arrange breaded tenders in a single layer without touching and lightly spray with cooking oil.
- Bake for 9-10 minutes, then flip each tender and cook an additional 9-10 minutes until golden brown and internal temperature reaches 165°F (74°C).
- For a crispy exterior, serve immediately with your preferred dipping sauce.
Notes
- Pat chicken tenders dry with paper towels to help breading stick better and create crispier texture.
- For gluten-free version, swap wheat flour with almond or rice flour and use gluten-free breadcrumbs.
- Add extra flavor by mixing herbs like dried thyme or parsley into breadcrumb mixture for more complexity.
- Check internal temperature with meat thermometer to ensure chicken reaches safe 165°F without overcooking.
- Prep Time: 10 minutes
- Cook Time: 18-20 minutes (bake) / 6-8 minutes (fry) / 10-12 minutes (air fry)
- Category: Chicken
- Method: Baking
- Cuisine: American
Nutrition
- Serving Size: 4
- Calories: 430 kcal
- Sugar: 1 g
- Sodium: 550 mg
- Fat: 20 g
- Saturated Fat: 5 g
- Unsaturated Fat: 13 g
- Trans Fat: 0 g
- Carbohydrates: 25 g
- Fiber: 1.5 g
- Protein: 40 g
- Cholesterol: 130 mg
Susan Whitaker
Content Specialist & Home Cooking Guide
Expertise
Family-friendly Meals, Simple Healthy Cooking, Ingredient Substitutions, Beginner-friendly Recipes, Flexible Meal Prep
Education
Susan is the steady, practical guide at Mary Sue & Susan, bringing clarity, structure, and a warm sense of encouragement to every recipe she touches. Susan joined the site with a simple goal: help people cook with more confidence and less guesswork.