Chinese Chicken Balls with Sweet and Sour Sauce Recipe
Chinese chicken balls with sweet and sour sauce recipe gives the fun of takeout night right to your home kitchen.
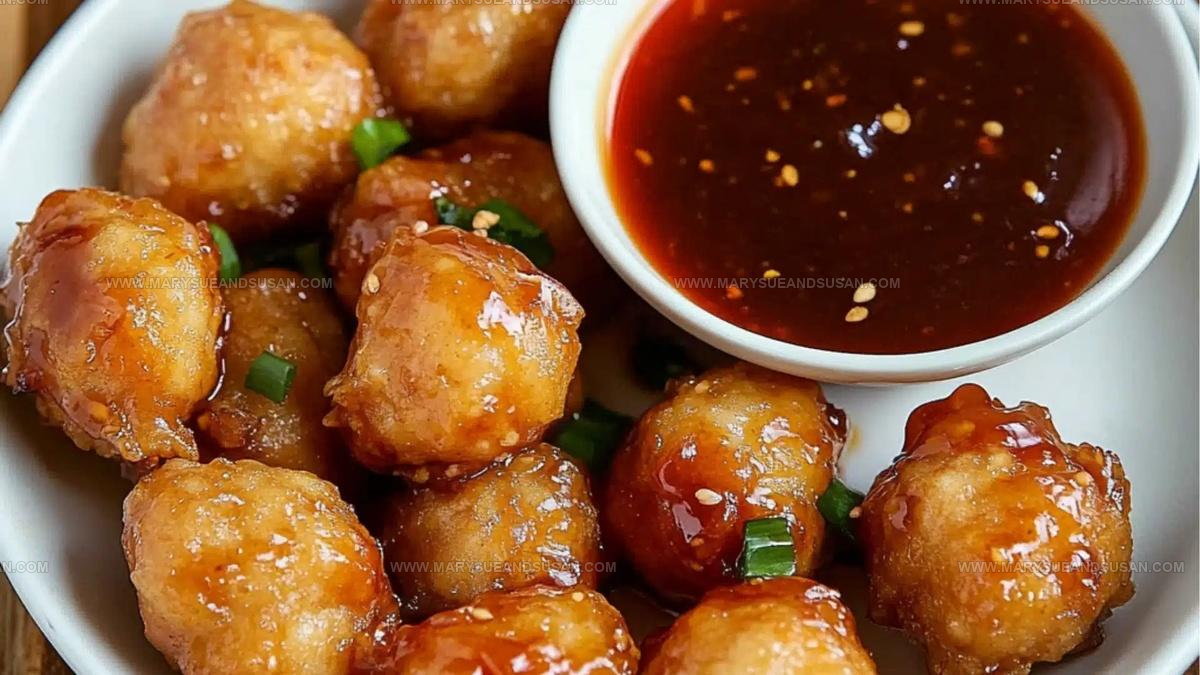
Golden, crispy bites paired with that glossy, flavor-packed sauce create a meal that feels like a celebration on any ordinary weeknight.
Families love gathering around plates piled high with food that's both comforting and exciting at the same time.
The contrast between crunchy exteriors and tender centers makes every bite satisfying in a way few dishes can match.
Serving something this crowd-pleasing means happy faces all around the dinner table without spending hours in the kitchen.
You can recreate that familiar taste from your favorite restaurant while controlling exactly what goes into each component.
Perfect for casual dinners or weekend gatherings, it's a dish that never goes out of style and always earns compliments.
Go straight to the recipe below and see just how simple it is to make magic happen at home.
Why Sweet and Sour Chicken Balls Are Always Loved

Chinese Chicken Balls Ingredient Essentials
Main Protein:Dry Coating Ingredients:Wet Binding Ingredients:Frying Ingredient:Sweet and Sour Sauce Components:Equipment Used for Chinese Chicken Balls
Chinese Chicken Balls Frying Instructions
Whip Up the Batter
Grab a medium bowl and toss in 1/2 cup all-purpose flour, 1/2 cup cornstarch, 1/2 teaspoon baking powder, 1/2 teaspoon salt, and 1/4 teaspoon pepper. Crack 1 egg into the dry ingredients and pour in 1/2 cup cold water. Whisk everything together until your batter looks smooth and free of lumps. Your chicken is about to get a seriously crispy makeover.
Coat the Chicken Pieces
Slice 1 lb of chicken breast or thighs into bite-sized chunks. Dunk each piece into the batter, making sure every nook and cranny gets a nice thick coating. Let the excess batter drip off before you prepare to fry.
Heat the Cooking Oil
Pour vegetable oil into a deep pan or wok, filling it about 2 inches deep. Crank up the heat to medium-high and watch for the temperature to hit 350°F. A food thermometer helps nail this perfectly.
Fry the Chicken Balls
Carefully slide the battered chicken pieces into the hot oil. Don’t crowd the pan – work in batches so each piece gets super crispy. Fry for 3-4 minutes, turning occasionally, until they turn a gorgeous golden brown. Use a slotted spoon to transfer the fried chicken balls onto a paper towel-lined plate to drain extra oil.
Craft the Sweet and Sour Sauce
Grab a small saucepan and combine these ingredients:
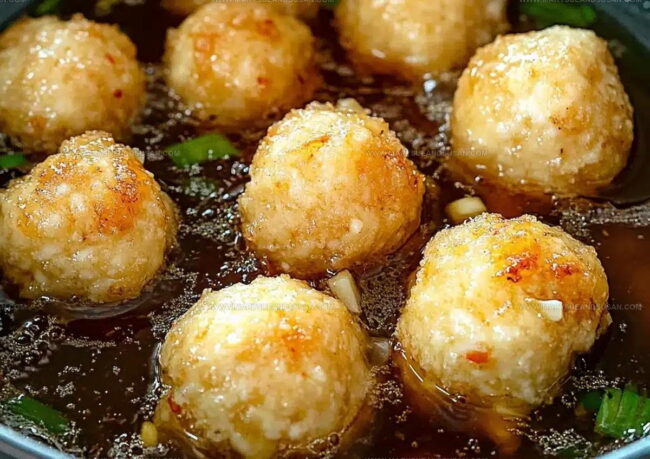
Stir everything together and bring to a simmer over medium heat. Keep stirring until the sauce thickens and looks glossy.
Sauce the Crispy Chicken
Transfer the golden chicken balls to a large bowl. Pour the warm sweet and sour sauce over top and gently toss until each piece gets a beautiful coating.
Serve and Enjoy
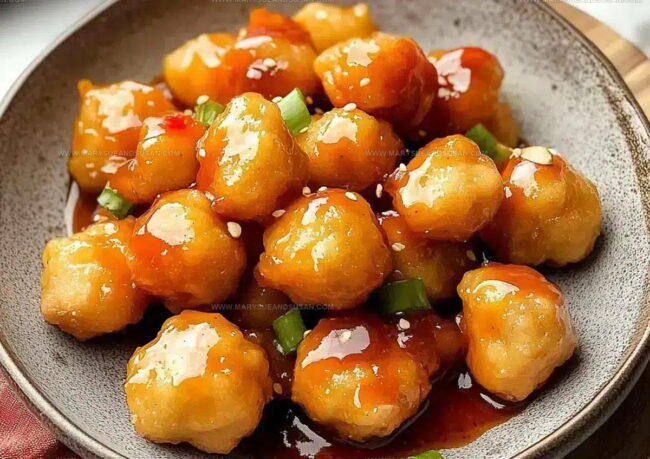
Plate up your crispy chicken balls right away. Sprinkle some sliced green onions or sesame seeds on top if you’re feeling fancy. Grab some chopsticks or a fork and dig in!
Things Worth Knowing About Chicken Balls
Chinese Chicken Balls With Sauce Variations
How to Serve Chinese Chicken Balls
Proper Storage For Chinese Chicken Balls
Common Recipe Questions for Chicken Balls
Why do some chicken balls turn out soggy instead of crispy?
The batter consistency matters most. Ensure it’s thick enough to coat the chicken but not too heavy. Pat chicken pieces completely dry before dipping, and make certain your oil temperature stays consistently hot around 350°F.
Can frozen chicken work for this recipe?
Fresh chicken works best. Frozen chicken contains extra moisture that can make your batter less crispy. If using frozen, thaw completely and pat extremely dry before battering.
How do I know when the oil is ready for frying?
Drop a small piece of batter into the oil. If it sizzles and rises immediately, your oil is perfect. If it burns quickly, the temperature is too high. If it sits without bubbling, the oil needs more heating.
What makes the sauce stick well to chicken balls?
Toss the chicken gently when sauce is slightly warm, not scorching hot. The sauce should coat each piece without making them lose their crispiness.
Can chicken balls be reheated?
Reheat in an oven at 375°F for 5-7 minutes to restore crispiness. Microwave will make them soggy, so avoid that method completely.

Chinese Chicken Balls with Sweet and Sour Sauce Recipe
- Total Time: 20 minutes
- Yield: 4 1x
Description
Crispy Chinese Chicken Balls dance with golden crunch and tangy sauce, delivering a takeout-style favorite right from your kitchen. Homemade goodness beats restaurant versions when your family tackles this crowd-pleasing dinner together.
Ingredients
Chicken Balls:
- 1 lb chicken breast or thighs
Dry Ingredients:
- ½ cup all-purpose flour
- ½ cup cornstarch
- ½ teaspoon baking powder
- ½ teaspoon salt
- ¼ teaspoon pepper
Wet Ingredients:
- ½ cup cold water
- 1 egg
- Vegetable oil
Sweet and Sour Sauce:
- ¼ cup ketchup
- ¼ cup white vinegar
- ¼ cup sugar
- 1 tablespoon soy sauce
- 1 tablespoon cornstarch
- ¼ cup water
Instructions
- Whisk ½ cup flour, ½ cup cornstarch, ½ teaspoon baking powder, ½ teaspoon salt, and ¼ teaspoon pepper in a medium mixing bowl. Create a smooth batter by adding 1 egg and ½ cup cold water, stirring until completely combined.
- Dip each bite-sized chicken piece into the batter, ensuring complete and even coating. Allow excess batter to drip off before frying.
- Heat vegetable oil in a deep pan to exactly 350°F. Drop battered chicken pieces carefully into hot oil, working in small batches to prevent overcrowding.
- Fry chicken pieces for precisely 3-4 minutes, turning occasionally to ensure uniform golden-brown color and crispy exterior. Remove with a slotted spoon when chicken reaches perfect crispness.
- Drain fried chicken balls on a paper towel-lined plate to absorb extra oil. Keep warm while preparing sauce.
- Combine ¼ cup ketchup, ¼ cup white vinegar, ¼ cup sugar, 1 tablespoon soy sauce, and ¼ cup water in a small saucepan over medium heat.
- Stir sauce constantly and simmer for 2-3 minutes until it reaches a glossy, slightly thickened consistency. Add 1 tablespoon cornstarch if you prefer a more substantial sauce.
- Transfer crispy chicken balls to a large mixing bowl. Pour hot sweet and sour sauce over chicken, gently tossing to coat each piece thoroughly.
- Plate immediately and garnish with thinly sliced green onions or sesame seeds for added freshness and texture. Serve with steamed rice or as a standalone appetizer.
Notes
- Check oil temperature carefully to ensure crispy, golden-brown chicken balls without burning or undercooking.
- Use very cold water in the batter to create an extra-light, crisp coating that stays crunchy after saucing.
- Pat chicken pieces completely dry before battering to help the coating stick better and create a crispier texture.
- For a gluten-free version, swap wheat flour with rice flour or a gluten-free all-purpose flour blend to maintain the same light texture.
- Prep Time: 10 minutes
- Cook Time: 10 minutes
- Category: Chicken
- Method: Frying
- Cuisine: Chinese
Nutrition
- Serving Size: 4
- Calories: 315 kcal
- Sugar: 13 g
- Sodium: 620 mg
- Fat: 6 g
- Saturated Fat: 1.5 g
- Unsaturated Fat: 4 g
- Trans Fat: 0 g
- Carbohydrates: 32 g
- Fiber: 1.2 g
- Protein: 30 g
- Cholesterol: 70 mg
Susan Whitaker
Content Specialist & Home Cooking Guide
Expertise
Family-friendly Meals, Simple Healthy Cooking, Ingredient Substitutions, Beginner-friendly Recipes, Flexible Meal Prep
Education
Susan is the steady, practical guide at Mary Sue & Susan, bringing clarity, structure, and a warm sense of encouragement to every recipe she touches. Susan joined the site with a simple goal: help people cook with more confidence and less guesswork.