Buttery Chicken Kiev Recipe with Tender Center
A chicken Kiev recipe brings the elegance of classic European dining straight to your own table with surprisingly achievable results.
This dish has charmed food lovers for generations because it delivers something truly special without demanding restaurant skills or fancy equipment.
When you slice into that golden exterior, the satisfaction feels almost magical.
The beautiful presentation makes any dinner feel like a celebration, whether feeding family on a weeknight or hosting friends for something memorable.
Everyone at the table gets excited when this gorgeous entrée appears, and the compliments start flowing before the first bite.
Comfort food meets sophistication in one stunning package that never fails to impress.
Why Chicken Kiev Feels Like a Fancy Classic
Chicken Kiev Ingredients Breakdown
Garlic Butter Ingredients:Chicken Ingredients:Coating Ingredients:Tools & Skillet/Oven Gear for Chicken Kiev
How to Prepare Chicken Kiev
Prepare Garlic Butter
Grab a mixing bowl and toss in ½ cup (115g) softened unsalted butter. Chop 4 garlic cloves and 2 tablespoons fresh parsley super fine. Drop them right into the butter.
Season Butter Mixture
Squeeze in 1 tablespoon lemon juice and sprinkle 1 teaspoon lemon zest. Shake some salt and pepper to taste. Mix everything until the butter looks smooth and creamy.
Chill Butter Log
Roll the butter mixture into a tight log using plastic wrap. Slide it into the refrigerator for 15-20 minutes so it firms up nicely.
Prepare Chicken Breasts
Pull out 4 boneless chicken breasts. Place each between plastic wrap and gently pound until they’re about ½ inch thick. Season both sides with salt and pepper.
Stuff Chicken
Slice the chilled butter log into 4 equal portions. Place one butter portion right in the center of each chicken breast. Fold the sides over to completely hide the butter.
Secure Filling
Grab some toothpicks and carefully seal the edges of each chicken breast. This keeps the butter from leaking during cooking.
Create Coating Station
Set up three shallow dishes: one with 1 cup flour, another with 2 beaten eggs, and the last with 1 cup panko breadcrumbs.
Bread the Chicken
Coat each stuffed chicken breast first in flour, then dunk in eggs, and finally roll in breadcrumbs. Make sure every inch gets covered.
Fry Chicken
Heat ½ cup vegetable oil in a large skillet over medium-high heat. Carefully place the breaded chicken into the hot oil.
Cook to Golden
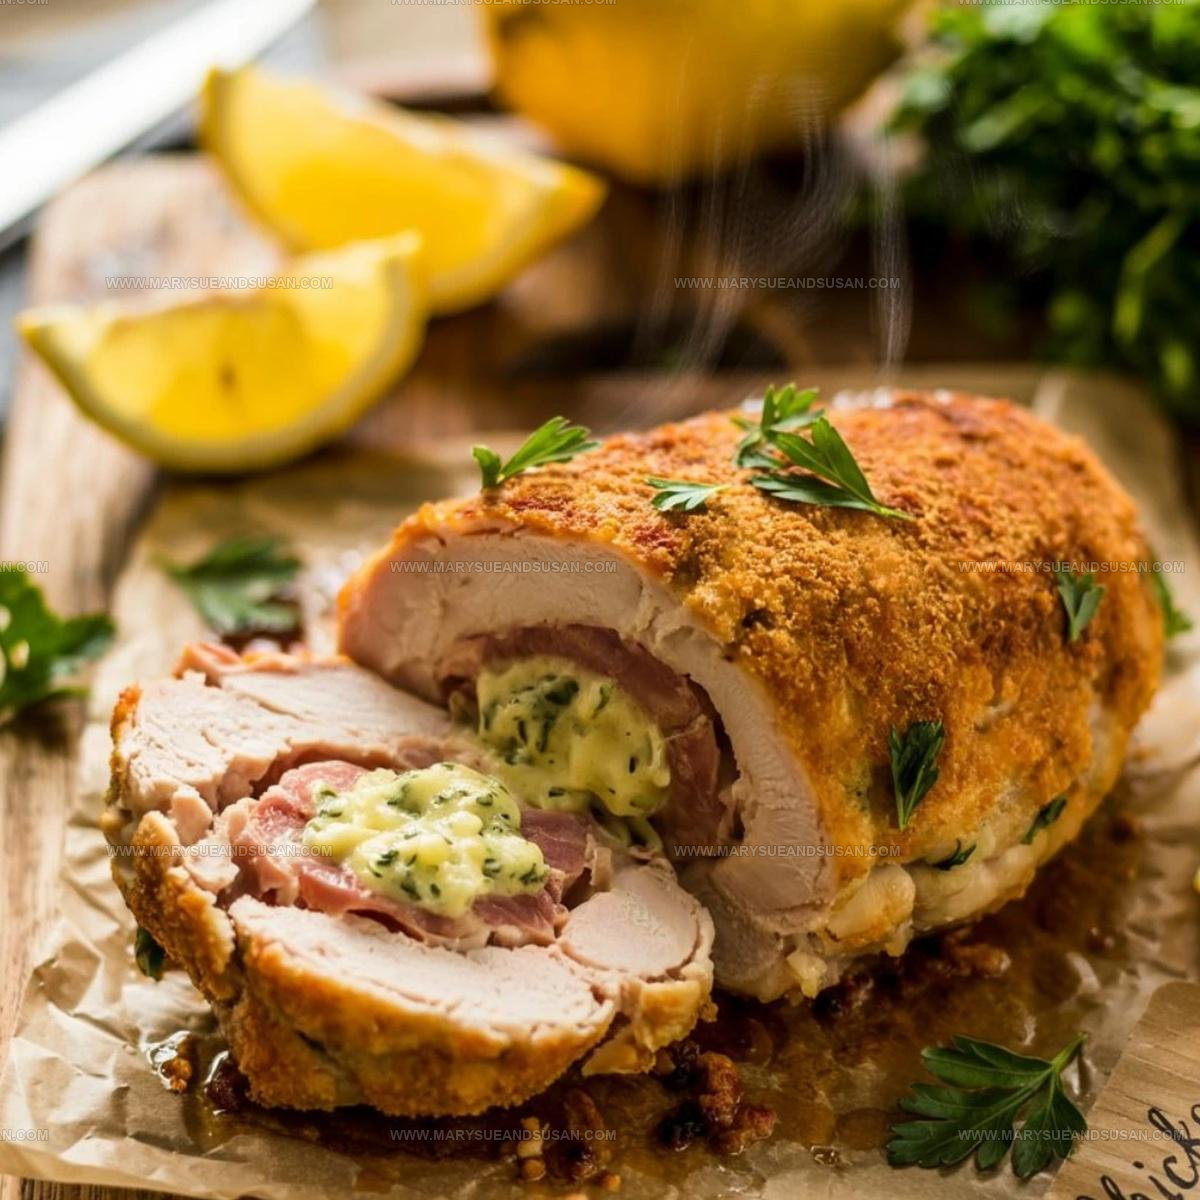
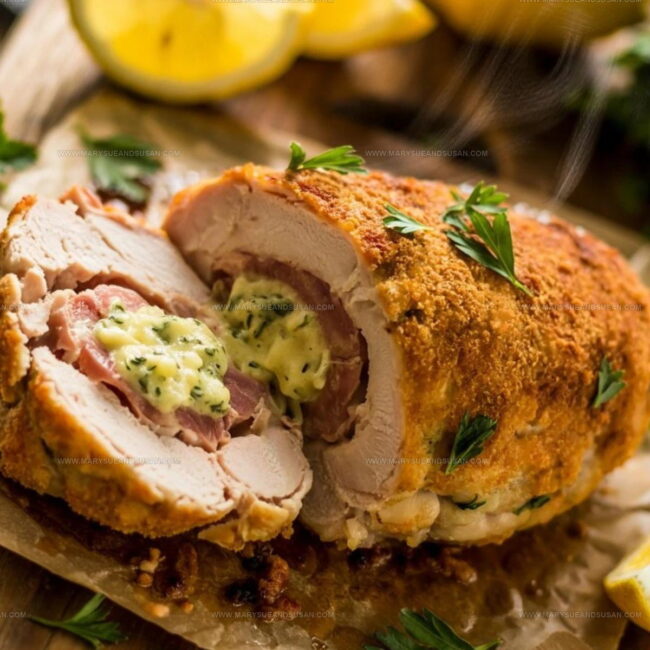
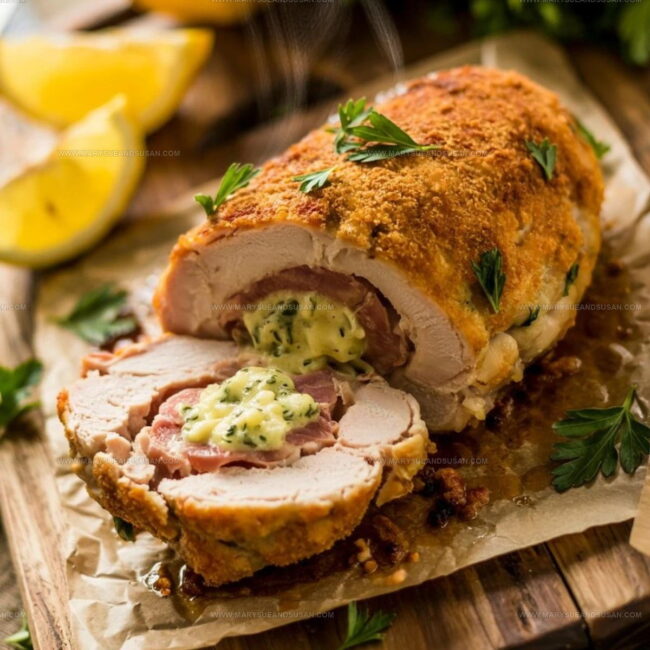
Fry each chicken breast for 4-5 minutes per side until they turn a deep golden brown. Use a meat thermometer to check the internal temperature hits 165°F (74°C).
Rest and Serve
Let the chicken rest for 3-4 minutes after cooking. Remove toothpicks and serve with your favorite side dishes like roasted vegetables or mashed potatoes.
Pro Tips for Buttery Centers and Crispy Coating
Chicken Kiev Variations to Explore
Serving Chicken Kiev with Sides
Best Way to Reheat Chicken Kiev
Chicken Kiev Recipe FAQs for Home Cooks
Why does the butter need to be chilled?
Chilling helps the butter stay inside the chicken during cooking instead of melting out immediately.
Can vegetable oil work for frying?
Absolutely! Vegetable oil provides a great crispy coating just like butter or other cooking oils.
What if my chicken breasts are really thick?
Pound them gently to an even thickness so they cook consistently and the butter stays sealed inside.
How do know if breadcrumbs are properly attached?
The breading should completely cover the chicken with no bare spots – gently press crumbs to help them stick.
Is a meat thermometer really necessary?
Definitely – it ensures the chicken reaches safe temperature and prevents undercooking or overcooking.
What happens if the butter leaks during cooking?
The butter might create some sizzling, but most will stay inside – just cook carefully and keep the chicken sealed.

Classic Chicken Kiev Recipe
- Total Time: 33-40 minutes
- Yield: 4 1x
Description
Recreating this classic Chicken Kiev brings back memories of comfort and flavor from my kitchen adventures. The crispy golden exterior gives way to a rich, herbed butter center that makes this dish a true crowd-pleaser for dinner guests and family alike.
Ingredients
Main Protein:
- 4 chicken breasts (boneless, skinless)
Seasoning and Dry Coating:
- 1 cup all-purpose flour
- 1 cup bread crumbs (panko)
- 1 teaspoon salt
- 1 teaspoon black pepper
Wet Ingredients and Binding:
- 2 large eggs (beaten)
- 0.5 cup unsalted butter (softened)
- 0.5 cup vegetable oil
- 4 cloves garlic (minced)
- 2 tablespoons fresh parsley (chopped)
- 1 tablespoon fresh dill
- 1 tablespoon lemon juice
- 1 teaspoon lemon zest
- 1 tablespoon chives
Instructions
- Craft a rich garlic butter by blending softened unsalted butter with minced garlic, chopped parsley, dill, lemon juice, lemon zest, chives, salt, and pepper until completely smooth.
- Shape the butter mixture into a compact log using plastic wrap and refrigerate for 15-20 minutes until firm.
- Place each chicken breast between plastic wrap and gently pound until reaching a uniform ½-inch thickness.
- Sprinkle both sides of the chicken breasts with salt and pepper for balanced seasoning.
- Divide the chilled garlic butter into four equal portions, positioning one portion at the center of each chicken breast.
- Carefully fold the chicken’s sides around the butter, completely encasing it to prevent leakage during cooking.
- Secure the butter-filled chicken packets with toothpicks to maintain their structural integrity.
- Create a three-stage breading station: spread flour on one plate, beat eggs in a bowl, and place breadcrumbs on another plate.
- Coat each chicken breast first in flour, then dip thoroughly in beaten eggs, and finally roll generously in breadcrumbs.
- Heat ½ cup vegetable oil in a large skillet over medium-high heat until it reaches 350°F.
- Gently place breaded chicken breasts into the hot oil, cooking 4-5 minutes per side until achieving a deep golden-brown exterior.
- Check internal temperature with a meat thermometer, ensuring it reaches exactly 165°F (74°C) for safe consumption.
- Remove chicken from skillet and let rest 3-4 minutes to allow juices to redistribute before serving.
- Plate your Chicken Kiev with complementary sides like roasted vegetables or creamy mashed potatoes.
Notes
- Chill the butter mixture thoroughly to help it stay intact during cooking and create a beautiful surprise when you cut into the chicken.
- Use a meat thermometer for precise doneness, preventing dry chicken while ensuring food safety.
- Seal the chicken edges carefully with toothpicks to keep the garlic butter from leaking during cooking.
- For a gluten-free version, replace breadcrumbs with crushed gluten-free crackers or almond meal for a crispy coating.
- Prep Time: 25-30 minutes
- Cook Time: 8-10 minutes
- Category: Chicken
- Method: Frying
- Cuisine: Ukrainian
Nutrition
- Serving Size: 4
- Calories: 680 kcal
- Sugar: 1 g
- Sodium: 370 mg
- Fat: 48 g
- Saturated Fat: 23 g
- Unsaturated Fat: 20 g
- Trans Fat: 0.5 g
- Carbohydrates: 29 g
- Fiber: 2 g
- Protein: 44 g
- Cholesterol: 160 mg
Susan Whitaker
Content Specialist & Home Cooking Guide
Expertise
Family-friendly Meals, Simple Healthy Cooking, Ingredient Substitutions, Beginner-friendly Recipes, Flexible Meal Prep
Education
Susan is the steady, practical guide at Mary Sue & Susan, bringing clarity, structure, and a warm sense of encouragement to every recipe she touches. Susan joined the site with a simple goal: help people cook with more confidence and less guesswork.