
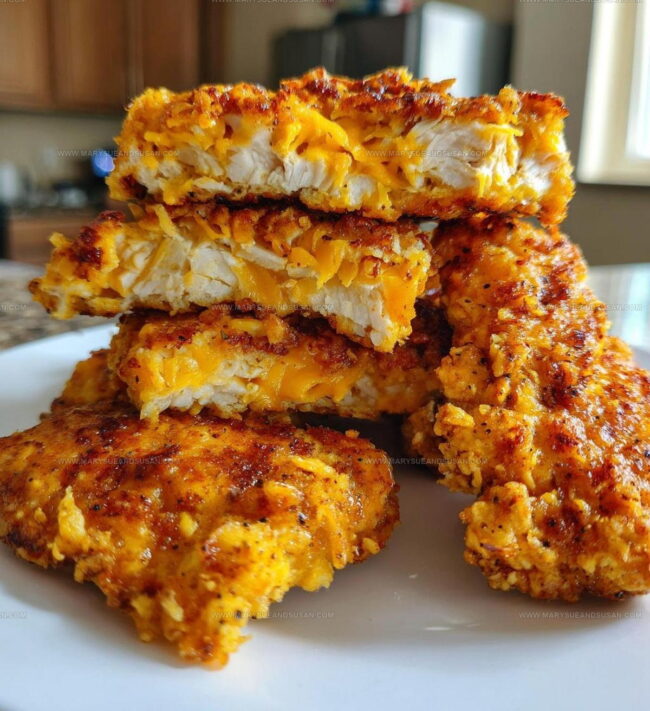
Cheddar Chicken Recipe with a Golden Crispy Crust
Crispy Cheddar Chicken recipe hits you with comfort food at its finest, combining two beloved favorites into one satisfying main course.
Weeknight dinners become something special when you serve up golden, flavorful chicken that appeals to every generation at the table.
Busy schedules don't stand a chance against a dish that comes together quickly while still feeling indulgent and homemade.
There's something wonderful about a meal that feels both familiar and exciting, offering comfort without being boring.
The crispy exterior and rich cheese flavor create a combination that never goes out of style, making it perfect for regular rotation.
Give it a go tonight and watch everyone ask for seconds before dessert even hits the table.
Top Reasons Crispy Cheddar Chicken Crunches
Complete Ingredient List for Crispy Cheddar Chicken
Main Proteins:Crunchy Coating:Seasonings:Core Kitchen Tools for Crispy Cheddar Chicken
Step By Step Directions For Cheddar Chicken
Warm Up the Oven
Get your oven cranked to 400 degrees Fahrenheit so it’s ready to transform these chicken breasts into something spectacular.
Create the Crispy Coating
Grab a mixing bowl and toss in your crunchy components:
Mix everything together so the seasonings dance around the cornflakes and cheese.
Prep Your Chicken
Spread 1/2 cup all-purpose flour on a plate and roll each chicken breast through it, shaking off any extra flour so you have a light, even coating.
Egg Bath
Crack 2 large eggs into a separate bowl and whisk them until they’re smooth. Dunk each floured chicken breast into the eggs, making sure they get a complete egg jacket.
Coat and Crunch
Roll the egg-covered chicken through your cornflake mixture, pressing gently to make sure the coating sticks perfectly to every inch of the chicken.
Baking Time
Place the coated chicken breasts on a baking sheet, giving each piece some breathing room. Slide the sheet into your preheated 400-degree oven and bake for 25-30 minutes until the chicken turns a gorgeous golden brown and is completely cooked through.
Smart Cooking Tips For Crispy Cheddar Chicken
Crispy Cheddar Chicken With Cheesy Coating Options
Best Ways To Serve Crispy Cheddar Chicken
Crispy Cheddar Chicken Storage Notes
Crispy Cheddar Chicken FAQs
Do cornflakes get soggy during baking?
The cornflakes stay crispy because the flour and egg coating creates a barrier that prevents moisture from making them soft. The high oven temperature also helps maintain that satisfying crunch.
Can frozen chicken breasts work for this recipe?
Thaw chicken completely before starting. Moisture from frozen chicken can make the coating slide off and prevent proper browning.
How thick should chicken breasts be?
Choose chicken breasts around 1/2 to 3/4 inch thick. Extremely thick pieces might need longer cooking and could dry out the coating.
What if cheese doesn’t stick to cornflakes?
Press the cheese and cornflake mixture firmly onto the chicken. Make sure each piece is evenly and generously coated for maximum flavor.
Can different cheeses be substituted?
Absolutely. Sharp cheddar works best, but mild cheddar, parmesan, or monterey jack can create delicious variations while maintaining a similar crispy texture.
Why use both flour and eggs in coating?
Flour helps the egg stick to the chicken, and eggs help the cornflake mixture adhere perfectly, creating a robust, crunchy exterior that seals in moisture.

Cornflake Crunch Crispy Cheddar Chicken Recipe
- Total Time: 35-40 minutes
- Yield: 4 1x
Description
Crispy cheddar chicken delivers a delightful crunch that’ll make your taste buds dance with joy. Baked to golden perfection, this family favorite turns ordinary chicken into a crispy, cheesy dinner sensation.
Ingredients
Protein:
- 4 boneless chicken breasts
Dry Coating:
- 1 cup crushed cornflakes
- 1 cup shredded cheddar cheese
- ½ cup all-purpose flour
Seasonings:
- 1 teaspoon garlic powder
- 1 teaspoon onion powder
- 2 large eggs
- Salt to taste
- Pepper to taste
Instructions
- Heat your oven to 400F, ensuring the rack sits in the center position for even cooking.
- Crush 1 cup cornflakes into fine crumbs using a rolling pin or food processor, creating a textured coating for your chicken.
- Thoroughly combine 1 cup shredded cheddar cheese, crushed cornflakes, 1 teaspoon garlic powder, 1 teaspoon onion powder, salt, and pepper in a shallow dish.
- Spread ½ cup flour on a separate plate, seasoning it lightly with salt and pepper.
- Whisk 2 large eggs in a medium bowl until fully blended and smooth.
- Roll each chicken breast through the flour, carefully shaking off any excess to create a thin, even layer.
- Dunk the floured chicken into the beaten eggs, allowing excess to drip back into the bowl.
- Press each egg-coated chicken breast into the cornflake-cheese mixture, ensuring every surface gets a thick, crunchy coating.
- Arrange the coated chicken on a rimmed baking sheet lined with parchment paper, leaving space between each piece.
- Bake at 400F for 25-30 minutes, checking that the internal temperature reaches 165F and the exterior turns golden and crispy.
Notes
- Crushing cornflakes by hand creates a more rustic, uneven coating that adds extra crunch to the chicken.
- For a gluten-free version, swap regular flour with almond flour or cornstarch and use gluten-free cornflakes.
- Pat chicken breasts dry before flouring to help the coating stick better and achieve a crispier texture.
- Make ahead tip: Prepare the coated chicken and refrigerate for up to 2 hours before baking to let the coating set and enhance flavor.
- Prep Time: 10 minutes
- Cook Time: 25-30 minutes
- Category: Chicken
- Method: Baking
- Cuisine: American
Nutrition
- Serving Size: 4
- Calories: 382 kcal
- Sugar: 1 g
- Sodium: 450 mg
- Fat: 17 g
- Saturated Fat: 7 g
- Unsaturated Fat: 6 g
- Trans Fat: 0.3 g
- Carbohydrates: 20 g
- Fiber: 1 g
- Protein: 38 g
- Cholesterol: 150 mg
Susan Whitaker
Content Specialist & Home Cooking Guide
Expertise
Family-friendly Meals, Simple Healthy Cooking, Ingredient Substitutions, Beginner-friendly Recipes, Flexible Meal Prep
Education
Susan is the steady, practical guide at Mary Sue & Susan, bringing clarity, structure, and a warm sense of encouragement to every recipe she touches. Susan joined the site with a simple goal: help people cook with more confidence and less guesswork.