
Chicken Pot Pie Casserole Recipe for Creamy Family Meals
Creamy chicken pot pie casserole has become a weeknight hero for busy households everywhere, delivering all the comfort and warmth we crave without the fuss.
This dish feels like a giant hug after a long day, filling the kitchen with aromas that make everyone come running to the table.
The beauty here is how satisfying and hearty it tastes while being surprisingly simple to pull together on even the most chaotic evenings.
You can count on this meal to please picky eaters and adventurous diners alike, making dinner time peaceful instead of stressful.
It's the kind of food that works beautifully for casual Sunday suppers or when friends stop by unexpectedly.
Every bite offers that cozy, homestyle flavor that reminds us why classic comfort food never goes out of style.
The best part is how consistently delicious it turns out, giving you confidence each time you serve it.
Why You’ll Love Chicken Pot Pie Casserole
Ingredients For Cozy Chicken Pot Pie Casserole
Main Protein Ingredient:Main Vegetable Ingredients:Liquid and Seasoning Ingredients:Biscuit Topping Ingredients:Casserole Dishes Bowls And Tools For Biscuit Prep
How to Prepare Chicken Pot Pie Casserole
Prepare Filling
Melt 2 tablespoons butter in a large skillet over medium heat. Toss in your chopped onion, diced carrots, and celery, cooking for about 5 minutes until the vegetables soften. Add 2 minced garlic cloves and cook for another 30 seconds. Sprinkle ⅓ cup flour over the vegetables and stir to coat, creating a smooth base for your sauce.
Create Creamy Sauce
Gradually pour in 2 cups chicken broth and 1 cup milk, whisking constantly to prevent lumps. Let the mixture simmer for 3-4 minutes until it starts to thicken. Add these ingredients to your skillet:
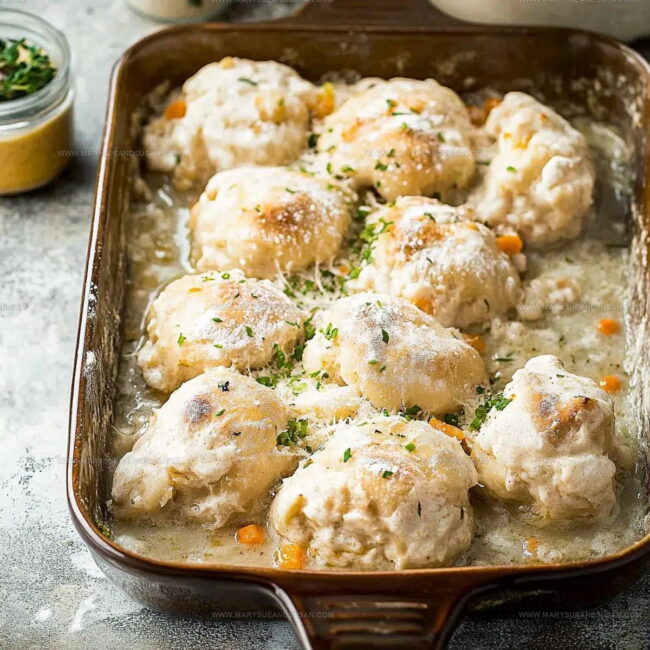
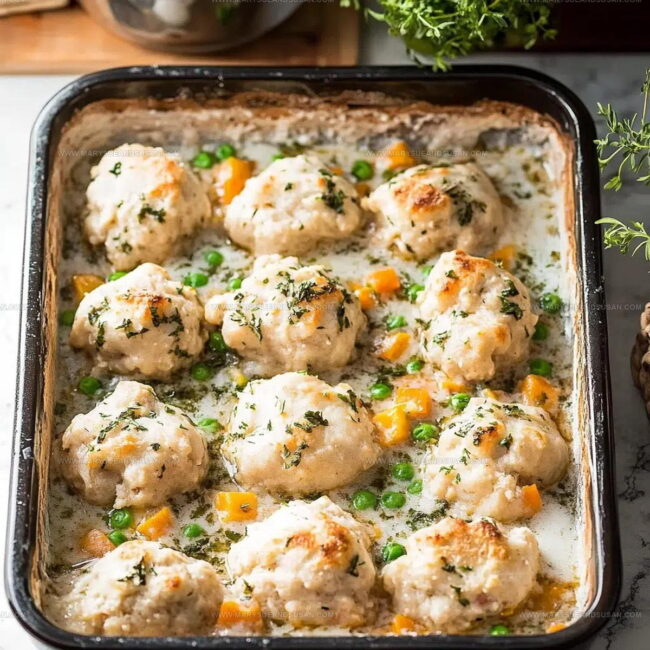
Stir everything together and let the filling simmer for 5 minutes. Transfer the mixture to a greased 9×13-inch baking dish.
Mix Biscuit Topping
Grab a large bowl and combine 2 cups all-purpose flour, 1 tablespoon baking powder, ½ teaspoon baking soda, and 1 teaspoon salt. Use your fingers or a pastry cutter to work ½ cup cold cubed butter into the dry ingredients until the mixture looks like coarse crumbs.
Finish Biscuit Topping
Stir 1 cup shredded cheddar cheese into your flour mixture. Pour in 1 cup buttermilk and mix just until the dough comes together. Don’t overmix or your biscuits will be tough.
Assemble Casserole
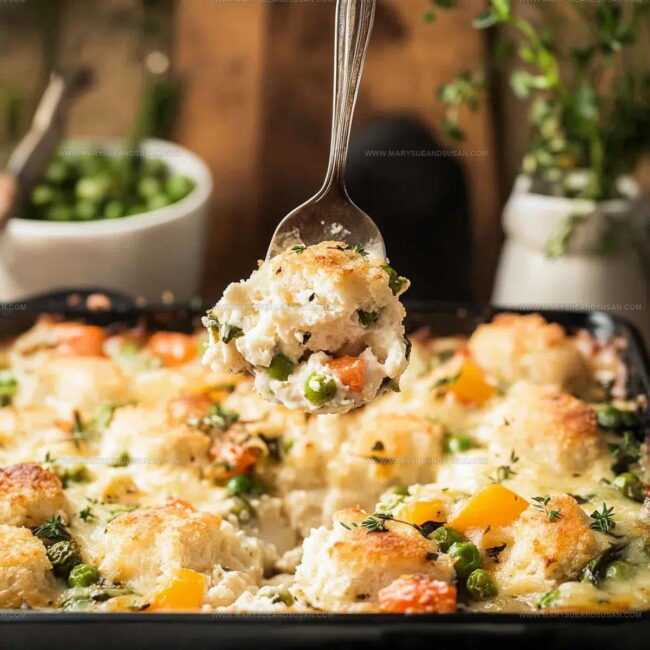
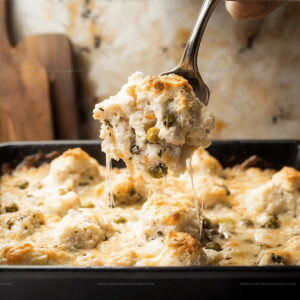
Drop spoonfuls of the biscuit dough evenly over the chicken filling, making sure to cover most of the surface.
Bake Casserole
Slide the casserole into a preheated oven at 375°F (190°C). Bake uncovered for 25-30 minutes, until the biscuit topping turns a beautiful golden brown. Let the casserole rest for 10 minutes before serving to allow the filling to set.
Tips For Creamy Filling And Fluffy Biscuits
Variations With Veggies Or Seasonings
Serving Casserole For Family Dinners
Keeping Pot Pie Casserole Fresh For Leftovers
Chicken Pot Pie Q&A
Can vegetable sizes be different?
Chopped veggies should be uniform, roughly pea-sized. This helps them cook evenly and ensures each bite has consistent texture and flavor.
What cheese works best?
Sharp cheddar gives incredible depth. Mild cheddar works too, but sharper varieties create richer flavor in the biscuit topping.
Should chicken be precooked?
Absolutely use cooked, shredded chicken. Rotisserie chicken saves time and adds extra flavor. Fresh-cooked chicken breasts also work perfectly.
How do refrigerate leftovers?
Cover casserole tightly with foil and store in refrigerator for 3-4 days. Reheat gently in oven at 350°F to maintain biscuit crispness.
Can casserole be frozen?
Freeze assembled but unbaked casserole. Wrap tightly in plastic, then foil. Thaw overnight in refrigerator before baking as directed.
What if buttermilk unavailable?
Mix regular milk with tablespoon of lemon juice or white vinegar. Let stand 5 minutes before using. Works like magic for tender biscuits.
Creamy Chicken Pot Pie Casserole Recipe
- Total Time: 50-55 minutes
- Yield: 6 1x
Description
Comfort comes alive with Chicken Pot Pie Casserole, where creamy filling meets crispy golden crust in one delicious baking dish. Hearty chunks of tender chicken, vegetables, and a rich sauce get topped with flaky pastry that turns this classic meal into something seriously satisfying.
Ingredients
Main Ingredients:
- 2 cups cooked chicken
- 2 cups all-purpose flour
- 1 cup frozen peas
- 1 cup shredded cheddar cheese
- 1 cup buttermilk
- 1 cup chicken broth
- 1 cup milk
Supporting Ingredients:
- 2 tablespoons butter
- ½ cup cold butter, cubed
- ⅓ cup flour
- 1 onion
- 2 carrots
- 2 celery stalks
- 2 cloves garlic
Seasonings and Leavening Agents:
- 1 tablespoon baking powder
- ½ teaspoon baking soda
- 1 teaspoon dried thyme
- 1 teaspoon dried rosemary
- 1 teaspoon salt
- ½ teaspoon salt
- Black pepper, to taste
Instructions
- Gather a large skillet and melt 2 tablespoons (30 ml) butter over medium heat. Add 1 chopped onion, 2 diced carrots, 2 chopped celery stalks, and 2 minced garlic cloves. Sauté until vegetables soften, about 5-6 minutes.
- Sprinkle ⅓ cup (40 g) flour into the skillet, stirring continuously to create a smooth roux. This prevents lumpy sauce formation.
- Gradually pour 2 cups (480 ml) chicken broth and 1 cup (240 ml) milk into the skillet. Whisk consistently to blend ingredients seamlessly.
- Incorporate 2 cups cooked chicken, 1 cup frozen peas, 1 teaspoon dried thyme, and 1 teaspoon dried rosemary. Season with salt and pepper to your preference.
- Simmer the mixture for 8-10 minutes until sauce thickens and coats the back of a spoon. Transfer to a greased 9×13-inch (23×33 cm) baking dish.
- Preheat your oven to 375°F (190°C). Prepare biscuit topping by combining 2 cups (240 g) all-purpose flour, 1 tablespoon baking powder, ½ teaspoon baking soda, and 1 teaspoon salt in a mixing bowl.
- Cut ½ cup (115 g) cold butter into small cubes. Work butter into flour mixture using a pastry cutter until it resembles coarse crumbs.
- Fold 1 cup shredded cheddar cheese into the dry ingredients. Gently pour 1 cup (240 ml) buttermilk and mix until just combined.
- Distribute biscuit dough across the chicken filling using large spoonfuls. Ensure even coverage for consistent baking.
- Bake uncovered for 25-30 minutes until biscuit topping turns golden brown and filling bubbles around edges. Rest for 10 minutes before serving to allow filling to set.
Notes
- Always use cold butter for the biscuit topping to ensure a flaky, tender texture that melts in your mouth.
- Shred fresh cheddar cheese instead of using pre-shredded, as it creates a more creamy and authentic flavor in the topping.
- Let the filling cool slightly before adding the biscuit topping to prevent the dough from becoming soggy and ensure a crisp golden crust.
- For a gluten-free version, substitute all-purpose flour with a gluten-free blend and use cornstarch to thicken the filling instead of regular flour.
- Prep Time: 15 minutes
- Cook Time: 35-40 minutes
- Category: Chicken
- Method: Baking
- Cuisine: American
Nutrition
- Serving Size: 6
- Calories: 395 kcal
- Sugar: 4 g
- Sodium: 570 mg
- Fat: 22 g
- Saturated Fat: 12 g
- Unsaturated Fat: 8 g
- Trans Fat: 0.5 g
- Carbohydrates: 29 g
- Fiber: 2 g
- Protein: 26 g
- Cholesterol: 75 mg
Susan Whitaker
Content Specialist & Home Cooking Guide
Expertise
Family-friendly Meals, Simple Healthy Cooking, Ingredient Substitutions, Beginner-friendly Recipes, Flexible Meal Prep
Education
Susan is the steady, practical guide at Mary Sue & Susan, bringing clarity, structure, and a warm sense of encouragement to every recipe she touches. Susan joined the site with a simple goal: help people cook with more confidence and less guesswork.