Crispy Beef and Cheese Chimichangas Recipe for Satisfying Dinners
Beef and cheese chimichangas deliver that perfect combination of crispy, golden goodness and savory satisfaction everyone craves.
This crowd-pleasing dish brings bold flavors to the table without requiring hours in the kitchen.
Whether you need a weeknight dinner solution or want something special for casual entertaining, this recipe fits the bill beautifully.
The appeal lies in that delightful contrast between the crunchy exterior and the warm, melty filling inside.
Comfort food lovers will appreciate how filling and flavorful each bite becomes.
Make this recipe soon and watch it become a regular request at your dinner table.
What Gives Beef and Cheese Chimichangas Their Signature Crunchy Comfort
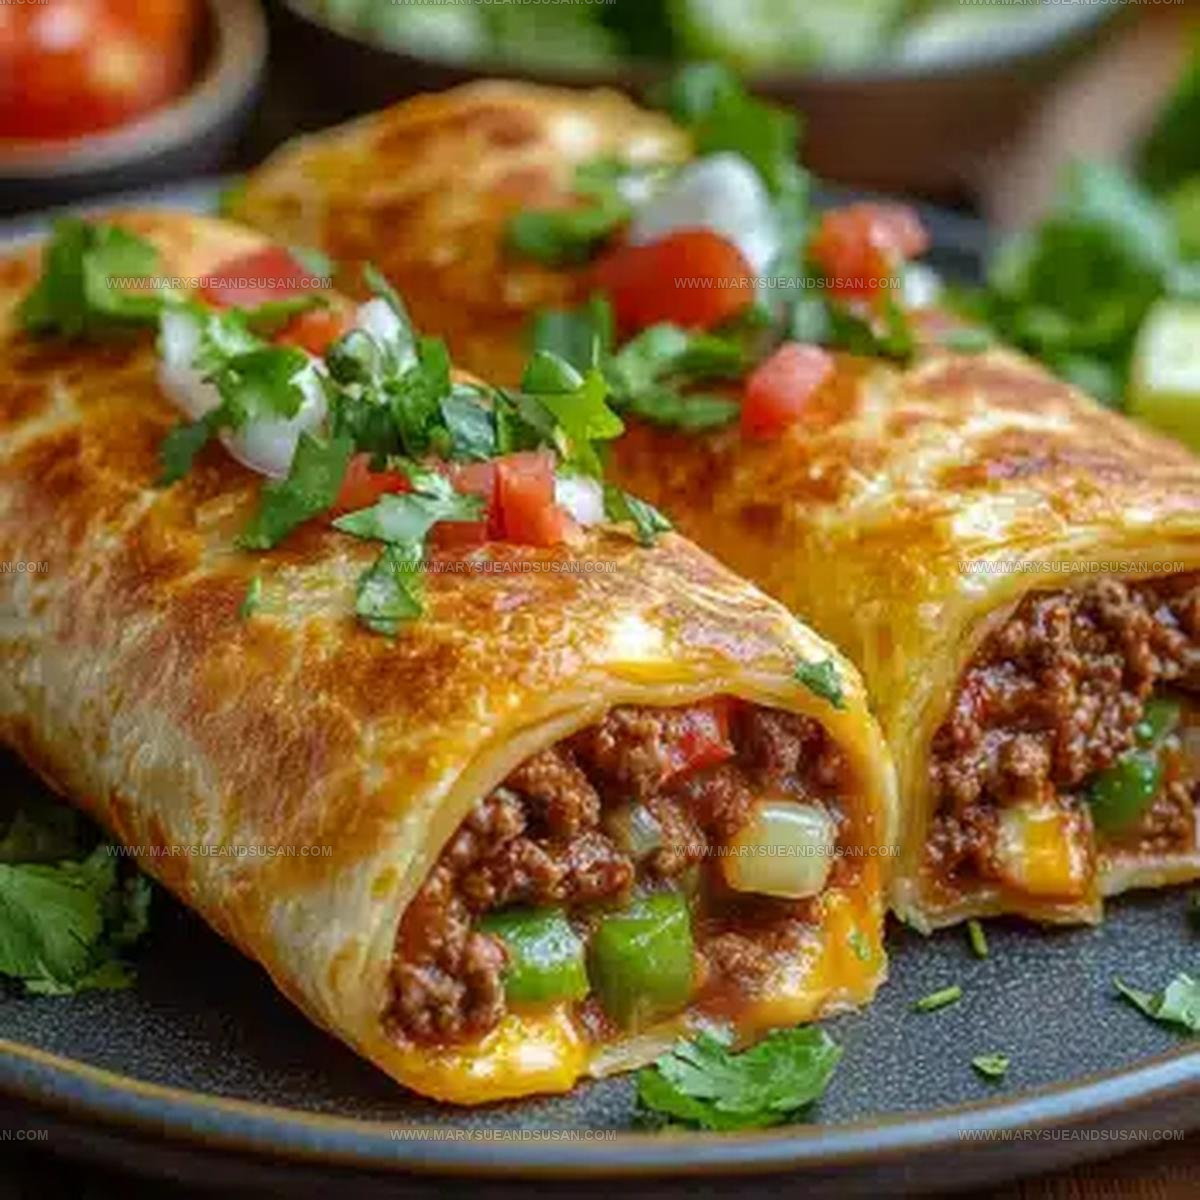
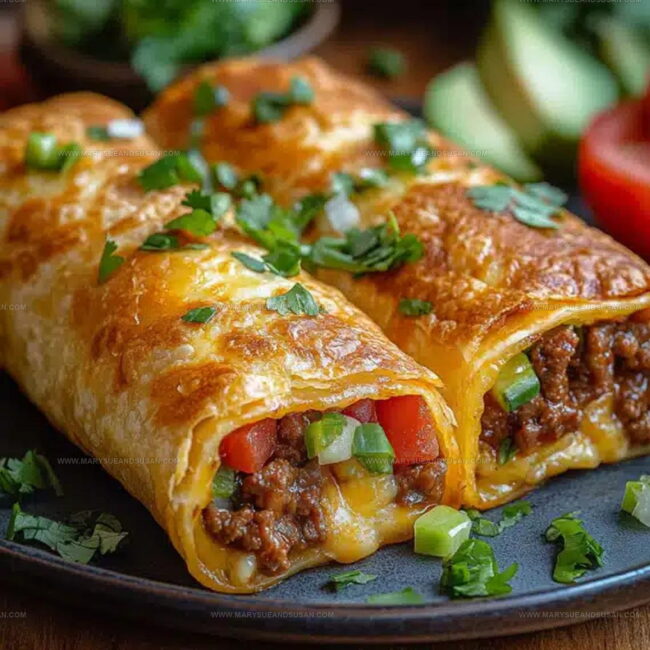
Seasoned Beef And Melted Cheese Inside Chimichangas

Skillets Tongs and Tools for Frying or Baking
Nail the Crunch: The Fill, Roll, and Sizzle Chimichanga Path
Prepare the Beef Base
Heat a large skillet over medium heat and add 1 lb (450g) ground beef. Break the meat apart while cooking until it browns nicely. Add these ingredients to enhance the flavor:
Cook for 2-3 minutes until the onions soften completely.
Season the Meat
Stir these seasonings into the beef mixture:
These spices will give your chimichangas a robust, warm flavor profile.
Create the Meat Sauce
Pour in these liquid ingredients:
Simmer the mixture for exactly 5 minutes until it thickens slightly. Remove the skillet from the heat and let it cool for a few minutes.
Assemble the Chimichangas
Grab your 6 large flour tortillas and spread about 1/3 cup of the beef mixture in the center of each one. Sprinkle 2-3 tablespoons of shredded cheese (about 1 cup or 120g total) over the meat.
Fold the sides of the tortilla inward, then roll tightly like a compact burrito, making sure the ends are sealed.
Fry to Golden Perfection
Pour 1 cup (240ml) vegetable oil into a deep skillet and heat to exactly 350°F (175°C).
Carefully place two chimichangas seam-side down into the hot oil. Fry for 2-3 minutes per side until they turn a beautiful golden brown. Transfer to paper towels to drain excess oil.
Alternative Cooking Methods
For a healthier option, preheat your oven to 400°F (200°C). Brush the chimichangas with 2 tablespoons melted butter and bake for 20-25 minutes, flipping halfway through.
Alternatively, use an air fryer at 375°F (190°C) for 8-10 minutes, spraying lightly with cooking spray.
Serve and Garnish
Plate your crispy chimichangas with classic toppings. Add a dollop of sour cream, fresh guacamole, or salsa.
Sprinkle some chopped cilantro and shredded lettuce on the side. Serve with Mexican rice or refried beans for a complete meal.
Seal Tight Tips for Leak Free Chimichangas
Crispy Mexican-Style Iterations Of Beef Chimichangas
Crispy Mexican-Style Main Presentations For Chimichangas
Crispy Mexican Main Preservation Tactics For Chimichangas
Chimichangas Q&A for a Crispy and Hearty Mexican Dish
Can I make the beef filling ahead of time?
Absolutely! Prepare the beef mixture up to two days in advance and store it in an airtight container in the refrigerator. When ready to assemble, simply reheat the filling and proceed with wrapping your chimichangas.
What if my tortillas tear while rolling?
No worries! Work with room temperature tortillas, which are more flexible. If a tortilla tears, use a second tortilla as a backup wrapper or carefully patch the tear with a small piece of tortilla.
How do I prevent chimichangas from unrolling during cooking?
Secure the rolls tightly by tucking in the sides firmly and placing them seam-side down when cooking. For extra insurance, you can use a toothpick to hold the seam closed.
Can I freeze assembled chimichangas before cooking?
Definitely! Wrap each chimichanga individually in plastic wrap, then place in a freezer bag. They’ll keep for up to three months. Thaw in the refrigerator before cooking.
What cheese works best for this recipe?
Shredded cheddar or Mexican blend cheese are perfect. Monterey Jack or pepper jack also add great flavor and melt beautifully inside the chimichangas.
Are chimichangas supposed to be soft or crispy? Traditionally they’re fried to a crisp golden shell, but baking gives a softer, lighter version.

Crispy Beef Filled Chimichanga Recipe
- Total Time: 25-40 minutes
- Yield: 6 1x
Description
Mexican beef and cheese Chimichangas bring crispy, golden comfort straight from the skillet to your plate. Packed with seasoned ground beef, melted cheese, and wrapped in a perfectly crisped tortilla, these delightful parcels make dinner feel like a festive celebration.
Ingredients
Main Ingredients:
- 1 lb (450g) ground beef
- 6 large flour tortillas
- 1 cup (120g) shredded cheese
- 1 cup (240ml) vegetable oil
Spices and Seasonings:
- 1 tsp chili powder
- 1 tsp ground cumin
- ½ tsp paprika
- ½ tsp salt
- ¼ tsp black pepper
Supporting Ingredients:
- ½ small onion, finely diced
- 2 cloves garlic, minced
- ½ cup (120ml) tomato sauce
- ¼ cup (60ml) beef broth
- 2 tablespoons butter
Garnishes:
- Sour cream
- Guacamole
- Salsa or pico de gallo
- Chopped cilantro
- Shredded lettuce
Instructions
- Grab a large skillet and brown 1 pound (450g) ground beef over medium heat, breaking it into small crumbles while cooking.
- Mix ½ finely diced onion and 2 minced garlic cloves into the beef. Sauté for 2-3 minutes until onions soften.
- Sprinkle 1 teaspoon chili powder, 1 teaspoon cumin, ½ teaspoon paprika, ½ teaspoon salt, and ¼ teaspoon black pepper over the meat mixture.
- Pour ½ cup tomato sauce and ¼ cup beef broth into the skillet. Simmer for 5 minutes at medium-low heat until sauce thickens slightly.
- Place a large flour tortilla on your work surface and center ⅓ cup beef mixture in the middle.
- Scatter 2-3 tablespoons shredded cheese directly on top of the beef filling.
- Carefully fold the tortilla sides inward, then roll tightly to create a secure chimichanga packet.
- For frying, heat 1 cup vegetable oil to 350°F (175°C) in a deep skillet.
- Gently lower two chimichangas seam-side down into hot oil. Fry 2-3 minutes per side until deep golden brown.
- Drain fried chimichangas on paper towels to remove excess oil.
- Serve immediately with sour cream, salsa, and chopped cilantro on the side.
Notes
- Ground beef works best with 80/20 lean-to-fat ratio for maximum flavor and juiciness.
- Double-wrap tortillas to prevent filling from leaking during cooking if worried about sealing.
- Drain excess grease from beef completely to ensure crispy, not soggy chimichangas.
- Experiment with protein alternatives like shredded chicken or black beans for different dietary preferences.
- Prep Time: 10 minutes
- Cook Time: 15-30 minutes
- Category: Beef
- Method: Frying
- Cuisine: Mexican
Nutrition
- Serving Size: 6
- Calories: 540 kcal
- Sugar: 3 g
- Sodium: 720 mg
- Fat: 36 g
- Saturated Fat: 12 g
- Unsaturated Fat: 22 g
- Trans Fat: 1 g
- Carbohydrates: 30 g
- Fiber: 3 g
- Protein: 28 g
- Cholesterol: 75 mg
Mary Sue
Founder & Creative Recipe Developer
Expertise
Comfort Food Twists, Seasonal Cooking, Creative Flavor Pairings, Easy Weeknight Dinners, Flexible Pantry Cooking
Education
Mary Sue is the playful, creative recipe mind behind Mary Sue & Susan, known for big flavor ideas, warm storytelling, and dishes that feel both comforting and a little unexpected. She has a talent for taking familiar meals and giving them just enough personality to make them memorable.