Butter Chicken Recipe That Delivers Restaurant-Quality Flavor at Home
Crispy butter chicken has become one of the most beloved fusion dishes to come out of modern home kitchens, combining rich Indian flavors with a satisfying crunch that makes every bite memorable.
Something magical happens when traditional spices meet a golden, crispy coating that holds up beautifully against creamy sauces.
The contrast between the crunchy exterior and tender interior creates a textural experience that feels both comforting and exciting at the same time.
When you serve it at dinner parties, watch how quickly plates empty and compliments flow around the table.
It manages to feel familiar yet new, bridging the gap between classic comfort food and bold, aromatic cuisine that leaves everyone satisfied.
Once it comes out of the pan with that perfect golden finish, the hard part is waiting long enough to plate it before taking that first delicious bite.
Why Crispy Butter Chicken Shines
Essential Ingredients for Crispy Butter Chicken
Main Protein:Marinade:Coating Ingredients:Cooking Fat:Garnish:Everyday Kitchen Equipment for Crispy Butter Chicken
Cooking Method for Crispy Butter Chicken
Prep the Chicken
Grab those chicken thighs and trim off any extra fat. Chop them into pieces that’ll cook evenly and look great on the plate.
Buttermilk Bath
Pour 1 cup of buttermilk into a big bowl. Dunk each piece of chicken completely, making sure every bit gets coated. This is your secret weapon for keeping the meat super tender.
Chill and Marinate
Slide the buttermilk-covered chicken into the refrigerator for 2-4 hours. Go do something fun while the magic happens.
Create the Crispy Coating
In a shallow dish, mix together your flour and spices:
Blend everything until it looks perfectly combined.
Drain and Coat
Pull the chicken from its buttermilk bath, letting the excess liquid drip away. Roll each piece through the seasoned flour, making sure it’s totally covered.
Prepare the Skillet
Melt 1/2 cup unsalted butter in a large cast-iron skillet over medium-high heat. Watch for those butter bubbles to start dancing.
Fry to Golden Perfection
Carefully place the coated chicken pieces into the hot butter. Don’t crowd the pan – give each piece some space. Fry for 5-6 minutes on each side until they turn a beautiful golden brown.
Check the Temperature
Make absolutely certain the chicken reaches 165°F internal temperature. Safety first!
Drain and Finish
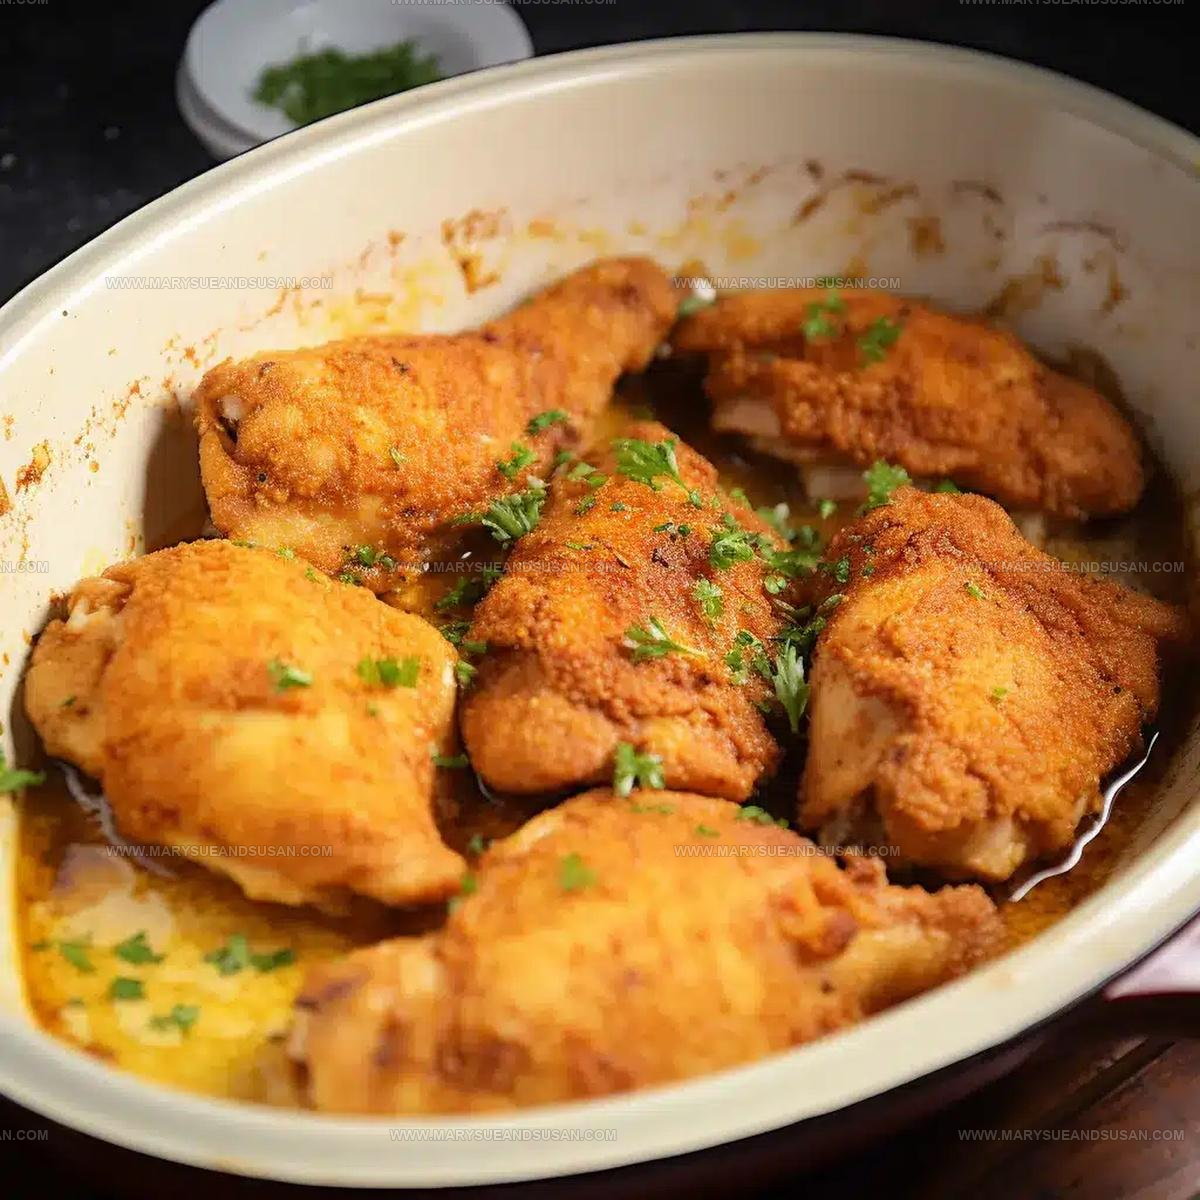
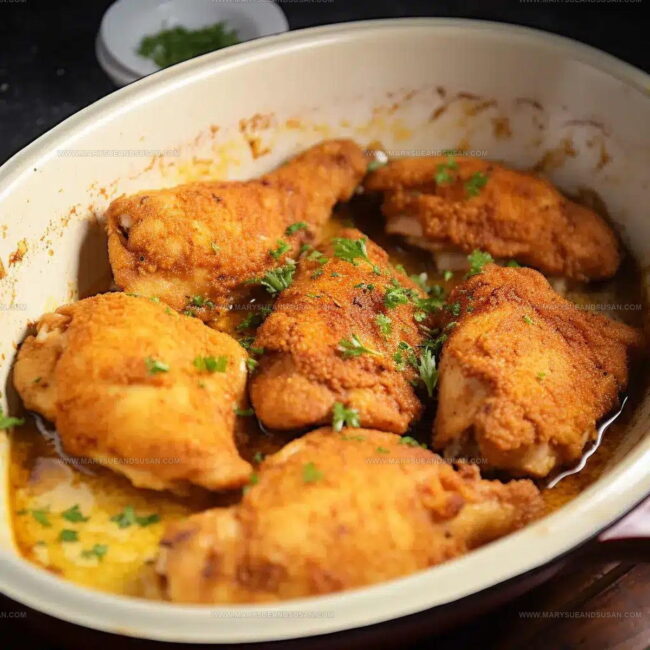
Move the crispy chicken to a wire rack to let any extra butter drip off. Sprinkle 2 tbsp of fresh chopped parsley over the top while it’s still piping hot.
Serve and Enjoy
Plate up your crispy butter chicken with fresh lemon wedges on the side. Squeeze a bit of lemon over the top for a bright, zesty finish.
Refined Cooking Notes For Crispy Butter Chicken
Flavor Options for Crispy Butter Chicken
Serving Notes For Crispy Butter Chicken
Storing Crispy Butter Chicken Properly
Crispy Butter Chicken Common Questions Answered
Can I use chicken breasts instead of thighs?
Chicken breasts work well, but they tend to dry out faster. Thighs have more fat, which keeps the meat juicy during frying.
What if I don’t have buttermilk?
Make your own by mixing milk with a tablespoon of lemon juice or vinegar. Let it sit for 5 minutes before using.
How crispy will the coating get?
The flour mixture creates a super crunchy exterior when fried in butter. Shaking off excess flour helps achieve maximum crispiness.
Is cayenne pepper too spicy for kids?
Reduce or skip the cayenne for a milder flavor. The other spices still provide excellent taste without heat.
Can I bake this chicken instead of frying?
Baking works, but won’t deliver the same crispy butter-fried texture. The skillet method creates the best golden, crunchy coating.
Do I need a cast-iron skillet specifically?
A heavy-bottomed pan works, but cast-iron provides the most even heat and best browning for your chicken.

Crispy Butter Chicken Recipe
- Total Time: 2 hours 27 minutes
- Yield: 4 1x
Description
Crispy butter chicken brings tender, juicy chicken drenched in a creamy, spiced tomato sauce that’ll make your taste buds dance with pure delight. Serve this classic Indian dish over fluffy basmati rice for a restaurant-worthy meal straight from your own kitchen.
Ingredients
Main Ingredients:
- 2 lbs boneless skinless chicken thighs
- 1 cup buttermilk
- ½ cup unsalted butter
Breading and Seasoning:
- 1 cup all-purpose flour
- 2 teaspoons salt
- 1 teaspoon black pepper
- 1 teaspoon paprika
- ½ teaspoon garlic powder
- ½ teaspoon onion powder
- ¼ teaspoon cayenne pepper
Garnish:
- 2 tablespoons chopped fresh parsley
- 1 lemon, cut into wedges
Instructions
- Trim 2 lbs chicken thighs into uniform 2-inch pieces, removing any excess fat for even cooking.
- Submerge chicken completely in 1 cup buttermilk, ensuring every piece is coated for maximum tenderness.
- Refrigerate buttermilk-covered chicken for exactly 3 hours to help tenderize and enhance flavor absorption.
- Combine 1 cup flour with 2 tsp salt, 1 tsp black pepper, 1 tsp paprika, ½ tsp garlic powder, ½ tsp onion powder, and ¼ tsp cayenne in a shallow dish.
- Drain chicken from buttermilk, allowing excess liquid to drip off completely.
- Roll each chicken piece thoroughly in seasoned flour mixture, patting gently to help coating adhere.
- Melt ½ cup unsalted butter in a large cast-iron skillet over medium-high heat until it foams and bubbles.
- Place chicken pieces carefully into hot butter, maintaining 1-inch spacing between each piece.
- Fry chicken for 5-6 minutes on first side until deep golden brown, checking for even coloration.
- Flip chicken and cook additional 5-6 minutes until internal temperature reaches exactly 165°F.
- Transfer crispy chicken to a wire rack, allowing excess butter to drain for maximum crispiness.
- Sprinkle 2 tbsp fresh chopped parsley over hot chicken for bright, herbal finish.
- Serve immediately with fresh lemon wedges for bright, tangy accent.
Notes
- Marinating chicken in buttermilk helps tenderize and add subtle tanginess, making each bite more flavorful.
- Use a meat thermometer to ensure chicken reaches exactly 165°F for safe, perfectly cooked meat without drying out.
- Cast-iron skillet provides the best heat distribution and creates an extra crispy, golden brown exterior on the chicken.
- Let chicken rest on a wire rack after frying to maintain crispiness and prevent soggy bottoms by allowing excess butter to drip away.
- Prep Time: 15 minutes
- Cook Time: 12 minutes
- Category: Chicken
- Method: Frying
- Cuisine: Indian
Nutrition
- Serving Size: 4
- Calories: 670 kcal
- Sugar: 1 g
- Sodium: 1600 mg
- Fat: 45 g
- Saturated Fat: 25 g
- Unsaturated Fat: 18 g
- Trans Fat: 1 g
- Carbohydrates: 20 g
- Fiber: 1 g
- Protein: 50 g
- Cholesterol: 210 mg
Mary Sue
Founder & Creative Recipe Developer
Expertise
Comfort Food Twists, Seasonal Cooking, Creative Flavor Pairings, Easy Weeknight Dinners, Flexible Pantry Cooking
Education
Mary Sue is the playful, creative recipe mind behind Mary Sue & Susan, known for big flavor ideas, warm storytelling, and dishes that feel both comforting and a little unexpected. She has a talent for taking familiar meals and giving them just enough personality to make them memorable.