Crispy Chili Chicken Recipe

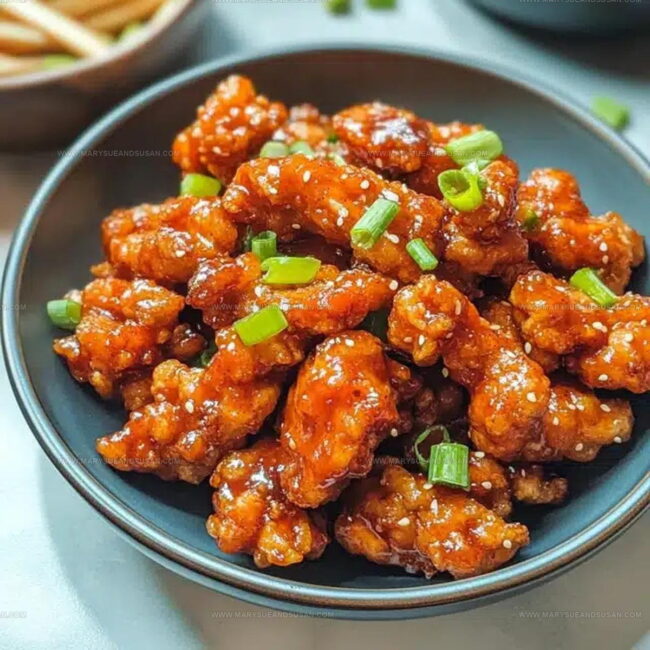
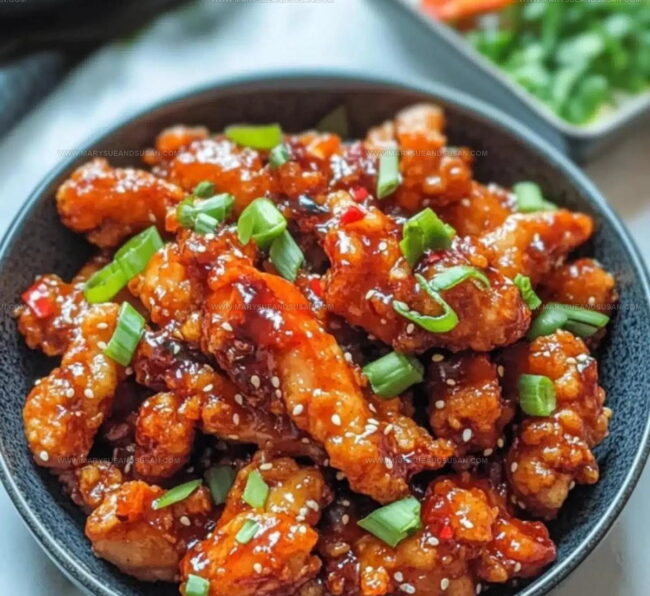
Spicy Chili Chicken Recipe with Crispy Golden Finish

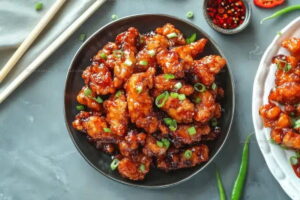
A crispy chili chicken recipe delivers that perfect combination of crunch and spice that makes takeout so addictive, except now it's ready in your own kitchen.

The contrast between golden, crunchy coating and tender meat creates an experience that satisfies on every level.

This dish works beautifully for weeknight dinners when you need something exciting yet doable, and it impresses guests without requiring advanced cooking skills.

The bold flavors wake up your taste buds while the texture keeps you coming back for another bite.

Whether you need a crowd-pleaser for game night or simply want to shake up your dinner rotation, this delivers every single time.

The beauty here is how restaurant-worthy results come together with straightforward techniques anyone can master.

Scroll down and start cooking up something spectacular tonight.

Why You Will Love The Bold Kick Of This Crispy Chilli Chicken

  • Crowd-Pleaser: This chicken dish turns a regular meal into a family favorite. Your relatives and friends will keep asking when you’re cooking it again.
  • Simple Technique: The step-by-step coating process makes crispy chicken easy for anyone. Even kitchen beginners can master this delicious recipe without stress.
  • Flavor Adventure: Combining sweet, spicy, and savory sauces creates an exciting taste experience. Your taste buds will dance with each perfectly seasoned bite.
  • Quick Comfort: From kitchen to table, this meal comes together faster than ordering takeout. Dinner becomes something special without hours of complicated preparation.

Components That Create Crispy Chilli Chicken Crunch

Components That Create Crispy Chilli Chicken Crunch
Main Protein:
  • 500g Chicken Breast or Thigh: Tender meat cut into bite-sized pieces for perfect, evenly cooked morsels that absorb the sauce beautifully.
Coating Ingredients:
  • 1 Cup Cornstarch, ½ Cup All-Purpose Flour: Essential dry ingredients creating a light, crispy exterior that transforms ordinary chicken into a crunchy delight.
  • 1 Teaspoon Salt, ½ Teaspoon Black Pepper, 1 Teaspoon Garlic Powder, 1 Teaspoon Paprika: Seasoning blend that delivers robust flavor to every chicken piece.
  • 1 Egg, ¼ Cup Water: Binding liquid that helps the dry coating stick perfectly to the chicken.
Frying and Sauce Ingredients:
  • Oil for Frying, 2 Tablespoons Oil: Necessary for achieving golden, crispy chicken and sautéing sauce ingredients.
  • 1 Tablespoon Garlic (Minced), 1 Tablespoon Ginger (Grated): Aromatic base that infuses the dish with depth and warmth.
  • 1 Red Bell Pepper, 1 Green Bell Pepper: Colorful vegetables adding crunch and freshness to the final dish.
  • 2 Tablespoons Soy Sauce, 1 Tablespoon Dark Soy Sauce, 1 Tablespoon Honey, 1 Tablespoon Tomato Ketchup: Sauce components creating a perfect balance of sweet, salty, and tangy flavors.
  • 1 Teaspoon Red Chili Flakes: Providing a spicy kick to elevate the overall taste.
  • 1 Tablespoon Cornstarch, 2 Tablespoons Water: Thickening agent for a glossy, clingy sauce.
Garnish Ingredients:
  • 2 Green Onions, Thinly Sliced: Fresh, mild onion topping that adds color and a light crunch to your chicken.
  • Extra Red Chili Flakes (Optional): Sprinkle over the finished dish for an extra layer of heat, if you prefer a spicier kick.

Tools Supporting Frying And Tossing

  • Large Mixing Bowl: Spacious container where you’ll combine dry ingredients and coat your chicken pieces thoroughly. Select a bowl that gives plenty of room for easy mixing.
  • Sharp Knife: Essential for cutting chicken into uniform bite-sized pieces that cook evenly and look professional. Ensure the blade is clean and sharp.
  • Deep Pan or Wok: Wide cooking vessel perfect for deep-frying chicken with enough space to prevent overcrowding. A pan with high sides helps contain hot oil safely.
  • Paper Towel-Lined Plate: Helpful surface for draining excess oil from your crispy chicken pieces after frying. The towels absorb grease and keep the chicken crisp.
  • Whisk: Small kitchen tool for blending egg and water smoothly, creating a perfect coating base for your chicken.
  • Measuring Spoons: Precise utensils for adding exact amounts of spices and seasonings to ensure consistent flavor every time.
  • Wooden Spoon or Tongs: Great for turning chicken pieces during frying and moving them around the pan without scratching surfaces.
  • Cornstarch Mixing Cup: Small container for preparing the cornstarch slurry, helping thicken your sauce without lumps.

Steps Forming A Bold Crispy Chilli Chicken

Steps Forming A Bold Crispy Chilli Chicken
1

Prepare Chicken

Cut 500g (about 1.1 pounds) chicken breast or thigh into bite-sized pieces. This helps the chicken cook evenly and ensures each piece gets a delicious crispy coating.

2

Mix Dry Coating

Grab a large bowl and combine these ingredients:

  • 1 cup cornstarch
  • ½ cup all-purpose flour
  • 1 teaspoon salt
  • ½ teaspoon black pepper
  • 1 teaspoon garlic powder
  • 1 teaspoon paprika

Whisk these dry ingredients until they’re well blended.

3

Create Egg Wash

In a separate small bowl, beat 1 egg with ¼ cup water until smooth.

4

Coat Chicken

Dip each chicken piece first into the egg mixture, then roll it thoroughly in the dry coating. Press the coating gently so it sticks well to your chicken.

5

Prepare for Frying

Heat oil in a deep pan or wok at 350°F (175°C). Drop a small piece of coated batter to test – if it sizzles and rises, your oil is ready.

6

Fry Chicken

Carefully add chicken pieces in batches. Fry for 5-7 minutes, turning occasionally, until golden brown and crispy. Place cooked pieces on a paper towel to drain excess oil.

7

Create Sauce Base

Heat 2 tablespoons oil in a large wok over medium heat (325°F/165°C). Add:

  • 1 tablespoon minced garlic
  • 1 tablespoon grated ginger

Stir until fragrant, about 30 seconds.

8

Add Vegetables

Toss in:

  • 1 red bell pepper (sliced)
  • 1 green bell pepper (sliced)
  • 2 red chilies (sliced)

Sauté for 2 minutes until slightly softened.

9

Build Sauce Flavors

Pour in these ingredients:

  • 2 tablespoons soy sauce
  • 1 tablespoon dark soy sauce
  • 1 tablespoon honey
  • 1 tablespoon tomato ketchup
  • 1 teaspoon red chili flakes

Stir everything together thoroughly.

10

Thicken Sauce

Mix 1 tablespoon cornstarch with 2 tablespoons water, then stir into the sauce. Cook for 1 minute until the sauce thickens.

11

Combine Chicken and Sauce

Add crispy chicken to the pan, tossing to coat completely. Cook for an additional minute.

12

Garnish and Serve

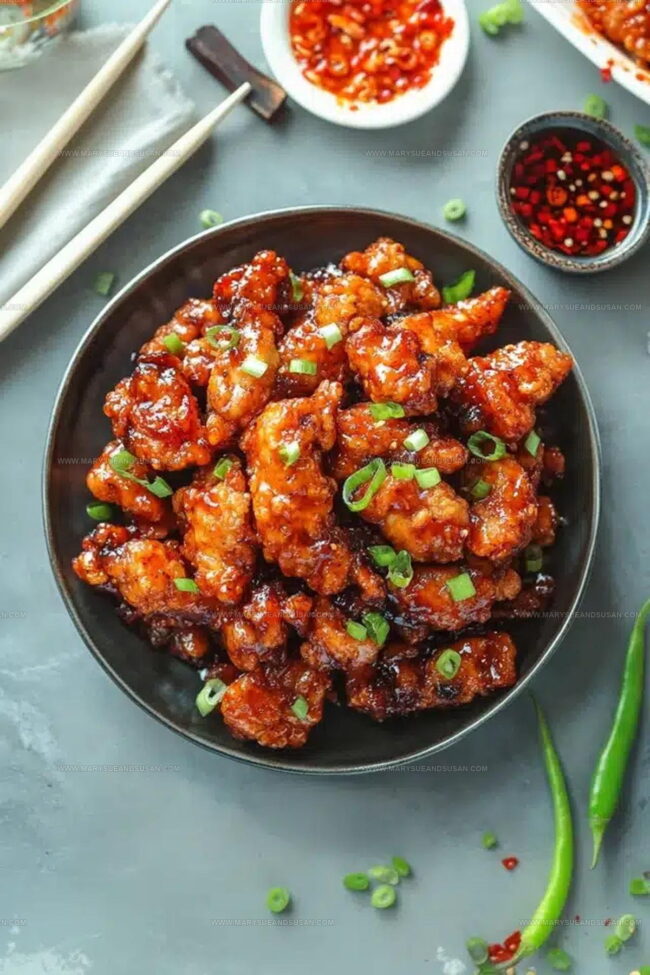
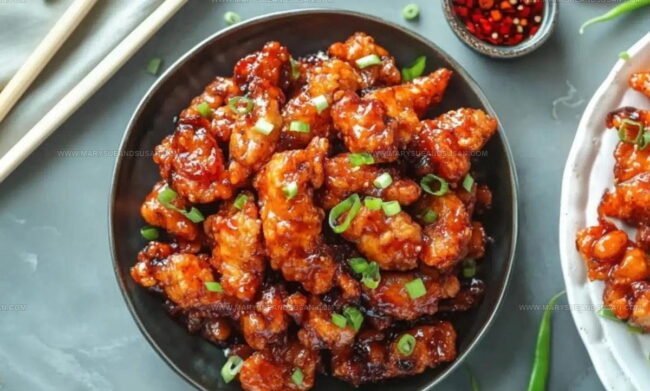
Sprinkle 2 chopped spring onions over the top for a fresh finish. Serve hot and enjoy your crispy chili chicken.

Spice Boosters That Intensify Chilli Flavor

Spice Boosters That Intensify Chilli Flavor
  • Slice chicken into uniform bite-sized pieces to guarantee even cooking and perfect sauce coverage in every delectable morsel.
  • Mix dry ingredients thoroughly to create a light, crunchy batter that will stick beautifully to your chicken pieces.
  • Check oil readiness by dropping a small batter piece – when it sizzles and rises, your pan is perfectly heated for crispy perfection.
  • Cook chicken in batches to prevent overcrowding, ensuring each piece turns golden brown and maintains that incredible crunch.
  • Stir sauces carefully to blend sweet, salty, and spicy flavors, coating your crispy chicken with maximum deliciousness.

Heat Intensity And Sticky Glaze Swaps For Crispy Chicken

Heat Intensity And Sticky Glaze Swaps For Crispy Chicken
  • Gluten-Free Crispy Chicken: Replace wheat flour with rice flour or almond flour to make the recipe safe for gluten-sensitive guests.
  • Baked Version: Skip deep frying and coat chicken pieces with cooking spray, then bake at 425°F for a healthier alternative that still delivers crispy texture.
  • Vegetarian Alternative: Swap chicken with tofu or cauliflower florets, using the same crispy coating technique for a plant-based version of the dish.
  • Low-Spice Option: Remove red chilies and reduce chili flakes to create a milder sauce perfect for sensitive palates while keeping the crispy chicken’s core flavor profile.

Serving Tips For A Hot Plate Of Crispy Chilli Chicken

  • Serve Immediately: Get the chicken straight from the pan to the plate while it’s steaming hot and super crispy. The moment those golden pieces hit the sauce, the coating starts softening, so timing matters.
  • Rice Pairing Perfection: Serve this spicy chicken over fluffy white rice or fragrant jasmine rice. The rice soaks up all those delicious sauce drippings and balances the chili’s heat.
  • Fresh Veggie Balance: Add a simple cucumber salad or quick pickled vegetables on the side. Their cool, crisp texture cuts through the rich, spicy chicken and provides a refreshing contrast.
  • Drink Companions: Pour a cold Asian beer like Tsingtao or a crisp white wine to help cool down the chili’s kick. Something light and slightly sweet works best with this bold dish.

Ways To Keep Crispy Chicken Crunchy

Ways To Keep Crispy Chicken Crunchy
  • Refrigerate leftover chicken in an airtight container for up to 3 days. The coating might lose some crispness, but the flavor stays fantastic.
  • Reheat in an air fryer at 375°F for 3-4 minutes to restore that delightful crunch. Your chicken will taste almost as good as when first cooked.
  • Warm in a skillet over medium heat with a splash of oil to help revive the crispy exterior. Keep stirring to prevent burning and distribute heat evenly.
  • Transform cold leftovers into a tasty chicken salad by chopping the pieces and mixing with fresh greens and a light dressing. This gives your meal a whole new delicious dimension.

Crispy Chilli Chicken Questions Spice Fans Ask

FAQ

Why do I need to coat the chicken in both egg and flour?

The egg helps the flour mixture stick to the chicken, creating a barrier that locks in moisture and ensures a super crispy exterior that doesn’t fall off while cooking.

FAQ

Can I use a different type of pepper?

Absolutely! Bell peppers are versatile, so feel free to swap them for whatever color or variety you prefer—green, yellow, or even spicy jalapeños work great.

FAQ

How do I know the chicken is fully cooked?

Check the internal temperature with a meat thermometer—it should reach 165°F (74°C). If you don’t have one, cut into the thickest piece to ensure there’s no pink meat inside.

FAQ

What makes the coating extra crispy?

Double-frying is the secret! The first fry cooks the chicken, and the second fry creates that perfect golden, crunchy exterior that everyone loves.

FAQ

Can I make this dish less spicy?

Reduce or eliminate the red chilies and chili flakes. The sauce will still have amazing flavor without intense heat.

Print
clock clock iconcutlery cutlery iconflag flag iconfolder folder iconinstagram instagram iconpinterest pinterest iconfacebook facebook iconprint print iconsquares squares iconheart heart iconheart solid heart solid icon
Crispy Chili Chicken Recipe

Crispy Chili Chicken Recipe


5 Stars 4 Stars 3 Stars 2 Stars 1 Star

4.8 from 40 reviews

  • Total Time: 30-35 minutes
  • Yield: 4 1x

Description

Crispy chilli chicken serves up crunchy chicken coated in a spicy, glossy sauce packed with bold flavor. It’s a takeout-style favorite that feels exciting without complicated prep.


Ingredients

Scale

Main Ingredients:

  • 500 grams (17.6 ounces) chicken breast or thigh
  • 1 cup cornstarch
  • ½ cup all-purpose flour
  • 2 tablespoons oil
  • 1 egg

Seasonings and Spices:

  • 1 teaspoon salt
  • ½ teaspoon black pepper
  • 1 teaspoon garlic powder
  • 1 teaspoon paprika
  • 1 tablespoon garlic (minced)
  • 1 tablespoon ginger (grated)
  • 1 teaspoon red chili flakes

Sauces and Additional Ingredients:

  • ¼ cup water
  • 2 tablespoons soy sauce
  • 1 tablespoon dark soy sauce
  • 1 tablespoon honey
  • 1 tablespoon tomato ketchup
  • 1 tablespoon cornstarch (mixed with 2 tablespoons water)
  • 1 red bell pepper (sliced)
  • 1 green bell pepper (sliced)
  • 2 spring onions (chopped, for garnish)
  • 2 red chilies (sliced, for heat)
  • Oil for frying

Instructions

  1. Slice 500g chicken breast or thigh into bite-sized pieces ensuring uniform 1-inch chunks for even cooking and coating.
  2. Blend 1 cup cornstarch, ½ cup all-purpose flour, 1 teaspoon salt, ½ teaspoon black pepper, 1 teaspoon garlic powder, and 1 teaspoon paprika in a wide mixing bowl.
  3. Whisk 1 egg with ¼ cup water in a separate bowl to create a smooth binding liquid.
  4. Dunk each chicken piece into egg mixture, then thoroughly coat with the dry ingredient blend, pressing gently to help breading adhere completely.
  5. Pour oil into a deep pan, heating to 350°F (175°C). Check temperature by dropping a small batter piece—it should immediately sizzle and float.
  6. Fry chicken pieces in small batches for 5-6 minutes, turning occasionally to achieve golden-brown crispy exterior. Drain on paper towels.
  7. Heat 2 tablespoons oil in a wok over medium heat. Sauté 1 tablespoon minced garlic and 1 tablespoon grated ginger until aromatic, about 30 seconds.
  8. Toss in sliced bell peppers, cooking for 2 minutes to maintain crispness.
  9. Add 2 tablespoons soy sauce, 1 tablespoon dark soy sauce, 1 tablespoon honey, 1 tablespoon tomato ketchup, and 1 teaspoon red chili flakes. Stir thoroughly.
  10. Mix 1 tablespoon cornstarch with 2 tablespoons water, then pour into sauce. Simmer for 1 minute until sauce thickens.
  11. Fold crispy chicken into sauce, ensuring complete coating. Cook an additional minute to meld flavors.
  12. Garnish with 2 chopped spring onions and sliced red chilies for fresh, zesty finish.

Notes

  • Ensure chicken pieces are uniformly cut to promote even cooking and consistent crispiness.
  • Pat chicken completely dry before coating to help breading adhere and create a crunchier exterior.
  • For gluten-free version, swap wheat flour with cornstarch or rice flour in the coating mixture.
  • When frying, maintain oil temperature around 350-375°F to prevent soggy chicken and achieve golden, crisp texture.
  • Prep Time: 15 minutes
  • Cook Time: 15-20 minutes
  • Category: Chicken
  • Method: Frying
  • Cuisine: Chinese

Nutrition

  • Serving Size: 4
  • Calories: 314 kcal
  • Sugar: 6 g
  • Sodium: 620 mg
  • Fat: 11 g
  • Saturated Fat: 2 g
  • Unsaturated Fat: 8 g
  • Trans Fat: 0 g
  • Carbohydrates: 26 g
  • Fiber: 2 g
  • Protein: 33 g
  • Cholesterol: 85 mg
Susan Whitaker

Susan Whitaker

Content Specialist & Home Cooking Guide

Expertise

Family-friendly Meals, Simple Healthy Cooking, Ingredient Substitutions, Beginner-friendly Recipes, Flexible Meal Prep

Education

Saint Paul College
  • Program: Culinary Arts Diploma
  • Focus: Trained in a hands-on professional kitchen environment with coursework spanning core culinary technique, pastry, butchery, charcuterie, food safety, sanitation, restaurant operations, and the nutritional side of healthy cooking, with real-world practice tied to the college’s student-run restaurant.

Susan is the steady, practical guide at Mary Sue & Susan, bringing clarity, structure, and a warm sense of encouragement to every recipe she touches. Susan joined the site with a simple goal: help people cook with more confidence and less guesswork.

Leave a Reply

Your email address will not be published. Required fields are marked *

Recipe rating 5 Stars 4 Stars 3 Stars 2 Stars 1 Star