
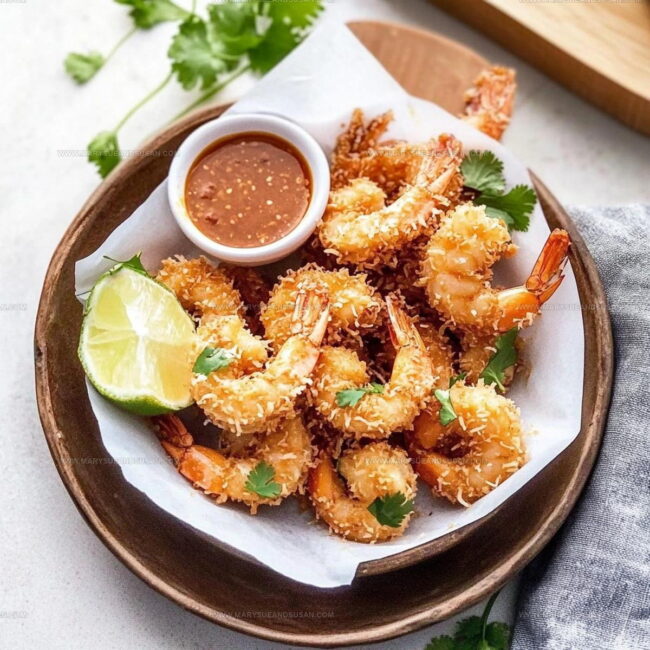
Coconut Shrimp Recipe With Sweet Chili Sauce
Crispy coconut shrirm with sweet chili sauce captures that perfect balance of savory crunch and bold flavor that makes any meal feel special.
The combination works beautifully as an appetizer for gatherings or as a main course when you want something different from the usual weeknight rotation.
Each bite offers contrasting textures that keep things interesting from start to finish.
The dish appeals to seafood lovers and anyone who enjoys tropical-inspired flavors without the fuss of complicated cooking techniques.
It's one of those recipes that looks impressive but comes together more easily than most people expect.
Whether you're hosting friends or simply treating yourself to something delicious, this recipe hits all the right notes.
Start cooking now and watch how quickly these disappear from the plate!
What Makes Crispy Coconut Shrimp a Crunch to Love
Ingredients That Create Crispy Coconut Shrimp with Sweet Chili Sauce
Main Ingredients:Coating Components:Wet Ingredients:Serving Component:Coconut Shrimp with Chili Sauce: Frying-Ready Tools
Frying Guide for Coconut Shrimp with Sweet Chili Sauce
Prep Your Workstation
Line up three shallow dishes on your kitchen counter. In the first bowl, mix 1/2 cup (60g) all-purpose flour with 1 teaspoon salt and 1/2 teaspoon black pepper. Pour 2 large beaten eggs into the second bowl. Fill the third bowl with 1 cup (80g) unsweetened coconut flakes.
Coat the Shrimp
Take your 1 pound of large peeled and deveined shrimp and work with them one at a time. First, roll each shrimp in the seasoned flour mixture, making sure every inch gets a light dusting. Then dunk the floured shrimp into the egg wash, letting excess drip off. Finally, roll the shrimp in coconut flakes until completely covered.
Heat the Oil
Pour about 1 inch of vegetable oil into a large frying pan. Set the heat to medium-high (375°F) and wait until the oil starts to shimmer and look slightly wavy.
Fry in Batches
Gently place coated shrimp into the hot oil, being careful not to overcrowd the pan. Fry each batch for 2-3 minutes per side until they turn a beautiful golden brown color.
Drain and Rest
Use a slotted spoon to transfer the crispy shrimp onto a paper towel-lined plate. This helps absorb extra oil and keeps the coating super crunchy.
Serve and Enjoy
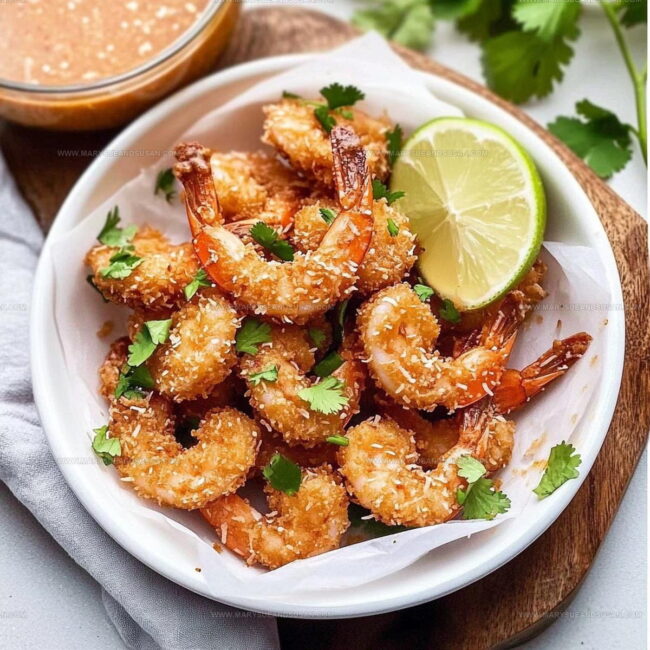
Arrange the hot, crispy coconut shrimp on a serving plate alongside 1 cup of sweet chili sauce for dipping. Grab your favorite beverage and dig in while they’re fresh and hot!
Frying Notes for Crispy Coconut Shrimp
Flavor Adjustments for Coconut Shrimp with Sweet Chili
How to Serve Crispy Coconut Shrimp with Sweet Chili Sauce
How to Store Crispy Coconut Shrimp with Sweet Chili Sauce
Your Most-Asked Questions About Coconut Shrimp Snacks
Can I use frozen shrimp?
Absolutely! Thaw them completely, pat dry with paper towels, and ensure they’re super dry before coating to get the best crispy texture.
What if I cannot find coconut flakes?
Shredded coconut works perfectly fine. Just make sure it’s unsweetened for a better savory result.
How do I know the oil is hot enough for frying?
Drop a small piece of coconut into the oil – if it sizzles immediately, your oil is ready for frying.
Can this recipe be made ahead of time?
Coat the shrimp right before cooking for maximum crispiness. They’re best served fresh and hot off the pan.
Is there a healthier alternative to deep-frying?
Bake the coconut shrimp at 425°F for about 10-12 minutes, flipping halfway through. They’ll be less crispy but still delicious.
What size shrimp works best?
Medium to large shrimp (16-20 count) are ideal for this recipe, giving you a perfect bite-sized piece that’s easy to coat and cook.

Crispy Coconut Shrimp with Sweet Chili Sauce Recipe
- Total Time: 20 minutes
- Yield: 4 1x
Description
Coconut Shrimp from the tropics brings a delightful crunch to your dinner table, delivering a perfect balance of golden-crisp coating and succulent seafood that dances with zesty sweet chili sauce. Grab some jumbo shrimp and coconut flakes for an easy coastal-inspired feast that sparks instant dinner excitement.
Ingredients
Main Ingredients:
- 1 pound large shrimp
- 1 cup unsweetened coconut flakes
Coating Ingredients:
- ½ cup all-purpose flour
- 2 large eggs
Seasoning Ingredients:
- 1 teaspoon salt
- ½ teaspoon black pepper
Dipping Sauce:
- 1 cup sweet chili sauce
Instructions
- Arrange three shallow dishes: combine ½ cup flour with 1 teaspoon salt and ½ teaspoon black pepper in the first bowl, whisk 2 large eggs in the second bowl, and pour 1 cup unsweetened coconut flakes in the third bowl.
- Dredge each peeled and deveined shrimp through the seasoned flour, ensuring a light, even coating that helps the egg adhere smoothly.
- Submerge the floured shrimp into beaten eggs, allowing excess to drip off before transferring to the coconut flakes.
- Roll the egg-coated shrimp through coconut flakes, pressing gently to create a complete, crisp exterior that will seal in moisture.
- Heat vegetable oil to 375°F (190°C) in a large, heavy-bottomed skillet, filling approximately 1 inch deep for optimal frying conditions.
- Gently lower 4-5 shrimp into the hot oil, maintaining a consistent temperature to prevent burning and ensure golden, crisp results.
- Fry each batch for 2-3 minutes, turning once midway to achieve an even, deep golden-brown color across the entire surface.
- Transfer fried shrimp to a wire rack lined with paper towels, allowing excess oil to drain and maintaining maximum crispiness.
- Serve immediately alongside 1 cup sweet chili sauce, presenting the shrimp while they remain hot and crunchy.
Notes
- Use unsweetened coconut flakes for a more authentic crispy coating that won’t burn quickly.
- Pat shrimp completely dry before coating to help breading stick better and create extra crunch.
- Choose large or jumbo shrimp for the best texture and easier handling during coating and frying.
- For a healthier version, try baking the coated shrimp at 425°F for 10-12 minutes, turning once halfway through cooking.
- Prep Time: 10 minutes
- Cook Time: 10 minutes
- Category: Shrimp
- Method: Frying
- Cuisine: Asian
Nutrition
- Serving Size: 4
- Calories: 360 kcal
- Sugar: 12 g
- Sodium: 720 mg
- Fat: 16 g
- Saturated Fat: 9 g
- Unsaturated Fat: 6 g
- Trans Fat: 0 g
- Carbohydrates: 36 g
- Fiber: 4 g
- Protein: 28 g
- Cholesterol: 220 mg
Susan Whitaker
Content Specialist & Home Cooking Guide
Expertise
Family-friendly Meals, Simple Healthy Cooking, Ingredient Substitutions, Beginner-friendly Recipes, Flexible Meal Prep
Education
Susan is the steady, practical guide at Mary Sue & Susan, bringing clarity, structure, and a warm sense of encouragement to every recipe she touches. Susan joined the site with a simple goal: help people cook with more confidence and less guesswork.