Crispy French Duck Technique Recipe to Master
Crispy French duck technique has been perfected over centuries in bistros across Paris, and home cooks everywhere can master it too.
The golden, crackling skin paired with tender meat makes any meal feel special without requiring professional training or fancy equipment.
French chefs have long understood that patience and proper heat management turn ordinary poultry into something extraordinary.
Weeknight dinners suddenly feel more luxurious when you know how to achieve that signature crackle and rich flavor.
Mastering the fundamentals means never settling for soggy skin again, and the results speak for themselves at any table.
Friends and family will ask how you managed such impressive results, but the real secret lies in simple techniques passed down through generations.
Restaurant kitchens use the same approach that works beautifully in home ovens, proving that great food doesn't need complicated methods.
Every occasion becomes more memorable when you serve something this satisfying and impressive.
What Makes Crispy French Duck Technique Special
Core Ingredients for Crispy French Duck
Duck Preparation:Spice Blend:Aromatics and Cooking Liquid:Essential Kitchen Tools for Crispy French Duck Technique
The Method for Crispy French Duck
Prepare Spice Mixture
Grab your spice grinder and toss in 1 tsp allspice berries, 4-5 whole cloves, 1 tsp black peppercorns, and 1 tsp coriander. Pulse until everything turns into a fine powder. Mix this fragrant blend with 1 cup kosher salt and a few sprigs of fresh thyme. Your kitchen will smell amazing right away.
Salt Cure Duck Legs
Take 8 whole duck legs and carefully score the skin in a diamond pattern. Generously rub the spice salt mixture all over each leg, making sure to coat every surface. Pop these into a covered dish and let them hang out in the refrigerator overnight. This helps the salt work its magic and infuse deep flavor.
Prepare Roasting Pan
Preheat your oven to exactly 325 degrees. Rinse the duck legs and pat them completely dry with paper towels. Grab a large roasting pan and set up a cozy bed for the duck with these ingredients:
Add Fat and Cover
Melt 6-8 cups of duck fat or olive oil until it’s smooth and liquid. Carefully pour the fat over the duck legs, making sure they’re completely submerged. Cover the pan first with parchment paper, then seal tightly with aluminum foil.
Slow Roast
Slide the covered roasting pan into the preheated 325-degree oven. Set a timer for 3 hours, and check the duck every hour to make sure everything looks good. The low and slow cooking will transform these legs into something incredible.
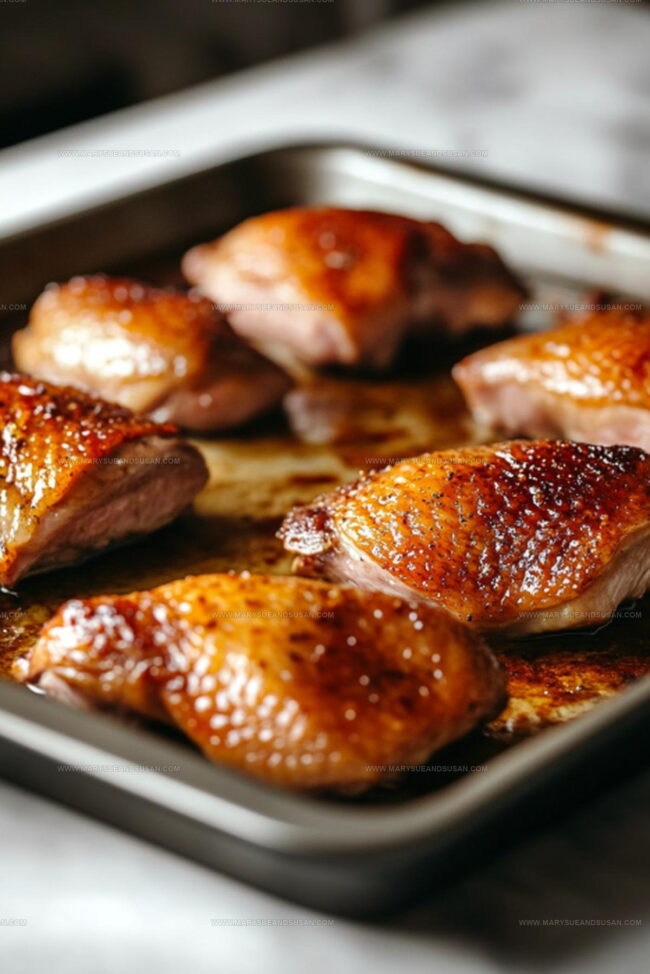
Crisp and Rest
Remove the foil and parchment for the last 30 minutes of cooking to help the skin crisp up beautifully. After pulling the pan from the oven, let the duck legs rest for 30 minutes before serving. This allows the juices to redistribute and makes each bite super tender.
Smart Cooking Notes for Crispy French Duck
Flavorful Options for Crispy French Duck
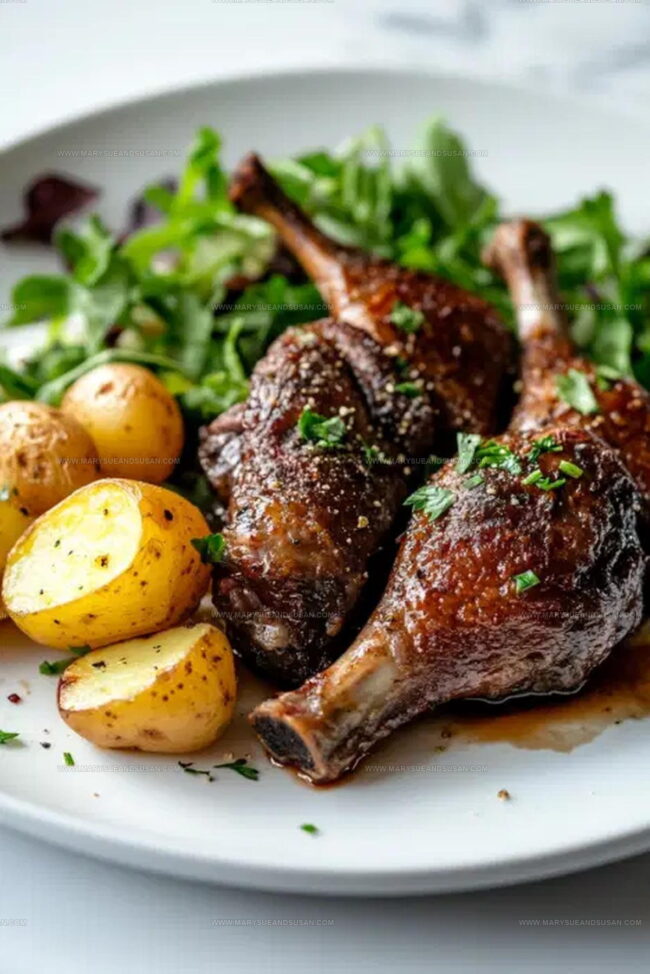
Presentation Notes for Crispy French Duck
Best Storage Practices For Crispy Duck
Crispy French Duck Technique FAQs
Why do I score the duck skin?
Scoring helps render fat and creates a crispy, golden surface that lets seasonings penetrate deeply into the meat.
Can I use chicken instead of duck?
Duck has unique fat content and flavor, so chicken won’t achieve the same rich results in this specific technique.
How salty should the salt cure be?
Sprinkle enough salt to lightly coat each duck leg – think of a gentle, even dusting that seasons without overwhelming.
What if I don’t have duck fat?
Olive oil works as an excellent substitute, though duck fat provides more traditional depth of flavor.
How can I tell when the duck is perfectly cooked?
The meat should be incredibly tender and easily separate from the bone with gentle pulling.
Do I need any special equipment for this recipe?
Just a roasting pan, parchment paper, foil, and a standard oven – no fancy tools required.
Crispy French Duck Technique Recipe
- Total Time: 19 hours 45 minutes
- Yield: 4 to 6 1x
Description
duck confit from France sizzles with rustic charm, turning simple poultry into a crispy, golden delicacy that melts right on your plate. Tender meat beneath crackling skin tells a delicious story of traditional cooking passed through generations of French kitchens.
Ingredients
Primary Ingredients:
- 8 whole duck legs
- 6–8 cups duck fat or olive oil
Seasoning Blend:
- 1 cup kosher salt
- 1 tsp allspice berries
- 4–5 whole cloves
- 1 tsp black peppercorns
- 1 tsp coriander
Aromatic Herbs and Additions:
- 2 heads garlic
- 3 fresh bay leaves
- 2 dried bay leaves
- 1 bunch fresh thyme
Instructions
- Crush 1 teaspoon each of allspice berries, cloves, black peppercorns, and coriander in a spice grinder until finely ground. Mix the ground spices with 1 cup kosher salt to create a fragrant seasoning blend.
- Carefully slice shallow diagonal cuts across the skin of 8 duck legs, ensuring you don’t pierce the meat. Generously coat each leg with the spice salt mixture, covering every surface thoroughly.
- Transfer the seasoned duck legs to a covered container and refrigerate for 12-16 hours, allowing the salt cure to penetrate and tenderize the meat.
- Heat your oven to 325 degrees. Remove duck legs from the refrigerator and rinse off the salt cure under cold water. Pat each leg completely dry with paper towels.
- Arrange the duck legs in a large roasting pan, nestling 2 heads of halved garlic, several sprigs of fresh thyme, and 3 bay leaves around them for additional flavor.
- Gently warm 6-8 cups of duck fat or olive oil until fully melted. Carefully pour the hot fat over the duck legs, ensuring they are completely submerged.
- Cover the roasting pan first with parchment paper, then with aluminum foil to create a tight seal. Slide the pan into the preheated oven.
- Slow-cook the duck legs for exactly 3 hours, checking the pan every hour to ensure the fat remains at a consistent temperature and the legs are cooking evenly.
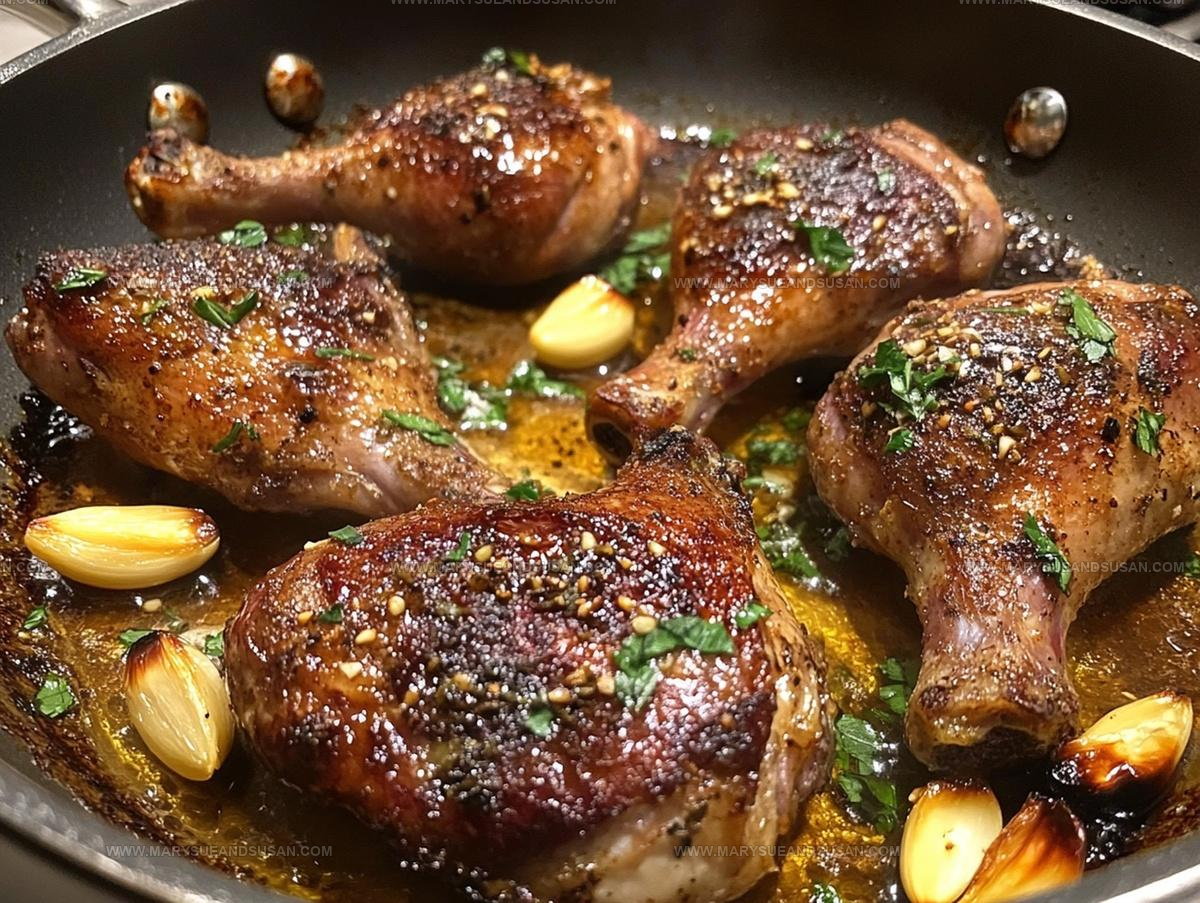
- Remove the foil and parchment during the last 15 minutes of cooking to allow the duck skin to crisp and turn golden brown.
- Once done, remove the pan from the oven and let the duck legs rest at room temperature for 30 minutes before serving, allowing the meat to become tender and the skin to remain crisp.
Notes
- Scoring the duck skin helps render fat and creates an incredibly crispy exterior that melts in your mouth.
- Salt curing overnight concentrates flavor and helps develop a deeper, more complex taste profile for the duck.
- Cooking low and slow in duck fat ensures tender, fall-apart meat that’s packed with rich, savory goodness.
- For a lighter version, substitute olive oil for duck fat, but know the traditional fat provides unbeatable depth of flavor.
- Prep Time: 16 hours
- Cook Time: 3 hours 45 minutes
- Category: Duck
- Method: Roasting
- Cuisine: French
Nutrition
- Serving Size: 4 to 6
- Calories: 430 kcal
- Sugar: 0 g
- Sodium: 800 mg
- Fat: 40 g
- Saturated Fat: 12 g
- Unsaturated Fat: 26 g
- Trans Fat: 0.5 g
- Carbohydrates: 1 g
- Fiber: 0.5 g
- Protein: 25 g
- Cholesterol: 110 mg
Susan Whitaker
Content Specialist & Home Cooking Guide
Expertise
Family-friendly Meals, Simple Healthy Cooking, Ingredient Substitutions, Beginner-friendly Recipes, Flexible Meal Prep
Education
Susan is the steady, practical guide at Mary Sue & Susan, bringing clarity, structure, and a warm sense of encouragement to every recipe she touches. Susan joined the site with a simple goal: help people cook with more confidence and less guesswork.