Crispy Chicken Chimichanga Recipe for Satisfying Mexican Comfort
Chicken chimichangas bring all the excitement of restaurant dining right to any home kitchen table.
Crispy golden outsides give way to savory fillings that satisfy even the heartiest appetites.
Families love how this dish turns weeknight dinners into something special without requiring hours of work.
Friends gather around plates piled high, and conversations flow as easily as the satisfying flavors.
You can count on hearty portions that leave everyone at the table happy and full.
This meal works beautifully for casual gatherings or simple suppers when comfort food sounds just right.
Why Chicken Chimichangas Are Worth Making
Ingredients Overview for Chicken Chimichangas
Main Ingredients:Chicken Chimichangas Frying Tools
How to Make Chicken Chimichangas
Sauté Spices and Aromatics
Heat a skillet over medium heat. Toss in the 1/2 cup diced white onion and let them dance around the pan. Add 2 teaspoons minced garlic and sprinkle in your spices:
Let these flavors mingle and become friends for about 2-3 minutes.
Build the Chicken Mixture
Drop 4 cups of cooked, shredded chicken into the skillet. Season with:
Stir everything together and warm the mixture through for 5 minutes.
Prepare Tortilla Bases
Warm 8 burrito-size flour tortillas so they’re flexible. Spread 2 cups of shredded Monterey Jack cheese nearby.
Create Chimichanga Bundles
Place a generous scoop of chicken mixture in the center of each tortilla. Sprinkle cheese on top. Fold the sides in, then roll tightly to create sealed packets.
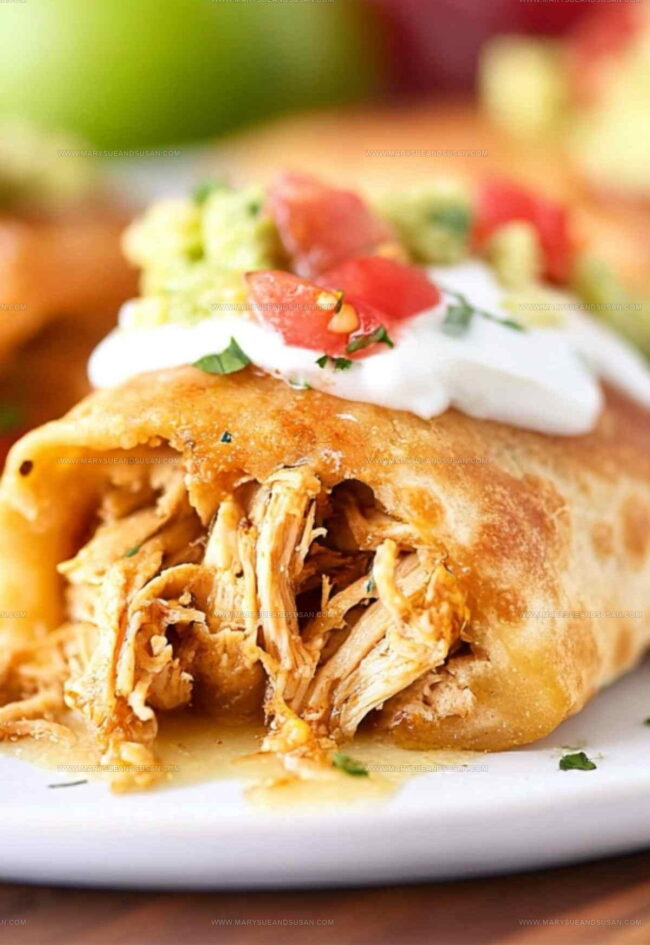
Fry to Golden Perfection
Pour 1 to 2 cups vegetable oil into a deep skillet. Heat to 375°F. Carefully place chimichangas seam-side down. Fry for 2-3 minutes per side until they turn a beautiful golden brown.
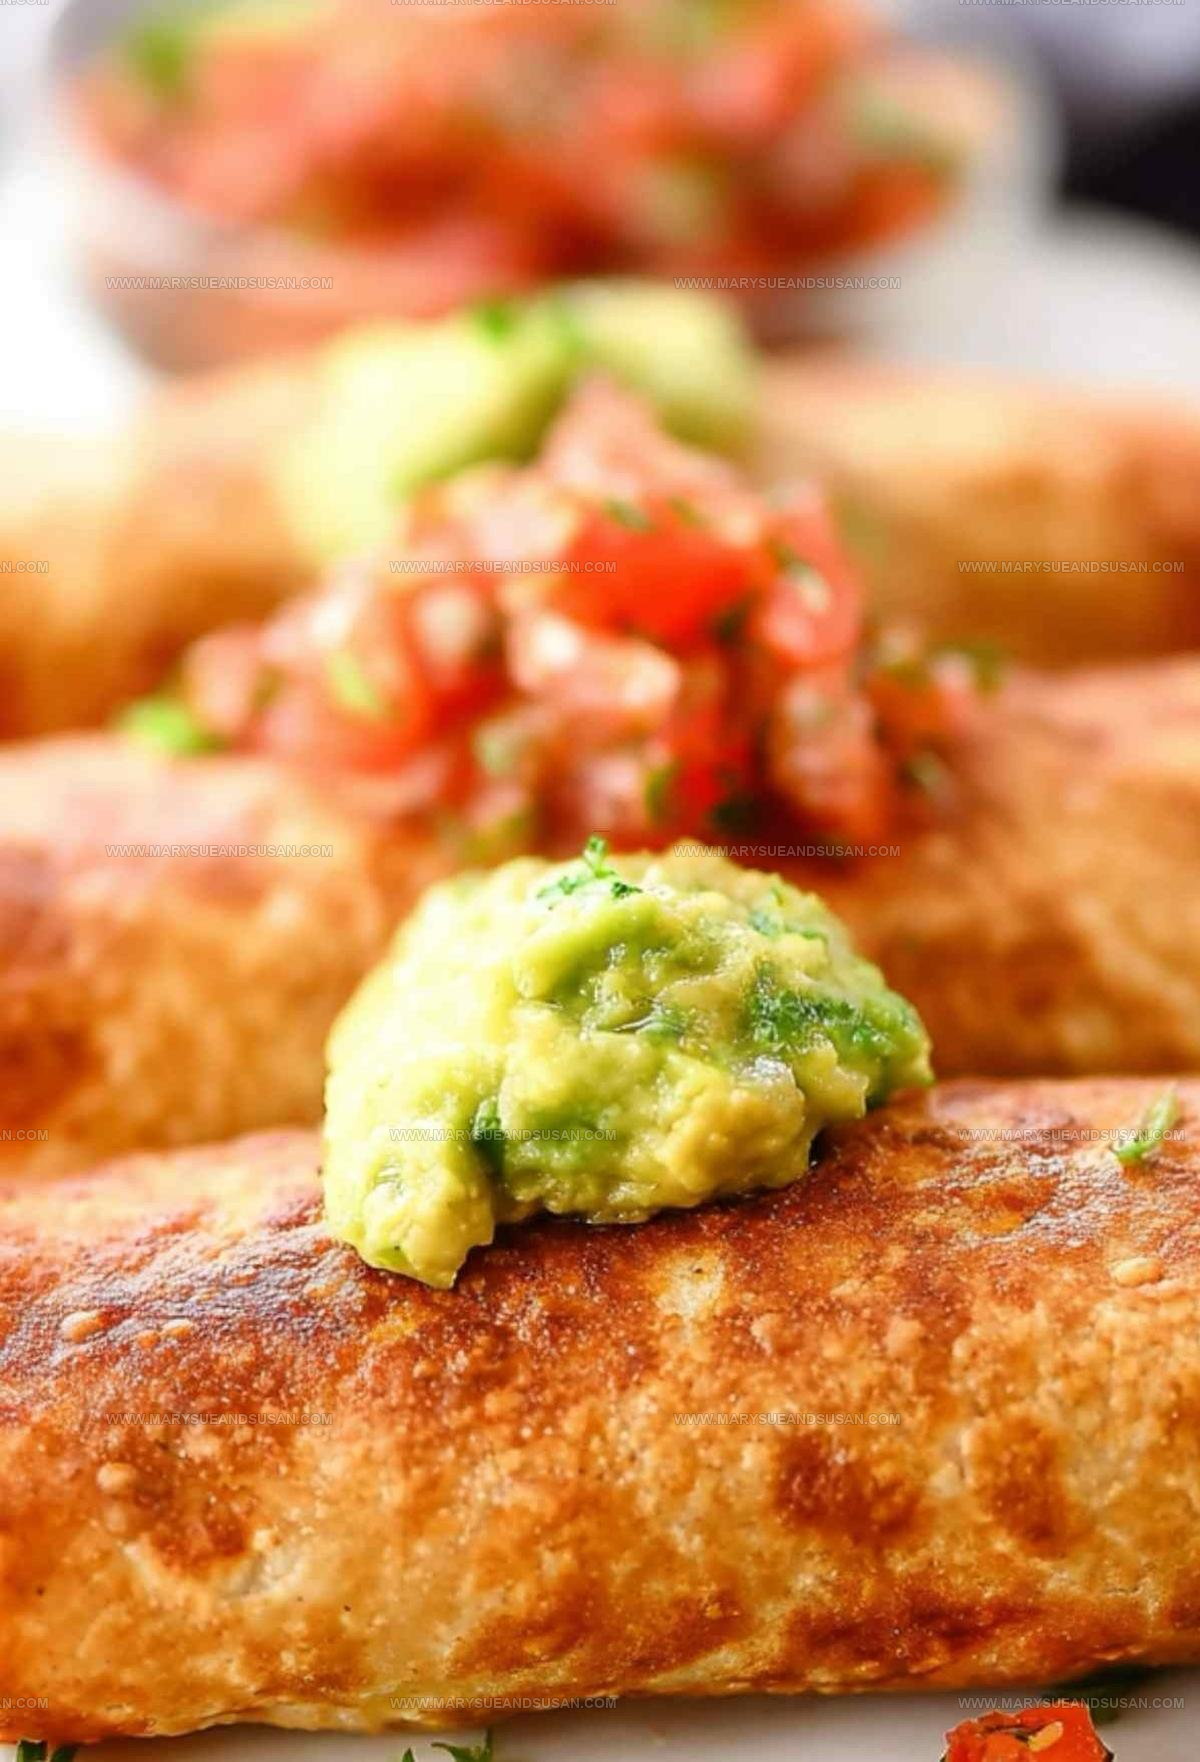
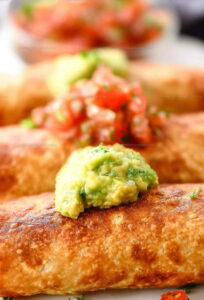
Serve and Decorate
Transfer chimichangas to a paper towel to drain excess oil. Plate and add your favorite toppings like salsa, sour cream, guacamole, pico de gallo, and chopped lettuce.
Helpful Tips for Chicken Chimichangas
What Chicken Chimichanga Variations to Try
Serving Ideas for Chicken Chimichangas
Storage Guidance for Chicken Chimichangas
Chicken Chimichangas FAQ Guide
Can I bake chimichangas instead of frying?
Baking works great! Brush the outside with oil and place on a baking sheet at 400°F for about 25 minutes until crispy and golden.
What type of tortillas are best?
Flour tortillas are perfect because they’re more flexible and create a better seal when rolling your chimichangas.
How do I prevent my chimichangas from unrolling during cooking?
Make sure to tuck in the sides tightly and use a toothpick to secure the seam if needed.
Can I make the chicken filling ahead of time?
Absolutely! Prepare the filling up to 2 days in advance and store in the refrigerator until ready to assemble your chimichangas.
What cheese melts best in chimichangas?
Monterey Jack or cheddar cheese work perfectly, providing great melting consistency and flavor.
How do I keep chimichangas crispy after cooking?
Let them drain on a wire rack or paper towels to prevent soggy bottoms and maintain that delicious crunch.
Crispy Fried Chicken Chimichangas Recipe
- Total Time: 25 minutes
- Yield: 6 to 8 1x
Description
Chicken Chimichangas bring crispy tortilla excitement straight from Mexican kitchens to your dinner table. Packed with seasoned shredded chicken and melted cheese, these golden-brown beauties will become your new favorite weeknight crunch.
Ingredients
Protein:
- 4 cups cooked, shredded chicken
Spices and Seasonings:
- ½ Tablespoon chili powder
- 1 teaspoon salt
- ½ teaspoon ground cumin
- ½ teaspoon pepper
- ¼ teaspoon oregano
Base and Additional Ingredients:
- 2 cups shredded Monterey Jack cheese
- 8 burrito-size flour tortillas
- ½ cup diced white onion
- 2 teaspoons minced garlic
- 1 can (4 ounces) diced green chilies
- 1 to 2 cups vegetable oil
Instructions
- Heat a large skillet over medium-high heat. Sauté ½ cup diced white onion and 2 teaspoons minced garlic for 3-4 minutes until softened and fragrant.
- Sprinkle ½ tablespoon chili powder, ¼ teaspoon oregano, and ½ teaspoon cumin into the skillet. Stir for 30 seconds to toast the spices and release their flavors.
- Add 4 cups shredded chicken, 1 teaspoon salt, ½ teaspoon pepper, and 4 ounces diced green chilies. Mix thoroughly and cook for 5 minutes until everything is heated evenly.
- Warm 8 flour tortillas briefly in the microwave or on a griddle to make them pliable. This prevents cracking when folding.
- Place ¼ cup chicken mixture and ¼ cup shredded Monterey Jack cheese in the center of each tortilla. Fold the sides inward, then roll tightly to create a sealed packet.
- Pour 1 to 2 cups vegetable oil into a deep skillet, heating to 375°F. The oil should be 2 inches deep for even frying.
- Carefully lower each chimichanga into the hot oil. Fry for 2-3 minutes per side until the exterior turns golden brown and crispy.
- Remove chimichangas with tongs, letting excess oil drip back into the pan. Place on a wire rack lined with paper towels to drain.
- Serve immediately with your choice of salsa, sour cream, guacamole, pico de gallo, or shredded lettuce on the side.
Notes
- Use a cast-iron skillet or heavy-bottomed pan for even, crispy frying that gives chimichangas a perfect golden exterior.
- Drain fried chimichangas on paper towels to remove excess oil and keep the texture light and crisp.
- For a healthier version, bake chimichangas at 425°F for 20-25 minutes, brushing with olive oil to help achieve a golden color.
- Experiment with different cheese blends like pepper jack or monterey jack to add extra flavor to your chicken filling.
- Prep Time: 10 minutes
- Cook Time: 15 minutes
- Category: Chicken
- Method: Frying
- Cuisine: Mexican-American
Nutrition
- Serving Size: 6 to 8
- Calories: 540 kcal
- Sugar: 2 g
- Sodium: 720 mg
- Fat: 30 g
- Saturated Fat: 11 g
- Unsaturated Fat: 16 g
- Trans Fat: 0.5 g
- Carbohydrates: 35 g
- Fiber: 3 g
- Protein: 38 g
- Cholesterol: 95 mg
Susan Whitaker
Content Specialist & Home Cooking Guide
Expertise
Family-friendly Meals, Simple Healthy Cooking, Ingredient Substitutions, Beginner-friendly Recipes, Flexible Meal Prep
Education
Susan is the steady, practical guide at Mary Sue & Susan, bringing clarity, structure, and a warm sense of encouragement to every recipe she touches. Susan joined the site with a simple goal: help people cook with more confidence and less guesswork.