Crispy Sweet Orange Chicken Recipe

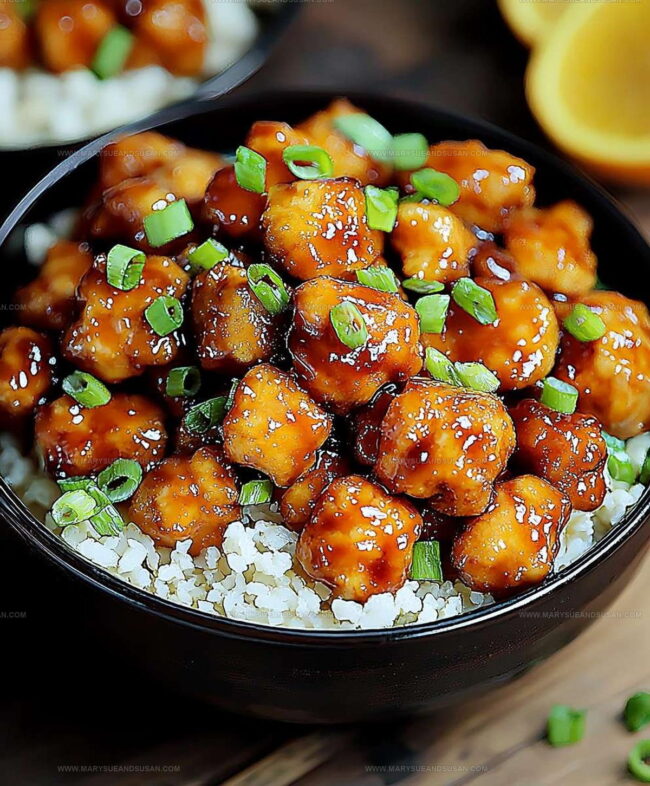
Classic Orange Chicken Recipe With Sweet Citrus Glaze

Few dishes manage to balance sweet and savory quite like orange chicken.

Restaurant menus have featured it for decades, and home cooks continue to recreate it because of how satisfying it tastes after a long day.

The glossy coating clings to every piece, while bright citrus notes cut through the richness.

Weeknight dinners feel special when something familiar yet exciting lands on the table.

Making it at home means controlling exactly what goes into every bite.

The aroma alone has a way of drawing everyone to the kitchen before plates even hit the table.

Once it all comes together, the combination of flavors proves why it remains such a beloved favorite.

Best Reasons to Try Homemade Orange Chicken

  • Quick Family Favorite: Your entire family will devour this classic takeout-style dish without the expensive restaurant bill, and it’s way more satisfying when made fresh at home.
  • Simple Ingredient Magic: With basic pantry staples like orange juice, soy sauce, and chicken, you can create a restaurant-quality meal that feels special without complicated shopping.
  • Crowd-Pleasing Flavor Bomb: The balance of sweet, tangy orange sauce with crispy chicken makes this dish a total winner that will have everyone asking for seconds at the dinner table.
  • Beginner-Friendly Cooking: Even someone new to cooking can nail this recipe with clear steps and basic techniques that build kitchen confidence while delivering delicious results.

What Makes Orange Chicken

Main Protein:
  • Boneless Skinless Chicken Thighs (2 lbs): These juicy chicken pieces create the perfect base for your crispy orange chicken. Cut them into 1-inch pieces for even cooking.
Coating Ingredients:
  • Cornstarch (1 cup): This will help create a super crispy exterior for your chicken.
  • Salt (1/2 teaspoon), Black Pepper (1/4 teaspoon): These seasonings will enhance the chicken’s flavor.
  • Large Egg (1): This helps the cornstarch coating stick to your chicken pieces.
Frying Ingredient:
  • Vegetable Oil (1/4 cup): Essential for getting that golden, crispy chicken texture.
Sauce Components:
  • Orange Juice (1/2 cup): Fresh-squeezed provides the brightest citrus flavor for your sauce.
  • Rice Vinegar (1/4 cup), Soy Sauce (1/4 cup): These add depth and tanginess to your orange sauce.
  • Granulated Sugar (1/4 cup), Honey (2 tablespoons): These sweeten the sauce and help create a glossy finish.
  • Orange Zest (1 tablespoon): Brings an intense orange flavor to your sauce.
Sauce Thickeners and Aromatics:
  • Cornstarch (1 tablespoon), Water (1 tablespoon): Creates a slurry to thicken your sauce perfectly.
  • Ginger (1 teaspoon), Garlic (1 teaspoon): Adds wonderful aromatic flavor to the sauce.
  • Red Pepper Flakes (1/4 teaspoon): Optional ingredient for a spicy kick.
Serving Extras:
  • Cooked White Rice: The perfect base for serving your orange chicken.
  • Sesame Seeds, Green Onions: Optional garnishes to add extra flavor and visual appeal.

Tools That Handle Orange Chicken Cooking

  • Large Skillet or Wok: Your primary cooking vessel for frying chicken to golden perfection. Aim for a heavy-bottomed pan that distributes heat evenly.
  • Large Mixing Bowl: Essential for coating chicken with cornstarch and egg, ensuring each piece gets perfectly seasoned.
  • Wire Rack: Helps drain excess oil from fried chicken, keeping the crispy coating intact.
  • Medium Saucepan: Perfect for creating your tangy orange sauce and letting flavors develop smoothly.
  • Small Bowl: Needed for mixing cornstarch slurry, helping you thicken the sauce precisely.
  • Whisk: Critical for blending sauce ingredients without lumps and creating a silky-smooth consistency.
  • Measuring Cups and Spoons: Ensures accurate ingredient proportions for balanced flavor.
  • Sharp Knife: Helps mince ginger, garlic, and chop green onions with ease.
  • Cutting Board: Provides a clean surface for chopping ingredients safely.

How to Cook Crispy Orange Chicken

How to Cook Crispy Orange Chicken
1

Prep the Chicken Coating

Grab a large bowl and toss in 1 cup cornstarch, 1/2 teaspoon salt, and 1/4 teaspoon black pepper. Cut 2 lbs boneless, skinless chicken thighs into 1-inch pieces. Roll the chicken pieces in the dry mixture until they’re completely covered. Crack 1 large egg and beat it, then pour over the chicken. Mix everything so each piece gets a nice, even coating.

2

Heat the Cooking Oil

Pour 1/4 cup vegetable oil into a large skillet. Set the heat to medium-high and let the oil warm up until it’s shimmering and ready for frying.

3

Fry the Chicken Pieces

Carefully place chicken pieces into the hot oil in a single layer. Don’t crowd the pan – work in batches if needed. Fry for 5-7 minutes, flipping occasionally, until the chicken turns golden brown. Each piece should reach an internal temperature of 165°F. Transfer the cooked chicken to a wire rack with paper towels to drain excess oil.

4

Create the Orange Sauce

Grab a medium saucepan and mix these ingredients:

  • 1/2 cup fresh orange juice
  • 1/4 cup rice vinegar
  • 1/4 cup soy sauce
  • 1/4 cup granulated sugar
  • 2 tablespoons honey
  • 1 tablespoon orange zest

In a separate small bowl, combine 1 tablespoon cornstarch and 1 tablespoon water to make a slurry. Add the slurry to the sauce along with:

  • 1 teaspoon minced ginger
  • 1 teaspoon minced garlic
  • 1/4 teaspoon red pepper flakes (if you want some heat)
5

Simmer the Sauce

Bring the sauce to a gentle simmer over medium heat. Stir constantly for 3-5 minutes until it thickens. Taste and adjust the seasonings if needed.

6

Combine Chicken and Sauce

Drop the fried chicken pieces into the saucepan. Gently toss to make sure every piece gets coated with the tangy orange sauce. Let it cook for another 1-2 minutes to blend the flavors.

7

Serve and Garnish

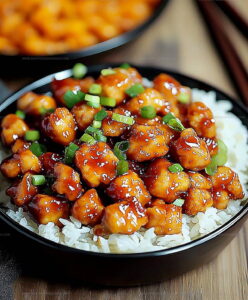
Spoon the saucy chicken over a bed of white rice. Sprinkle some sesame seeds and chopped green onions on top for extra flavor and crunch. Dinner is ready!

Notes That Improve Homemade Orange Chicken

  • Ensure every piece gets a perfect, even layer of cornstarch by shaking the bowl gently instead of stirring, which prevents clumping and helps create a crispy exterior.
  • Test your oil’s readiness by dropping a small piece of bread or chicken – it should sizzle immediately and turn golden within seconds without burning.
  • Watch your cornstarch slurry carefully while stirring; the sauce will transform from watery to glossy and coat-like right before your eyes.
  • Work in batches to avoid overcrowding the pan, which keeps your chicken crispy instead of steaming and ensures each piece gets beautifully golden brown.
  • Let your chicken rest in the orange sauce for an extra minute to help those delicious citrus notes really soak into every crevice of the crispy meat.

Which Orange Chicken Variations Glaze Better

  • Spicy Mandarin Chicken Variation: Swap orange juice for mandarin juice and add extra red pepper flakes to kick up the heat for those who enjoy a fiery flavor profile.
  • Gluten-Free Orange Chicken Variation: Replace regular soy sauce with tamari, use gluten-free cornstarch, and ensure all ingredients are certified gluten-free for your dietary needs.
  • Lighter Baked Orange Chicken Variation: Skip deep frying and instead bake chicken pieces at 400°F for 20-25 minutes, turning halfway through, which reduces oil and creates a crisp exterior without excess grease.
  • Air Fryer Orange Chicken Variation: Cook coated chicken pieces in air fryer at 390°F for 10-12 minutes, shaking basket halfway through, creating a crispy texture with minimal oil usage.

Simple Serving Ideas for Orange Chicken

  • Perfectly Plate the Dish: Scoop fluffy white rice onto your plate, then arrange the crispy orange chicken on top for a restaurant-quality presentation that looks amazing.
  • Boost the Flavor: Sprinkle toasted sesame seeds and fresh green onions over the chicken to add a delightful crunch and bright color that makes the dish pop.
  • Smart Side Pairings: Steamed broccoli or a light cucumber salad will balance the rich, tangy chicken and provide a fresh counterpoint to the meal.
  • Drink Companion: A cold, crisp Asian beer or a slightly sweet Riesling wine will complement the zesty orange sauce beautifully.

How to Store Orange Chicken for Reheating?

  • Store leftover chicken in an airtight container in the refrigerator, where it’ll stay fresh for about 3-4 days. The sauce keeps the meat tender when reheated gently.
  • Separate the chicken from the sauce when storing to prevent soggy breading. Warm them together in a skillet over medium heat when ready to enjoy again.
  • Freeze individual portions in sealed freezer bags for up to 2 months. Thaw overnight in the refrigerator and reheat carefully to maintain the crispy texture.
  • Keep extra orange sauce in a sealed container in the refrigerator for up to a week – it’s perfect for quick weeknight meal upgrades or dipping.

Orange Chicken Reader FAQs

FAQ

Can I use chicken breasts instead of thighs?

Absolutely! Chicken breasts work perfectly. Just cut them into bite-sized pieces and follow the same coating and frying process. Ensure they reach the correct internal temperature for food safety.

FAQ

What if I don’t have fresh orange juice?

Bottled orange juice works great. Fresh provides the best flavor, but store-bought will still create a delicious sauce. Avoid using concentrate as it might taste too sweet.

FAQ

How spicy are the red pepper flakes?

Red pepper flakes add a gentle heat. Start with a small pinch and adjust according to your preference. They’re optional, so feel free to skip them if you prefer a milder sauce.

FAQ

Can I make this dish ahead of time?

Prepare the chicken and sauce separately, then combine just before serving. Refrigerate components separately to maintain the chicken’s crispiness. Reheat gently to prevent soggy texture.

FAQ

Do I need a special type of wok for frying?

Any large skillet or wok works fine. The key is using a pan with high sides to prevent oil splatter and ensure even cooking.

Print
clock clock iconcutlery cutlery iconflag flag iconfolder folder iconinstagram instagram iconpinterest pinterest iconfacebook facebook iconprint print iconsquares squares iconheart heart iconheart solid heart solid icon
Crispy Sweet Orange Chicken Recipe

Crispy Sweet Orange Chicken Recipe


5 Stars 4 Stars 3 Stars 2 Stars 1 Star

4.7 from 37 reviews

  • Total Time: 25-30 minutes
  • Yield: 4 1x

Description

Crispy Orange Chicken delivers a tangy restaurant-style dinner that comes together faster than ordering takeout. Zesty orange sauce coats perfectly golden chicken pieces, making weeknight meals deliciously simple and satisfying.


Ingredients

Scale

Main Ingredients:

  • 2 lbs chicken thighs
  • 1 cup cornstarch

Sauce Ingredients:

  • ½ cup orange juice
  • ¼ cup rice vinegar
  • ¼ cup soy sauce
  • ¼ cup granulated sugar
  • 2 tablespoons honey
  • 1 tablespoon orange zest
  • 1 tablespoon cornstarch
  • 1 teaspoon ginger, minced
  • 1 teaspoon garlic, minced

Seasoning and Cooking Ingredients:

  • ½ teaspoon salt
  • ¼ teaspoon black pepper
  • ¼ teaspoon red pepper flakes
  • 1 large egg
  • ¼ cup vegetable oil
  • 1 tablespoon water
  • Cooked white rice
  • Sesame seeds
  • Green onions

Instructions

  1. Blend 1 cup cornstarch with ½ teaspoon salt and ¼ teaspoon black pepper in a large bowl. Toss 2 pounds chicken pieces in the mixture until each morsel is completely coated.
  2. Drizzle 1 beaten egg over the chicken and gently mix, ensuring every piece gets an even egg wash.
  3. Pour ¼ cup vegetable oil into a large skillet, heating to 375°F. Arrange chicken pieces in a single layer without overcrowding.
  4. Fry chicken for 5-6 minutes, rotating occasionally to achieve a deep golden-brown exterior. Ensure internal temperature reaches 165°F before removing.
  5. Drain fried chicken on a paper towel-lined rack to remove excess oil.
  6. Combine ½ cup orange juice, ¼ cup rice vinegar, ¼ cup soy sauce, ¼ cup sugar, and 2 tablespoons honey in a saucepan over medium heat.
  7. Whisk in 1 tablespoon orange zest, 1 teaspoon minced ginger, 1 teaspoon minced garlic, and ¼ teaspoon red pepper flakes.
  8. Mix 1 tablespoon cornstarch with 1 tablespoon water to create a slurry. Stir into the sauce and simmer for 3-4 minutes until thickened.
  9. Gently fold chicken into the sauce, coating each piece thoroughly. Warm for 1-2 minutes.
  10. Plate over steamed white rice. Sprinkle with sesame seeds and chopped green onions if desired.

Notes

  • Coat chicken pieces thoroughly in cornstarch for an extra crispy exterior that seals in moisture during frying.
  • Use a thermometer to check chicken’s internal temperature, ensuring perfectly cooked meat without drying out.
  • For a gluten-free version, swap regular soy sauce with tamari and use gluten-free cornstarch.
  • Let the sauce simmer slowly to develop rich, deep flavors and achieve the perfect thick consistency without burning.
  • Prep Time: 10 minutes
  • Cook Time: 15-20 minutes
  • Category: Chicken
  • Method: Frying
  • Cuisine: Chinese-American

Nutrition

  • Serving Size: 4
  • Calories: 474 kcal
  • Sugar: 16 g
  • Sodium: 592 mg
  • Fat: 17 g
  • Saturated Fat: 3 g
  • Unsaturated Fat: 13 g
  • Trans Fat: 0 g
  • Carbohydrates: 50 g
  • Fiber: 1 g
  • Protein: 33 g
  • Cholesterol: 93 mg
Susan Whitaker

Susan Whitaker

Content Specialist & Home Cooking Guide

Expertise

Family-friendly Meals, Simple Healthy Cooking, Ingredient Substitutions, Beginner-friendly Recipes, Flexible Meal Prep

Education

Saint Paul College
  • Program: Culinary Arts Diploma
  • Focus: Trained in a hands-on professional kitchen environment with coursework spanning core culinary technique, pastry, butchery, charcuterie, food safety, sanitation, restaurant operations, and the nutritional side of healthy cooking, with real-world practice tied to the college’s student-run restaurant.

Susan is the steady, practical guide at Mary Sue & Susan, bringing clarity, structure, and a warm sense of encouragement to every recipe she touches. Susan joined the site with a simple goal: help people cook with more confidence and less guesswork.

Leave a Reply

Your email address will not be published. Required fields are marked *

Recipe rating 5 Stars 4 Stars 3 Stars 2 Stars 1 Star