Crunchy Chicken Chimichangas Recipe

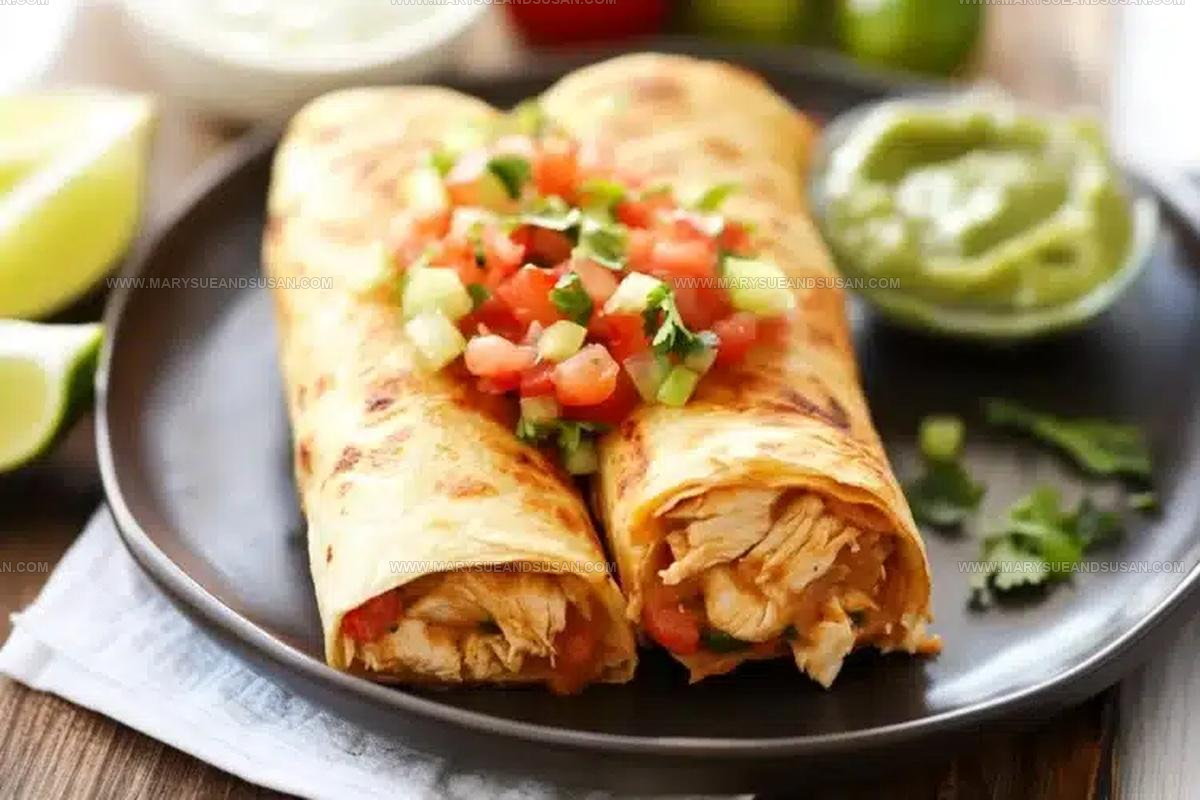
Crispy Chicken Chimichanga Recipe with Golden Crunch

Crunchy chicken chimichangas deliver that satisfying golden exterior everyone craves at their favorite Mexican restaurant, now ready to enjoy right at home.

The contrast between crispy shell and savory filling makes each bite feel like a celebration of bold flavors and textures.

Comfort food reaches new heights when handheld favorites arrive at the dinner table with that unmistakable crunch.

Whether you need a crowd-pleasing meal for game day or a fun weeknight dinner, this dish never disappoints.

The beauty of chimichangas lies in how they turn simple components into something truly special that appeals to all ages.

Each crispy package delivers warmth, flavor, and pure satisfaction that keeps people coming back for seconds.

Roll up your sleeves and start cooking, you won't regret it.

Why You Will Crave These Crispy Chicken Chimichangas Every Week

  • Simple Meal Prep: Transforming leftover chicken into a crowd-pleasing dinner takes minimal effort. Your family will devour these crispy bundles without complicated kitchen gymnastics.
  • No-Fuss Technique: Baking instead of deep-frying makes this recipe healthier and cleaner. Your kitchen stays splatter-free while still delivering that satisfying crunch everyone craves.
  • Versatile Crowd-Pleaser: These chimichangas work perfectly for casual weeknight dinners or weekend gatherings with friends. Folks of all ages will appreciate the cheesy, seasoned chicken wrapped in a crispy tortilla.
  • Customizable Comfort: Swap proteins or add extra veggies to match your household’s taste preferences. Your dinner table becomes a personalized flavor adventure with endless filling possibilities.

Essential Components For These Crispy Chicken Chimichangas

Essential Components For These Crispy Chicken Chimichangas
Main Protein:
  • 2 Cups Cooked and Shredded Chicken: Tender meat forming the hearty core of your chimichanga, bringing robust flavor and protein to the dish.
Spice and Seasoning Blend:
  • 1 Teaspoon Ground Cumin, 1 Teaspoon Chili Powder, 1 Teaspoon Garlic Powder, 1 Teaspoon Onion Powder: Warming spices that transform ordinary chicken into a zesty, aromatic filling.
  • ½ Teaspoon Salt, ½ Teaspoon Black Pepper: Essential seasonings balancing and enhancing the overall taste profile.
Filling Components:
  • 1 (4 Oz) Can Diced Green Chilies: Bright, tangy peppers adding subtle heat and complexity to your chicken mixture.
  • 1 Cup Shredded Cheddar Cheese, 1 Cup Shredded Monterey Jack Cheese: Melty cheeses creating a rich, creamy texture that binds the filling together.
  • 6 Large Flour Tortillas: Soft wrappers that become crispy golden shells encasing your delicious stuffing.
  • 3 Tablespoons Butter, Melted: Golden liquid ensuring a perfect crisp exterior when baked at 400°F.
  • Cooking Spray: Light coating preventing sticking and promoting even browning.

Essential Gear For Crispy Chicken Chimichangas

  • Large Mixing Bowl (4-quart): Perfect for combining your chicken and spices without making a mess on your counter. Your ingredients will mix beautifully in this spacious bowl.
  • Baking Sheet (Half Sheet, 13×18 inches): Essential for creating crispy chimichangas with even browning. Parchment paper or a nonstick mat helps keep cleanup super simple.
  • Sharp Chef’s Knife (8-inch): Helps dice green chilies and shred chicken with precision. A sharp blade makes prep work smooth and quick.
  • Measuring Cups (1-cup): Ensures accurate portioning of chicken mixture for consistent chimichangas every time.
  • Pastry Brush: Great for evenly spreading melted butter across your tortillas, creating that gorgeous golden-brown exterior.
  • Cutting Board: Provides a clean surface for chopping ingredients and assembling your chimichangas.
  • Cheese Grater: Ideal for freshly grating cheddar and Monterey Jack cheese for maximum flavor and melting potential.
  • Tongs: Helpful for flipping chimichangas halfway through baking and transferring them to serving plates.

Fill, Fold, and Crisp Steps for Chicken Chimichangas

Fill, Fold, and Crisp Steps for Chicken Chimichangas
1

Prepare the Oven

Preheat your oven to 400°F (204°C). A hot oven ensures your chimichangas will turn out crispy and golden.

2

Mix Chicken Filling

Grab a large mixing bowl and combine the following ingredients:

  • 2 cups cooked and shredded chicken
  • 1 teaspoon ground cumin
  • 1 teaspoon chili powder
  • 1 teaspoon garlic powder
  • 1 teaspoon onion powder
  • ½ teaspoon salt
  • ½ teaspoon black pepper
  • 1 (4 oz) can diced green chilies
  • 1 cup shredded cheddar cheese
  • 1 cup shredded Monterey Jack cheese

Stir everything together until the seasonings are evenly distributed throughout the chicken.

3

Wrap the Chimichangas

Lay out a large flour tortilla on your work surface. Spoon exactly ⅓ cup of the chicken mixture into the center of the tortilla. Carefully fold in the sides, then roll the tortilla tightly, making sure the filling stays tucked inside. Repeat this process with the remaining 5 tortillas.

4

Prepare for Baking

Place the rolled chimichangas seam-side down on a baking sheet lined with parchment paper. Brush each chimichanga with 3 tablespoons of melted butter, coating the entire surface to help them brown nicely.

5

Bake to Crispy Perfection

Slide the baking sheet into the preheated oven. Bake for 20-25 minutes, flipping the chimichangas halfway through to ensure even browning. Watch for a golden, crisp exterior.

6

Serve and Garnish

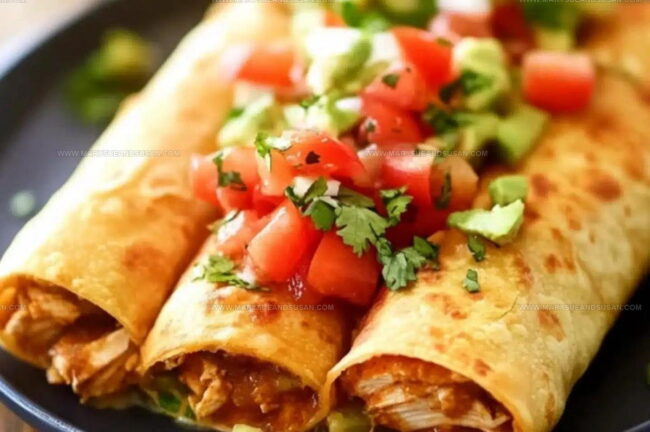
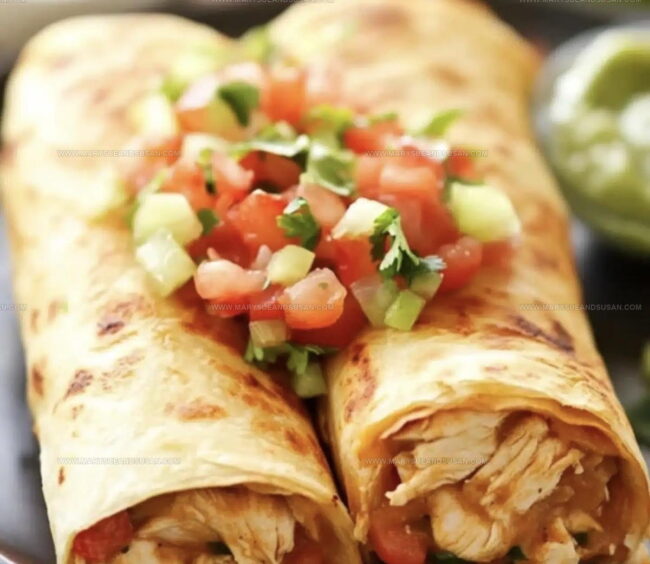
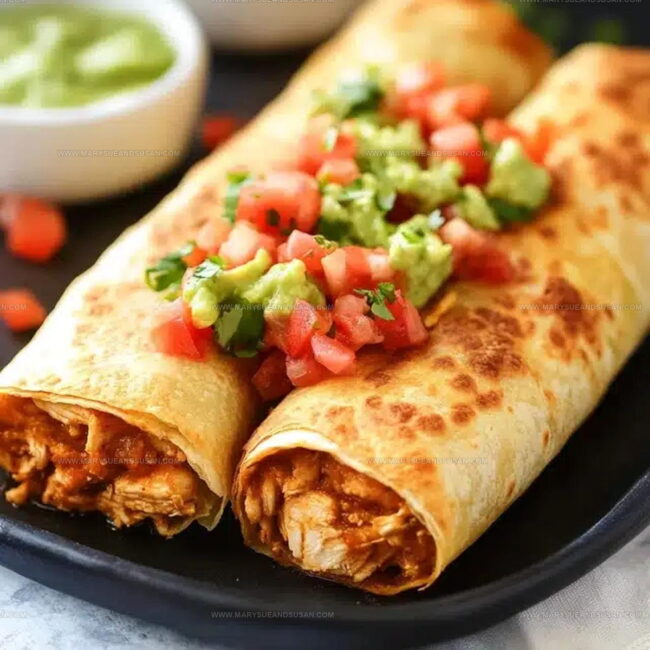
Remove the chimichangas from the oven and let them rest for a few minutes. Serve with your favorite toppings like sour cream, fresh salsa, or chopped cilantro. Enjoy your crispy, cheesy creation straight from the oven!

Tips For Crunchy Shells And Moist Filling

Tips For Crunchy Shells And Moist Filling
  • Choose tender, juicy chicken that shreds easily. Rotisserie chicken works perfectly and saves you tons of time in the kitchen.
  • Warm your tortillas briefly before filling to prevent cracking. Microwave them for 10-15 seconds wrapped in a damp paper towel.
  • Press the tortilla edges firmly when folding to keep the filling inside. A tight seal means zero leaks during baking.
  • Use a pastry brush to coat every inch of the chimichanga surface. This creates that gorgeous golden-brown crispiness we all crave.
  • Let the chimichangas rest for 2-3 minutes after baking. This helps them firm up and prevents burning your mouth when diving in.

Creative Chimichanga Variations For Flavor Hunters

  • Vegetarian Swap: Replace chicken with black beans, roasted sweet potatoes, or crumbled tofu for a hearty plant-based version that keeps your protein levels up.
  • Gluten-Free Option: Use corn tortillas instead of flour tortillas to make the chimichangas completely gluten-free and safe for sensitive diets.
  • Spicy Kick Variation: Add diced jalapeños or a dash of hot sauce to the filling for extra heat that’ll make your taste buds dance.
  • Low-Carb Alternative: Wrap the filling in large lettuce leaves instead of tortillas for a lighter, carb-conscious meal that still delivers big flavor.

Serving Chicken Chimichangas With Salsa Rice Or Beans

  • Serve with Fresh Salsa: Chop some tomatoes, onions, and cilantro to make a quick pico de gallo that’ll brighten up your crispy chimichangas and add a zesty kick to your plate.
  • Pair with Mexican Rice: Whip up some simple Mexican rice as a side dish that complements the rich, cheesy chicken filling and soaks up all those delicious flavors.
  • Create a Cool Dipping Station: Set out small bowls of sour cream, guacamole, and salsa verde so everyone can customize their chimichanga with their favorite toppings.
  • Balance with a Light Salad: Toss together a quick green salad with lime vinaigrette to cut through the richness of the crispy, cheesy chimichangas and add some freshness to your meal.

Keeping Chimichangas Crispy For Later

Keeping Chimichangas Crispy For Later
  • Refrigerate leftover chimichangas in an airtight container where they’ll stay fresh for 3-4 days. Wrap each one separately to maintain their crispy texture.
  • Reheat in the oven at 350°F for about 10-15 minutes to restore that delightful crunch. Placing them on a wire rack helps prevent soggy bottoms and keeps the exterior crisp.
  • Use your air fryer at 350°F for 3-5 minutes. This method brings back the original golden crispiness without drying out the filling.
  • Freeze your extra chimichangas by wrapping each tightly in plastic wrap, then placing them in a freezer bag. They’ll keep well for up to 2 months, ready for a quick meal whenever hunger strikes.

Chimichanga Questions Everyone Wants Answered

FAQ

What makes chimichangas different from regular burritos?

Chimichangas are deep-fried or baked until crispy, creating a crunchy exterior that sets them apart from soft, traditional burritos. The cooking method transforms the tortilla into a golden, crisp shell.

FAQ

Can vegetarians enjoy this recipe?

Absolutely! Replace chicken with black beans, roasted vegetables, or tofu for a delicious vegetarian version that maintains the same crispy texture and bold flavors.

FAQ

How do chimichangas stay sealed during baking?

Rolling them tightly and placing them seam-side down prevents the filling from leaking. Brushing the tortillas with butter helps seal the edges and create a crisp exterior.

FAQ

Are these chimichangas spicy?

The recipe offers a mild heat level. Adjust the chili powder and green chilies to control the spiciness according to your preference. Adding hot sauce afterward lets everyone customize their heat.

FAQ

What cheese works best for this recipe?

Cheddar and Monterey Jack create a perfect melty blend. Sharp cheddar adds tang, while Monterey Jack provides a smooth, creamy texture that complements the chicken filling.

Print
clock clock iconcutlery cutlery iconflag flag iconfolder folder iconinstagram instagram iconpinterest pinterest iconfacebook facebook iconprint print iconsquares squares iconheart heart iconheart solid heart solid icon
Crunchy Chicken Chimichangas Recipe

Crunchy Chicken Chimichangas Recipe


5 Stars 4 Stars 3 Stars 2 Stars 1 Star

4.9 from 20 reviews

  • Total Time: 35-40 minutes
  • Yield: 6 1x

Description

Crispy Chicken Chimichangas bring sizzling Mexican-inspired flavors straight from your kitchen to the dinner table. Golden tortillas packed with seasoned chicken and melted cheese create a crunchy meal perfect for family gatherings or weekend comfort dining.


Ingredients

Scale

Proteins:

  • 2 cups cooked and shredded chicken
  • 1 cup shredded cheddar cheese
  • 1 cup shredded Monterey Jack cheese

Spices and Seasonings:

  • 1 teaspoon ground cumin
  • 1 teaspoon chili powder
  • 1 teaspoon garlic powder
  • 1 teaspoon onion powder
  • ½ teaspoon salt
  • ½ teaspoon black pepper

Supporting Ingredients:

  • 1 (4 ounces / 113 grams) can diced green chilies
  • 6 large flour tortillas
  • 3 tablespoons butter, melted
  • Cooking spray

Instructions

  1. Mix 2 cups shredded chicken with 1 teaspoon each cumin, chili powder, garlic powder, onion powder, plus ½ teaspoon salt and pepper. Combine thoroughly in a medium bowl.
  2. Fold in 4 ounces diced green chilies and 2 cups total mixed cheese (combining cheddar and Monterey Jack). Stir until ingredients distribute evenly.
  3. Warm 6 large flour tortillas at room temperature for easier folding. Spread ⅓ cup chicken mixture precisely in the center of each tortilla.
  4. Carefully fold tortilla sides inward, then roll tightly into compact bundles. Position each chimichanga seam-side facing downward on a parchment-lined baking sheet.
  5. Brush each chimichanga with 1 tablespoon melted butter. Coat surfaces completely to ensure golden exterior.
  6. Preheat oven to 400°F (204°C). Position rack in center position for consistent heating.
  7. Bake chimichangas for 22 minutes, turning halfway through cooking time. Watch for deep golden-brown exterior and crispy edges.
  8. Remove from oven and let rest 3-4 minutes before serving. Crispy exterior will remain intact during brief cooling period.

Notes

  • Drain the chicken thoroughly after boiling to ensure a crisp exterior when frying.
  • Use room temperature tortillas to prevent cracking when rolling the chimichangas.
  • Seal the edges of the tortillas with a bit of water or beaten egg to prevent them from opening during frying.
  • For a healthier version, bake the chimichangas at 400°F for 20-25 minutes instead of deep-frying, brushing with a little oil to help them crisp up.
  • Prep Time: 15 minutes
  • Cook Time: 20-25 minutes
  • Category: Chicken
  • Method: Baking
  • Cuisine: Mexican

Nutrition

  • Serving Size: 6
  • Calories: 475 kcal
  • Sugar: 1 g
  • Sodium: 680 mg
  • Fat: 27 g
  • Saturated Fat: 14 g
  • Unsaturated Fat: 12 g
  • Trans Fat: 0.5 g
  • Carbohydrates: 29 g
  • Fiber: 2 g
  • Protein: 28 g
  • Cholesterol: 85 mg
Susan Whitaker

Susan Whitaker

Content Specialist & Home Cooking Guide

Expertise

Family-friendly Meals, Simple Healthy Cooking, Ingredient Substitutions, Beginner-friendly Recipes, Flexible Meal Prep

Education

Saint Paul College
  • Program: Culinary Arts Diploma
  • Focus: Trained in a hands-on professional kitchen environment with coursework spanning core culinary technique, pastry, butchery, charcuterie, food safety, sanitation, restaurant operations, and the nutritional side of healthy cooking, with real-world practice tied to the college’s student-run restaurant.

Susan is the steady, practical guide at Mary Sue & Susan, bringing clarity, structure, and a warm sense of encouragement to every recipe she touches. Susan joined the site with a simple goal: help people cook with more confidence and less guesswork.

Leave a Reply

Your email address will not be published. Required fields are marked *

Recipe rating 5 Stars 4 Stars 3 Stars 2 Stars 1 Star