
Rolled Mexican Chicken Pinwheels Recipe for Gatherings
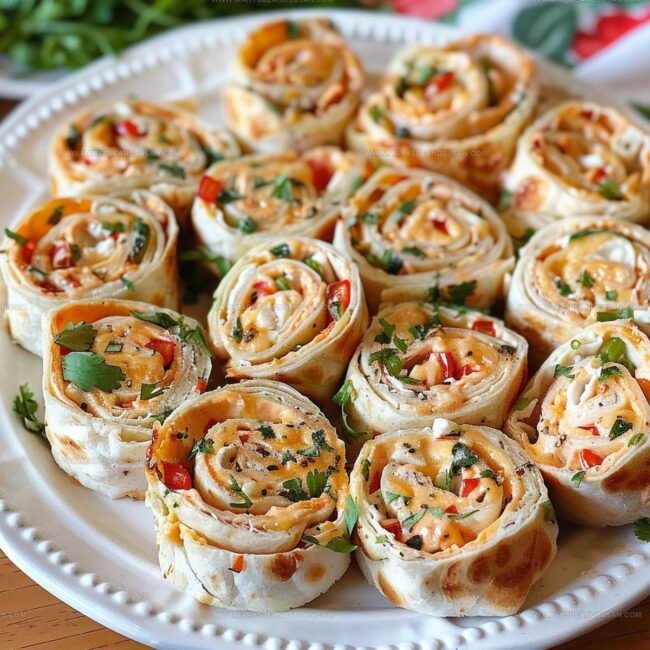
Easy Mexican chicken pinwheels have become a go-to appetizer for parties, game days, and casual gatherings because they pack bold flavors into every bite-sized spiral.
Creamy, savory, and fun to eat, pinwheels disappear fast from any platter.
They work beautifully for potlucks, lunch boxes, or afternoon snacks when you need something satisfying without spending hours in the kitchen.
The rolled presentation makes them visually appealing and simple to serve, requiring no plates or utensils.
Kids love the handheld format while adults appreciate the satisfying combination of textures and tastes.
Making them ahead saves valuable time since they chill in the fridge until you need them.
When you want an appetizer that looks impressive but comes together quickly, pinwheels deliver crowd-pleasing results every time.
What Makes Easy Mexican Chicken Pinwheels A Go To
Core Ingredients for Mexican Chicken Pinwheels
Main Proteins:Creamy Base Ingredients:Supporting Flavor Ingredients:Common Prep Tools for Mexican Chicken Pinwheels
Preparing Mexican Chicken Pinwheels Step by Step
Prepare the Filling
Grab a big mixing bowl and toss in the shredded chicken, Mexican cheese blend, softened cream cheese, sour cream, and other tasty ingredients. Mix everything together until it’s completely blended and looks super creamy.
Spread the Mixture
Lay out your tortillas on a clean counter and spread about 1/4 cup of the chicken mixture across each one. Leave a small border around the edges so nothing squeezes out when rolling.
Roll and Chill
Roll each tortilla tightly into a neat log. Wrap each one separately in plastic wrap and pop them in the refrigerator for 30 minutes. This helps them firm up and makes slicing easier.
Slice the Pinwheels
Take a sharp knife and slice each rolled tortilla into 1-inch thick rounds. Make sure your knife is clean and sharp for nice, clean cuts.
Serve and Enjoy
Arrange the pinwheel slices on a serving platter. Sprinkle some extra chopped cilantro on top if you want. Grab some salsa or guacamole for dipping and get ready to enjoy a seriously tasty snack.
Things Worth Knowing For Easy Mexican Chicken Pinwheels
Flavorful Options for Mexican Chicken Pinwheels
How To Serve Mexican Chicken Pinwheels
Proper Storage For Easy Mexican Chicken Pinwheels
Easy Mexican Chicken Pinwheels Common Questions
Can I use rotisserie chicken for this recipe?
Absolutely! Rotisserie chicken works perfectly and saves you time shredding chicken from scratch.
What if I don’t have fresh cilantro?
No problem. Dried cilantro or even parsley can substitute, though fresh herbs give the best flavor.
Are these pinwheels good for meal prep?
Definitely! These can be made ahead and stored in the refrigerator for 2-3 days, making them great for quick snacks or parties.
Can I freeze these pinwheels?
Yes, wrap them tightly in plastic wrap and store in a freezer bag. They’ll keep well for about a month.
Do these need to be served warm?
Not at all. These pinwheels are delicious served cold or at room temperature, which makes them perfect for potlucks and gatherings.
How many pinwheels does this recipe make?
Typically, one batch yields around 24-30 pinwheel slices, depending on how tightly you roll the tortillas.

Easy Mexican Chicken Pinwheels Recipe
- Total Time: 45 minutes (including 30 minutes refrigeration)
- Yield: 8 1x
Description
Mexican chicken pinwheels deliver a zesty party appetizer that brings smiles around any gathering. Packed with creamy cheese, tender chicken, and bold flavors, these little rolls disappear faster than you can slice them.
Ingredients
Protein:
- 2 Tyson Frozen Grilled & Ready Chicken Breasts
Cheese and Dairy:
- 2 cups shredded Mexican cheese blend
- 12 ounces cream cheese
- ½ cup sour cream
Supporting Ingredients:
- 8 taco-sized flour tortillas
- 10 ounces can diced tomatoes with green chiles
- 1 teaspoon minced garlic
- 1 cup chopped cilantro
- Salsa
- Guacamole
Instructions
- Combine 2 shredded Tyson Frozen Grilled & Ready Chicken Breasts, 2 cups Mexican cheese blend, 12 oz softened cream cheese, ½ cup sour cream, 10 oz drained diced tomatoes with green chiles, 1 tsp minced garlic, and 1 cup chopped cilantro in a large mixing bowl until your ingredients create a smooth, consistent filling.
- Spread exactly ¼ cup of the chicken mixture across each of your 8 taco-sized flour tortillas, carefully leaving a 1-inch border around every tortilla’s edge to prevent overflow.
- Roll each tortilla tightly and smoothly, ensuring the filling stays compact inside the wrap without squeezing out the sides.
- Individually wrap each rolled tortilla in plastic wrap, then refrigerate for a minimum of 30 minutes or up to 12 hours to help them firm up and hold their shape.
- Remove chilled tortilla rolls from refrigerator and slice each one into 1-inch thick pinwheel sections using a sharp kitchen knife with a clean, steady motion.
- Arrange pinwheel slices attractively on a serving platter, optionally garnishing with additional fresh chopped cilantro for color and flavor.
- Serve immediately with salsa, guacamole, or your favorite dipping sauce alongside the pinwheels for added enjoyment.
Notes
- Chill the rolled tortillas thoroughly to help them hold their shape and make slicing easier.
- For a low-carb version, swap flour tortillas with large lettuce leaves or low-carb tortilla alternatives.
- Drain tomatoes completely to prevent excess moisture from making the filling soggy.
- Experiment with different cheese blends like pepper jack or sharp cheddar for added flavor complexity.
- Prep Time: 15 minutes
- Cook Time: 0 minutes
- Category: Chicken
- Method: Refrigerating
- Cuisine: Mexican
Nutrition
- Serving Size: 8
- Calories: 340 kcal
- Sugar: 3 g
- Sodium: 620 mg
- Fat: 24 g
- Saturated Fat: 12 g
- Unsaturated Fat: 10 g
- Trans Fat: 0.5 g
- Carbohydrates: 17 g
- Fiber: 2 g
- Protein: 23 g
- Cholesterol: 65 mg
Mary Sue
Founder & Creative Recipe Developer
Expertise
Comfort Food Twists, Seasonal Cooking, Creative Flavor Pairings, Easy Weeknight Dinners, Flexible Pantry Cooking
Education
Mary Sue is the playful, creative recipe mind behind Mary Sue & Susan, known for big flavor ideas, warm storytelling, and dishes that feel both comforting and a little unexpected. She has a talent for taking familiar meals and giving them just enough personality to make them memorable.