
Sweet And Sour Chicken Recipe With Crispy Bite
Easy sweet and sour chicken recipe fans know that sometimes the best meals come together without any fuss in the kitchen.
The combination of contrasting flavors creates something truly satisfying that appeals to practically everyone at the table.
Busy weeknights call for recipes that deliver big on taste while keeping preparation simple and straightforward.
This dish hits all the right notes with its balanced profile that never feels too heavy or complicated.
Restaurant favorites can absolutely be recreated at home with minimal effort and common pantry staples.
Make tonight memorable with a homemade version that proves delicious food doesn't have to mean hours in the kitchen.
Why You’ll Love Sweet and Sour Chicken
Ingredients Used in Sweet and Sour Chicken
Protein Base:Coating Ingredients:Cooking Fat:Sauce Components:Aromatics and Seasonings:Fresh Additions:Essential Tools for Sweet and Sour Chicken
Easy Sweet and Sour Chicken Cooking Steps
Prep the Chicken
Grab those chicken breasts and slice them into neat 1-inch cubes. Keep the pieces uniform so they cook evenly and look great on your plate.
Set Up Coating Station
Crack two eggs into a medium bowl and whisk them until they’re smooth and well blended. In another shallow dish, spread out your cornstarch – this is where the crispy magic happens.
Coat the Chicken
Dunk each chicken cube first into the egg mixture, then roll it around in the cornstarch. Make sure each piece gets a light, even coating that’ll turn golden and crisp when cooking.
Fry the Chicken
Heat 1/4 cup vegetable oil in a large skillet over medium-high heat (375°F). When the oil is shimmering, carefully place your coated chicken pieces in. Cook for 3-4 minutes per side until they’re beautifully golden brown.
Drain the Chicken
Transfer the fried chicken to a plate lined with paper towels. This helps soak up any extra oil and keeps your chicken crisp.
Create the Sauce
Whip up the sauce with these ingredients:
Whisk everything together in a bowl until well combined.
Prepare Vegetables
Dice 1 red bell pepper into small, uniform pieces. Slice 2 green onions into thin rings.
Combine Sauce and Ingredients
Pour the sauce into the same skillet and heat over medium heat. Stir constantly for 2-3 minutes until it starts to thicken.
Final Cooking
Toss in the fried chicken, diced bell pepper, and 1 cup pineapple chunks. Gently mix everything so it’s coated in the sauce. Cook for an additional 2-3 minutes.
Serve and Garnish
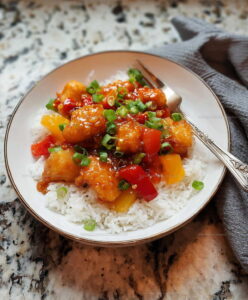
Sprinkle those green onion rings on top and serve your sweet and sour chicken piping hot over a bed of rice. Dinner is served!
What Pro Tips Balance Sweet and Sour Chicken
Sweet and Sour Chicken with Sauce Balance Variations
How Should Sweet and Sour Chicken Be Served
Best Storage Method For Sweet and Sour Chicken
Sweet and Sour Chicken Questions and Answers
What type of chicken works best for this recipe?
Boneless, skinless chicken breasts are perfect because they cook evenly and absorb the sweet and sour sauce beautifully.
Can frozen chicken be used?
Thaw chicken completely and pat dry before coating to ensure crispy, golden edges when frying.
How do I prevent the cornstarch coating from falling off?
Ensure chicken is dry before dipping, shake off excess egg and cornstarch, and let coated pieces rest for a few minutes before frying.
Is it possible to make this dish less greasy?
Use a wire rack after frying to drain excess oil, and avoid overcrowding the skillet during cooking.
What if I don’t have apple cider vinegar?
White vinegar makes an excellent substitute with nearly identical tangy results.
Can this recipe be made gluten-free?
Replace soy sauce with tamari or coconut aminos to create a gluten-free version that tastes just as delicious.
Easy Sweet And Sour Chicken Recipe
- Total Time: 27 minutes
- Yield: 4 1x
Description
Whipping up sweet and sour chicken will make your dinner table dance with flavor, bringing Chinese-American classic takeout right to your kitchen without the delivery wait. Crispy chicken pieces coated in tangy sauce guarantee a crowd-pleasing meal that’s ready faster than you can dial for takeout.
Ingredients
Proteins:
- 1.5 lbs boneless skinless chicken breasts
- 2 eggs
Sauce and Seasoning:
- ½ cup white sugar
- ¼ cup ketchup
- ¼ cup apple cider vinegar
- ¼ cup soy sauce
- 1 clove garlic
- ½ teaspoon salt
- ¼ teaspoon black pepper
Coating and Produce:
- ½ cup cornstarch
- ¼ cup vegetable oil
- 2 green onions
- 1 red bell pepper
- 1 cup pineapple chunks
Instructions
- Slice 1.5 lbs of chicken breasts into precise 1-inch cubes, maintaining uniform size for balanced cooking.
- Crack 2 eggs into a medium bowl and whisk thoroughly until completely blended.
- Pour ½ cup cornstarch into a separate shallow dish for coating your chicken pieces.
- Dunk each chicken cube first into the whisked eggs, then roll generously in cornstarch to create a crisp exterior.
- Pour ¼ cup vegetable oil into a large skillet and heat over medium-high heat until oil shimmers and feels hot.
- Gently place coated chicken cubes into the sizzling oil, cooking 3-4 minutes per side until achieving a rich golden-brown color.
- Transfer chicken to paper towel-lined plate, allowing excess oil to drain completely.
- Combine ½ cup sugar, ¼ cup ketchup, ¼ cup apple cider vinegar, ¼ cup soy sauce, 1 minced garlic clove, ½ tsp salt, and ¼ tsp black pepper in a mixing bowl.
- Dice 1 red bell pepper into small, consistent pieces.
- Slice 2 green onions into delicate thin rings.
- Pour sauce mixture into the same skillet, heating over medium temperature.
- Stir sauce continuously for 2-3 minutes until it visibly thickens.
- Add chicken, bell pepper, and 1 cup pineapple chunks to the skillet.
- Gently toss ingredients to ensure complete sauce coverage, cooking an additional 2-3 minutes.
- Sprinkle chopped green onions across the top and serve immediately over steamed rice.
Notes
- Keep chicken pieces uniform in size to guarantee even cooking and a consistent golden-brown exterior.
- Pat chicken dry before coating to help cornstarch adhere better and create a crispier texture.
- For a gluten-free version, replace soy sauce with tamari and use cornstarch as your coating agent.
- Drain fried chicken on a wire rack instead of paper towels to maintain maximum crispiness and prevent soggy bottoms.
- Prep Time: 15 minutes
- Cook Time: 12 minutes
- Category: Chicken
- Method: Frying
- Cuisine: Chinese
Nutrition
- Serving Size: 4
- Calories: 405 kcal
- Sugar: 22 g
- Sodium: 870 mg
- Fat: 18 g
- Saturated Fat: 3 g
- Unsaturated Fat: 13 g
- Trans Fat: 0 g
- Carbohydrates: 27 g
- Fiber: 2 g
- Protein: 35 g
- Cholesterol: 110 mg
Susan Whitaker
Content Specialist & Home Cooking Guide
Expertise
Family-friendly Meals, Simple Healthy Cooking, Ingredient Substitutions, Beginner-friendly Recipes, Flexible Meal Prep
Education
Susan is the steady, practical guide at Mary Sue & Susan, bringing clarity, structure, and a warm sense of encouragement to every recipe she touches. Susan joined the site with a simple goal: help people cook with more confidence and less guesswork.