
Recipe for Golden Honey Glazed Chicken with a Crunchy Coating
Crispy honey chicken recipe delivers that perfect balance of crunchy texture and sweet glaze that makes dinner feel special any night of the week.
It's become a go-go favorite for busy weeknights when something satisfying and comforting is needed without spending hours in the kitchen.
The combination works beautifully because it appeals to nearly everyone at the table, from picky eaters to adventurous food fans.
When golden, crunchy bites meet a glossy coating, the result is pure satisfaction that rivals what you'd find at your favorite takeout spot.
This dish fits seamlessly into casual family meals or when company comes over and you want something impressive yet approachable.
The flavors hit all the right notes without being overly complicated or requiring hard-to-find items.
Making this at home means you control everything while enjoying that restaurant-style experience everyone craves.
Why Is Crispy Honey Chicken a Top Takeout-Style Dish?
Ingredient Breakdown for Crispy Honey Chicken
Chicken Base:Coating Dry Ingredients:Sauce Ingredients:Garnish:Tools Used for Crispy Honey Chicken
Step-by-Step Cooking Guide for Crispy Honey Chicken
Chicken Coating Prep
Grab a big mixing bowl and toss in the dry ingredients for coating your chicken. Measure out 1 cup cornstarch, 1/2 cup all-purpose flour, 1 teaspoon salt, 1/2 teaspoon black pepper, 1/2 teaspoon garlic powder, and 1/2 teaspoon onion powder. Whisk everything together until it’s well combined.
Egg Wash Setup
In another bowl, crack 1 large egg and add 1/4 cup water. Whisk until smooth and ready for dipping.
Chicken Coating Process
Take each piece of chicken and give it a quick dunk in the egg mixture, letting any extra drip off. Then roll it through the dry ingredient mixture, pressing gently to make sure it gets a nice even coating. Shake off any excess and set aside on a clean plate.
Oil Preparation
Pour vegetable oil into a heavy pot, filling it about 2-3 inches deep. Heat the oil to exactly 350°F using a cooking thermometer to check the temperature.
First Batch Frying
Carefully lower chicken pieces into the hot oil, making sure not to crowd the pot. Fry for 5-7 minutes until they turn a beautiful golden brown. Check that the internal temperature hits 165°F with a meat thermometer.
Draining Fried Chicken
Use a slotted spoon to remove chicken pieces and place them on a wire rack with paper towels underneath. This helps drain extra oil and keeps the coating crisp.
Honey Sauce Base
In a saucepan, combine the sauce ingredients:
Finishing Sauce
Add to the pan:
Simmer the sauce on medium heat, stirring constantly for 3-5 minutes until it thickens.
Coating Chicken
Pour the warm sauce over the fried chicken, tossing gently to make sure every piece gets a delicious honey glaze.
Serving
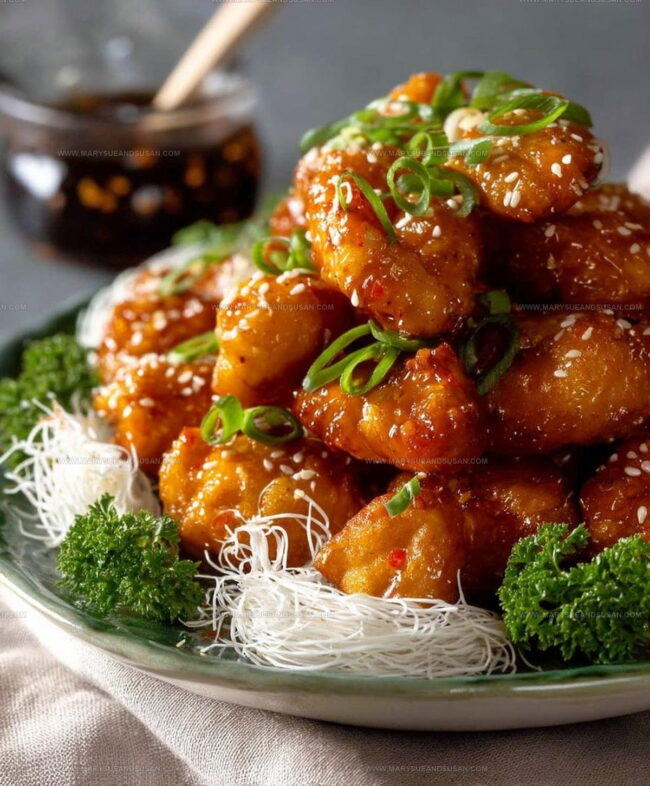
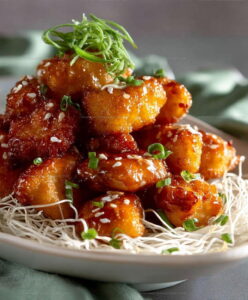
Transfer the saucy chicken to a serving platter. Sprinkle with sesame seeds and chopped green onions. Serve right away with steamed rice or noodles for a complete meal.
Which Tips Keep Crispy Honey Chicken Crunchy
Crispy Honey Chicken Variations to Try
Crispy Serving Suggestions for Honey Chicken
Best Storage Advice for Crispy Honey Chicken
Crispy Honey Chicken FAQs
What makes the coating so crispy?
Dredging chicken in cornstarch and flour creates an extra-crunchy exterior that stays crisp even after adding sauce. The key is thoroughly coating each piece and shaking off excess.
Can I use chicken breasts instead of thighs?
Absolutely. Chicken breasts work perfectly. Just ensure they are cut into similar-sized pieces for even cooking and maintain the same coating technique.
How do I know the oil is hot enough for frying?
Use a digital thermometer to check that oil reaches 350F. If you don’t have one, drop a small piece of bread in the oil – it should sizzle and brown within seconds.
Is it possible to make this recipe less spicy?
Simply omit the red pepper flakes when preparing the honey sauce. The sauce will remain flavorful and sweet without the heat.
What if I don’t have rice vinegar?
White wine vinegar or apple cider vinegar make excellent substitutes. They will provide a similar tangy background to the honey sauce.
Can I bake instead of fry?
While frying creates the best crispy texture, you can bake chicken at 425F for 20-25 minutes, turning halfway. The coating won’t be quite as crisp, but it will still taste delicious.
Extra-Crispy Crispy Honey Chicken Recipe
- Total Time: 30 minutes
- Yield: 4 1x
Description
Crispy Honey Chicken brings sizzling restaurant-style magic straight to your kitchen with golden-crusted chicken pieces glazed in a perfectly balanced sweet-tangy sauce. Weeknight dinner dreams come true when this crowd-pleasing recipe lands on your plate, ready to satisfy your craving for something deliciously crisp and irresistibly glazed.
Ingredients
Protein:
- 2 lbs boneless, skinless chicken thighs
Coating:
- 1 cup cornstarch
- ½ cup all-purpose flour
- 1 large egg
- ¼ cup water
Seasonings and Spices:
- 1 teaspoon salt
- ½ teaspoon black pepper
- ½ teaspoon garlic powder
- ½ teaspoon onion powder
- ½ teaspoon ginger, grated
- 1 clove garlic, minced
- ¼ teaspoon red pepper flakes
Sauce:
- ½ cup honey
- ¼ cup soy sauce
- 2 tablespoons rice vinegar
- 1 tablespoon ketchup
- 1 tablespoon cornstarch
- ¼ cup water
- 1 teaspoon sesame oil
Garnish:
- Sesame seeds
- Chopped green onions
Cooking:
- Vegetable oil, for frying
Instructions
- Mix 1 cup cornstarch, ½ cup flour, 1 teaspoon salt, ½ teaspoon pepper, ½ teaspoon garlic powder, and ½ teaspoon onion powder in a large mixing bowl. Whisk thoroughly to create your crispy coating.
- Whisk 1 beaten egg with ¼ cup water in a separate bowl to create a smooth binding liquid.
- Dunk each chicken piece into the egg mixture, allowing excess to drip away. Ensure every morsel gets a light egg wash.
- Roll each chicken piece through the cornstarch mixture, pressing firmly to create a complete, even coating. Shake off any loose powder.
- Heat vegetable oil to exactly 350F in a deep pot. Use a thermometer to confirm precise temperature for perfect frying.
- Carefully lower chicken pieces into hot oil, working in small batches. Never overcrowd the pot to maintain high heat.
- Fry chicken for 5-7 minutes, turning occasionally. Verify internal temperature reaches 165F with a meat thermometer.
- Transfer fried chicken to a wire rack lined with paper towels. Let excess oil drain completely.
- Combine ½ cup honey, ¼ cup soy sauce, 2 tablespoons rice vinegar, and 1 tablespoon ketchup in a saucepan.
- Whisk 1 tablespoon cornstarch with ¼ cup water, then add to the sauce mixture. Stir in 1 teaspoon sesame oil.
- Add 1 minced garlic clove and ½ teaspoon grated ginger to the sauce. Include red pepper flakes for extra kick if desired.
- Simmer sauce over medium heat for 3-5 minutes, stirring constantly until it thickens nicely.
- Gently toss hot chicken pieces in the warm honey sauce, ensuring each piece gets completely coated.
- Sprinkle with sesame seeds and chopped green onions. Serve immediately over steamed rice for maximum crispiness.
Notes
- Choose an oil with a high smoke point like peanut or vegetable oil for the crispiest chicken texture.
- Maintain consistent oil temperature around 350F to ensure evenly cooked, golden-brown chicken without burning.
- Pat chicken pieces completely dry before coating to help the cornstarch mixture adhere better and create a crunchier exterior.
- For gluten-free version, swap wheat flour with rice flour or a gluten-free all-purpose blend, which keeps the coating crisp and light.
- Prep Time: 15 minutes
- Cook Time: 15 minutes
- Category: Chicken
- Method: Frying
- Cuisine: Chinese
Nutrition
- Serving Size: 4
- Calories: 550 kcal
- Sugar: 25 g
- Sodium: 800 mg
- Fat: 20 g
- Saturated Fat: 4 g
- Unsaturated Fat: 14 g
- Trans Fat: 0 g
- Carbohydrates: 45 g
- Fiber: 2 g
- Protein: 40 g
- Cholesterol: 110 mg
Susan Whitaker
Content Specialist & Home Cooking Guide
Expertise
Family-friendly Meals, Simple Healthy Cooking, Ingredient Substitutions, Beginner-friendly Recipes, Flexible Meal Prep
Education
Susan is the steady, practical guide at Mary Sue & Susan, bringing clarity, structure, and a warm sense of encouragement to every recipe she touches. Susan joined the site with a simple goal: help people cook with more confidence and less guesswork.