
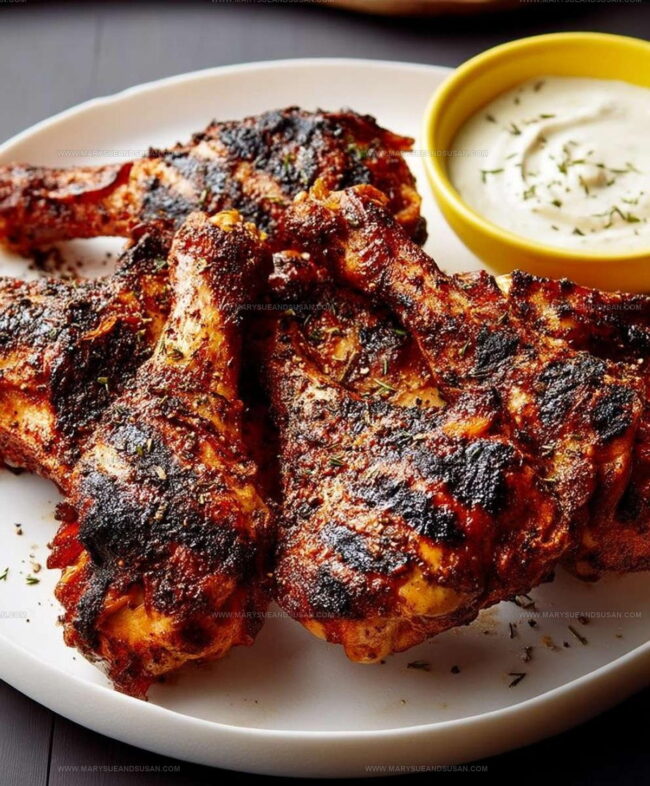
Smoky Grilled Chicken Drumsticks Recipe for Summer Dinners
Grilled chicken drumsticks deliver that perfect combination of smoky flavor and juicy tenderness that makes outdoor cooking so satisfying.
When the weather warms up and it's time to fire up the grill, few options match the universal appeal of chicken that's been kissed by flames and charred to perfection.
Budget-friendly and forgiving to cook, drumsticks have become a backyard favorite for good reason.
The crispy skin and succulent meat inside create a contrast that keeps everyone coming back for more.
Whether you need something simple for a weeknight dinner or want to impress at a weekend gathering, grilled chicken fits the bill beautifully.
There's something about that distinctive grilled aroma that signals good times and great food ahead.
Plus, drumsticks are easy to handle and eat, making them ideal for casual meals where conversation flows as freely as the lemonade.
Follow along to learn how to nail perfectly grilled chicken every single time.
Why Grilled Chicken Drumsticks Are Always a Hit
Ingredients That Shape Grilled Chicken Drumsticks
Main Protein:Spice Blend:Marinade Ingredients:What Tools Roast Chicken Drumsticks
Step-by-Step Grilling Instructions for Chicken Drumsticks
Mixing the Spice Blend
Grab a big mixing bowl and toss in these amazing dry spices:
Whisk these together until they’re perfectly combined.
Creating the Marinade
Pour these wet ingredients right into your spice mixture:
Whisk everything until the marinade looks smooth and blended.
Prepping the Chicken
Grab your 12 chicken drumsticks and slide them into a large resealable plastic bag.
Pour the entire marinade over the drumsticks, making sure each piece gets totally covered.
Give the bag a good massage to spread the marinade around.
Marinating Time
Stick the bag in the refrigerator for at least 2 hours. If you can plan ahead, overnight marinating makes these drumsticks even more delicious.
Grill Preparation
Clean your grill grates and brush them with a little olive oil. Heat the grill to 375°F, aiming for medium heat. If using a charcoal grill, set up for indirect heating.
Cooking the Drumsticks
Take the drumsticks out of the marinade and discard the leftover liquid. Place the drumsticks on the grill, spacing them out evenly.
Grill for about 20-25 minutes, flipping occasionally to ensure even cooking.
Checking Doneness
Use a meat thermometer to check that the internal temperature hits 165°F. This ensures your chicken is perfectly cooked and safe to eat.
Final Touch
Once cooked, pull the drumsticks off the grill and let them rest for 5-10 minutes. This helps keep them juicy.
Sprinkle some fresh chopped parsley on top if you want a little extra color and flavor.
Serving
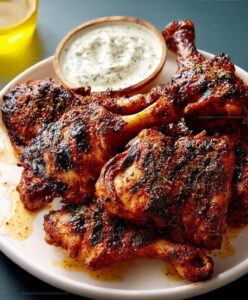
Plate up your gorgeous grilled drumsticks and serve with whatever sides make your heart happy.
Best Tips for Grilled Chicken Drumsticks
Juicy Grilled Chicken Drumstick Variations
How to Serve Grilled Chicken Drumsticks
How to Store Grilled Chicken Drumsticks Juicy?
Grilled Chicken Drumsticks FAQs
Can I use different parts of chicken for this recipe?
Absolutely! This marinade works great with chicken thighs, wings, or even a whole chicken. Just adjust grilling times based on the cut’s size.
How can I make the marinade less spicy?
Simply reduce or omit the cayenne pepper. The paprika and other spices will still provide excellent flavor without heat.
What if I don’t have a grill?
No problem! You can roast these drumsticks in a preheated oven at 425F for about 35-40 minutes, flipping halfway through cooking.
Is it safe to reuse marinade?
Never reuse marinade that has touched raw chicken. Always discard the used marinade to prevent bacterial contamination.
Can I prepare the marinade in advance?
Definitely! The marinade can be mixed and stored in the refrigerator for up to three days before using it on your chicken.
How do I know the chicken is fully cooked?
Always use a meat thermometer to check that the internal temperature reaches 165F at the thickest part of the drumstick.
Grilled Chicken Drumsticks Recipe
- Total Time: 2 hours 25 minutes to overnight plus cook time
- Yield: 6 1x
Description
Master Grilled Chicken Drumsticks offer a foolproof path to crispy, tender meat that’ll have your family asking for seconds. Seasoned with simple spices and grilled to golden-brown perfection, these drumsticks deliver maximum flavor with minimal effort.
Ingredients
Main Ingredients:
- 12 Chicken Drumsticks
- ¼ cup Olive Oil
Seasoning Blend:
- 2 tablespoons Paprika
- 1 tablespoon Garlic Powder
- 1 tablespoon Onion Powder
- 1 tablespoon Dried Thyme
- 1 teaspoon Dried Oregano
- 1 teaspoon Smoked Paprika
- ½ teaspoon Cayenne Pepper
- 1 teaspoon Salt
- ½ teaspoon Black Pepper
Liquid Ingredients:
- ¼ cup Apple Cider Vinegar
- 2 tablespoons Worcestershire Sauce
- 2 cloves Garlic
- 1 tablespoon Dijon Mustard
- Fresh parsley
Instructions
- Mix 2 tablespoons paprika, 1 tablespoon garlic powder, 1 tablespoon onion powder, 1 tablespoon dried thyme, 1 teaspoon dried oregano, 1 teaspoon smoked paprika, ½ teaspoon cayenne pepper, 1 teaspoon salt, and ½ teaspoon black pepper in a large bowl.
- Whisk ¼ cup olive oil, ¼ cup apple cider vinegar, 2 tablespoons Worcestershire sauce, 2 minced garlic cloves, and 1 tablespoon Dijon mustard into the spice mixture until smooth.
- Submerge 12 chicken drumsticks in the marinade, ensuring complete coverage. Gently massage the seasonings into each piece.
- Seal the container and refrigerate for 2-8 hours, rotating the drumsticks halfway through marinating time.
- Prepare the grill by cleaning grates and applying a light coat of oil. Heat to 375°F with zones for indirect cooking.
- Remove drumsticks from marinade and discard remaining liquid. Pat chicken dry with paper towels.
- Arrange drumsticks on the grill’s cooler side, spacing them evenly. Close the grill lid.
- Cook for 20-25 minutes, turning every 7-8 minutes to ensure even browning and prevent burning.
- Check internal temperature with a meat thermometer. Drumsticks are ready when they reach 165°F at the thickest part.
- Transfer chicken to a clean platter. Let rest for 7-10 minutes to redistribute juices.
- Garnish with fresh chopped parsley if desired. Serve immediately with your favorite accompaniments.
Notes
- Check the drumsticks carefully before marinating to ensure no skin tears or has rough edges that could prevent even seasoning.
- Use a resealable plastic bag for marinating to guarantee complete chicken coverage and easy turning without mess.
- Remove chicken from refrigerator 30 minutes before grilling to help it cook more evenly and prevent temperature shock.
- When testing doneness, insert meat thermometer into thickest part of drumstick without touching bone for accurate temperature reading.
- Prep Time: 10 minutes
- Cook Time: 15-25 minutes
- Category: Chicken
- Method: Grilling
- Cuisine: American
Nutrition
- Serving Size: 6
- Calories: 278 kcal
- Sugar: 0 g
- Sodium: 756 mg
- Fat: 15 g
- Saturated Fat: 3.5 g
- Unsaturated Fat: 11.2 g
- Trans Fat: 0 g
- Carbohydrates: 2 g
- Fiber: 1 g
- Protein: 28 g
- Cholesterol: 95 mg
Susan Whitaker
Content Specialist & Home Cooking Guide
Expertise
Family-friendly Meals, Simple Healthy Cooking, Ingredient Substitutions, Beginner-friendly Recipes, Flexible Meal Prep
Education
Susan is the steady, practical guide at Mary Sue & Susan, bringing clarity, structure, and a warm sense of encouragement to every recipe she touches. Susan joined the site with a simple goal: help people cook with more confidence and less guesswork.