Crispy Chicken Fries Recipe for Game Day Snacking
Crispy chicken fries are the ultimate crowd-pleasing comfort food that never disappoints hungry appetites.
Perfectly seasoned and golden-brown, these delightful strips offer a mouthwatering twist on classic chicken dishes.
Crunchy exteriors give way to juicy, tender meat that satisfies deep cravings for something deliciously indulgent.
Restaurant-style chicken fries are easier to prepare at home than most people realize.
Families and friends always gather around with excitement when these golden treats emerge from the kitchen.
Home cooks appreciate how simple ingredients can create such a spectacular result that everyone loves.
Get your kitchen ready for a seriously addictive snack that will become a permanent favorite in your meal rotation.
Why Chicken Fries Are Always A Hit
Ingredient List For Chicken Fries
Main Ingredients:Simple Kitchen Equipment for Chicken Fries
Steps for Making Chicken Fries
Prep the Coating Stations
Set up three shallow dishes on your counter. In the first dish, spread out the flour. In the second dish, whisk the eggs until smooth. For the third dish, mix together the breadcrumb coating:
Blend these ingredients thoroughly so the seasonings are evenly distributed.
Flour the Chicken
Cut the chicken breasts into long, thin strips. Dust each strip completely in flour, making sure every surface gets a light, even coating. Shake off any excess flour so you have a thin, even layer.
Egg Wash
Dip each floured chicken strip into the beaten eggs. Let the extra egg drip off, creating a light, sticky surface for the breadcrumbs to cling to.
Breadcrumb Coating
Roll the egg-coated chicken through the seasoned panko mixture. Press gently so the crumbs stick well to every part of the chicken strip.
Heat the Oil
Pour 1 cup vegetable oil into a large skillet. Heat the oil to exactly 350°F, checking with a kitchen thermometer to ensure the right temperature.
First Batch of Frying
Carefully lower the first batch of chicken strips into the hot oil. Fry for 3-4 minutes on each side. The exterior should turn a deep golden brown, and the internal temperature must reach 165°F for safe eating.
Drain the Chicken
Move the fried chicken strips to a plate lined with paper towels. This helps drain away any excess oil, keeping your chicken crisp.
Finish Frying
Continue frying the remaining chicken strips. Keep the oil temperature steady at 350°F between batches.
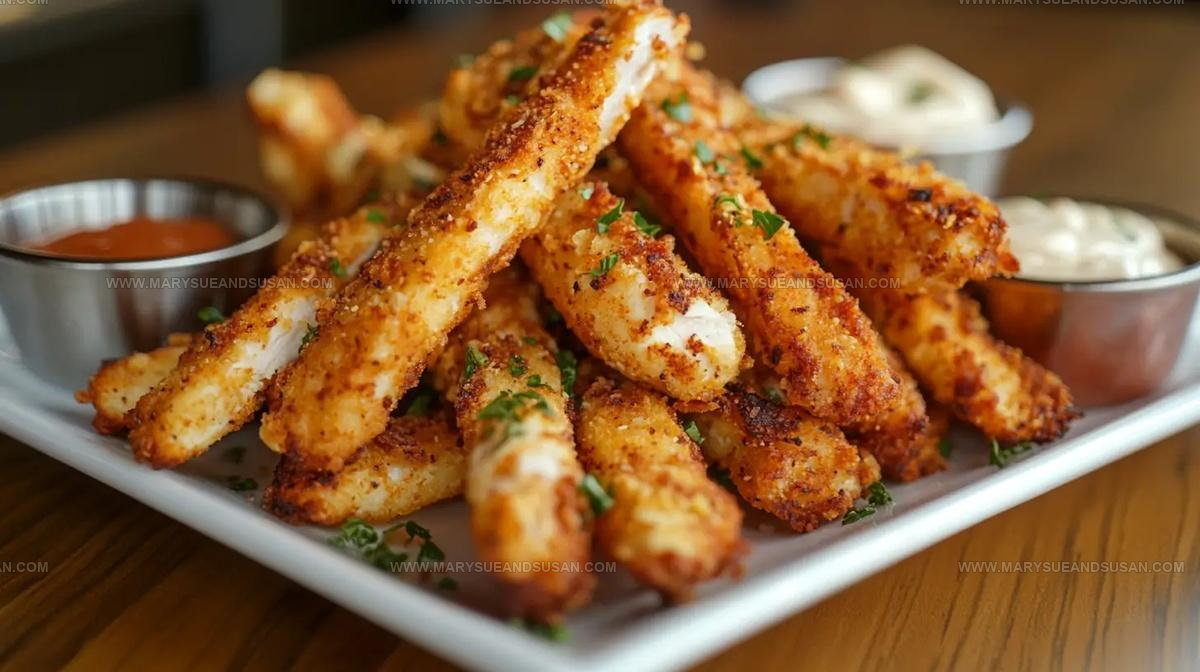
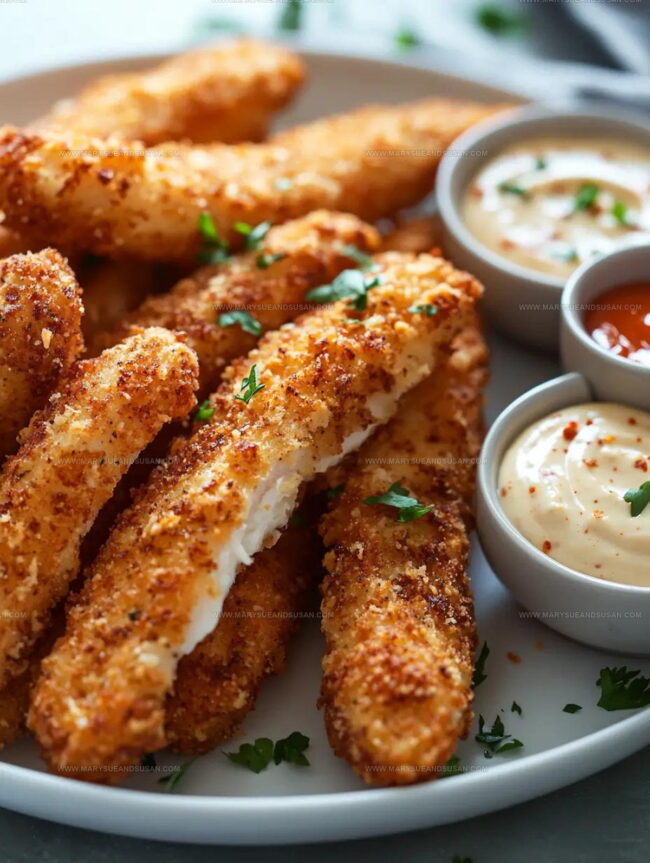
Serve Immediately
Plate the hot, crispy chicken fries right away. Grab your favorite dipping sauce and enjoy while they’re fresh and crunchy!
Cooking Know-How For Chicken Fries
Flavor Twists for Chicken Fries
How To Plate Chicken Fries
How To Store Chicken Fries
Chicken Fries Common Questions
Can I use chicken breasts instead of chicken strips?
Absolutely! Just slice chicken breasts into uniform strips about 1/2-inch thick to ensure even cooking and consistent crispiness.
How do I know the oil is hot enough without a thermometer?
Drop a small breadcrumb into the oil – if it sizzles and turns golden within seconds, the oil is ready for frying.
Are chicken fries freezer-friendly?
Yes! After frying, let chicken cool completely, then store in freezer-safe containers for up to 3 months. Reheat in oven at 400°F to maintain crispness.
Can whole wheat flour replace regular flour in the coating?
Whole wheat flour works perfectly. Your chicken will have a slightly nuttier flavor and added nutrition.
What makes the panko coating extra crispy?
Pressing the panko mixture gently onto the chicken and maintaining consistent oil temperature creates that perfect golden, crunchy exterior.
Can vegetable oil be substituted with another oil?
Canola or peanut oil are excellent alternatives. They have similar smoke points and neutral flavors that work wonderfully for frying.
Homemade Chicken Fries Recipe
- Total Time: 18 minutes
- Yield: 4 1x
Description
Chicken Fries bring crispy, golden comfort straight from your kitchen to the plate. Perfectly seasoned and crunchy, these homemade strips make snack time deliciously satisfying.
Ingredients
Main Ingredients:
- 2 large chicken breasts
- 1 cup all-purpose flour
- 1 cup panko breadcrumbs
- 1 cup vegetable oil
Supporting Ingredients:
- 2 large eggs
- ½ cup grated Parmesan
Seasonings:
- 1 teaspoon garlic powder
- 1 teaspoon paprika
- ½ teaspoon salt
- ½ teaspoon black pepper
Instructions
- Arrange three shallow dishes: first with 1 cup flour, second with 2 beaten eggs, third with 1 cup panko, ½ cup Parmesan, 1 teaspoon garlic powder, 1 teaspoon paprika, ½ teaspoon salt, and ½ teaspoon pepper.
- Take each chicken strip and thoroughly dust it with flour, ensuring complete coverage.
- Submerge the floured chicken into beaten eggs, allowing excess to drip off.
- Roll the egg-coated chicken through the seasoned panko mixture, pressing gently to help crumbs adhere firmly.
- Pour 1 cup vegetable oil into a large skillet and heat to precisely 350°F, monitoring temperature with a kitchen thermometer.
- Carefully lower chicken strips into hot oil, cooking 3-4 minutes per side until exterior turns deep golden brown and internal temperature reaches 165°F.
- Transfer fried chicken to paper towel-lined plate, letting excess oil drain completely.
- Repeat frying process with remaining chicken strips, maintaining consistent oil temperature.
- Plate hot crispy chicken fries immediately and serve with preferred dipping sauce.
Notes
- Use cold chicken strips straight from the fridge for better coating adhesion and crispier results.
- Press the panko coating firmly onto each chicken strip to create a thicker, crunchier exterior.
- For a gluten-free version, swap regular flour with almond flour and use gluten-free panko breadcrumbs.
- Pat the chicken strips completely dry before breading to help the coating stick and prevent soggy fries.
- Prep Time: 10 minutes
- Cook Time: 8 minutes
- Category: Chicken
- Method: Frying
- Cuisine: American
Nutrition
- Serving Size: 4
- Calories: 571 kcal
- Sugar: 1 g
- Sodium: 370 mg
- Fat: 35 g
- Saturated Fat: 6 g
- Unsaturated Fat: 27 g
- Trans Fat: 0 g
- Carbohydrates: 32 g
- Fiber: 2 g
- Protein: 48 g
- Cholesterol: 140 mg
Mary Sue
Founder & Creative Recipe Developer
Expertise
Comfort Food Twists, Seasonal Cooking, Creative Flavor Pairings, Easy Weeknight Dinners, Flexible Pantry Cooking
Education
Mary Sue is the playful, creative recipe mind behind Mary Sue & Susan, known for big flavor ideas, warm storytelling, and dishes that feel both comforting and a little unexpected. She has a talent for taking familiar meals and giving them just enough personality to make them memorable.