Crispy Chinese Orange Chicken Recipe You Can Make at Home
Chinese orange chicken has become one of the most beloved takeout dishes across America, and making it at home means you control every aspect of the final result.
Sweet, savory, and just a bit sticky, it's comfort food that satisfies cravings any night of the week.
The flavors are bold without being overwhelming, making it a crowd-pleaser that works just as well for weeknight dinners as it does for entertaining.
What makes this dish so appealing is how it balances different taste profiles into something completely crave-worthy.
Making it from scratch is surprisingly straightforward and takes less time than driving to a restaurant.
You won't believe how much better it tastes when it's freshly made in the comfort of home.
The recipe walks you through every step so you can recreate that restaurant experience whenever the craving hits.
Best Reasons to Try Homemade Chinese Orange Chicken
What Ingredients Make Orange Chicken
Main Proteins:Coating Ingredients:Sauce Ingredients:Aromatics:Garnish:Additional Ingredient:Necessary Tools for Chinese Orange Chicken
Homemade Chinese Orange Chicken Cooking Guide
Prepare Chicken Pieces
Cut chicken thighs into neat 1-inch chunks so each bite cooks perfectly. This helps your chicken get crispy and delicious when frying.
Set Up Coating Station
Grab two separate bowls. In one bowl, whisk those 2 eggs until smooth. In another bowl, dump the 1/2 cup cornstarch. Your coating setup is ready to go.
Coat Chicken
Dunk each chicken chunk into the egg, then roll completely in cornstarch. Tap off any extra powder so your pieces have a light, even coating.
Heat Cooking Oil
Pour 1/4 cup vegetable oil into a large skillet. Warm it up to 375°F over medium-high heat until the oil looks shimmery and ready for frying.
Fry Chicken Batches
Carefully drop chicken pieces into hot oil. Fry for 3-4 minutes, flipping once, until each piece turns golden brown and crisp.
Drain Fried Chicken
Transfer fried chicken to a plate lined with paper towels. This helps soak up extra oil and keeps your chicken crunchy.
Prepare Orange Sauce
Combine sauce ingredients in the same skillet:
Simmer Sauce
Whisk sauce ingredients together. Let it bubble gently for 2-3 minutes until it starts to thicken slightly.
Adjust Sauce Consistency
If sauce gets too thick, stir in 1/4 cup water. Keep stirring to maintain smooth texture.
Combine Chicken and Sauce
Drop fried chicken back into the skillet. Toss gently to coat each piece completely with the tangy orange sauce.
Final Heating
Cook chicken in sauce for 1-2 minutes to warm everything through and let flavors mingle.
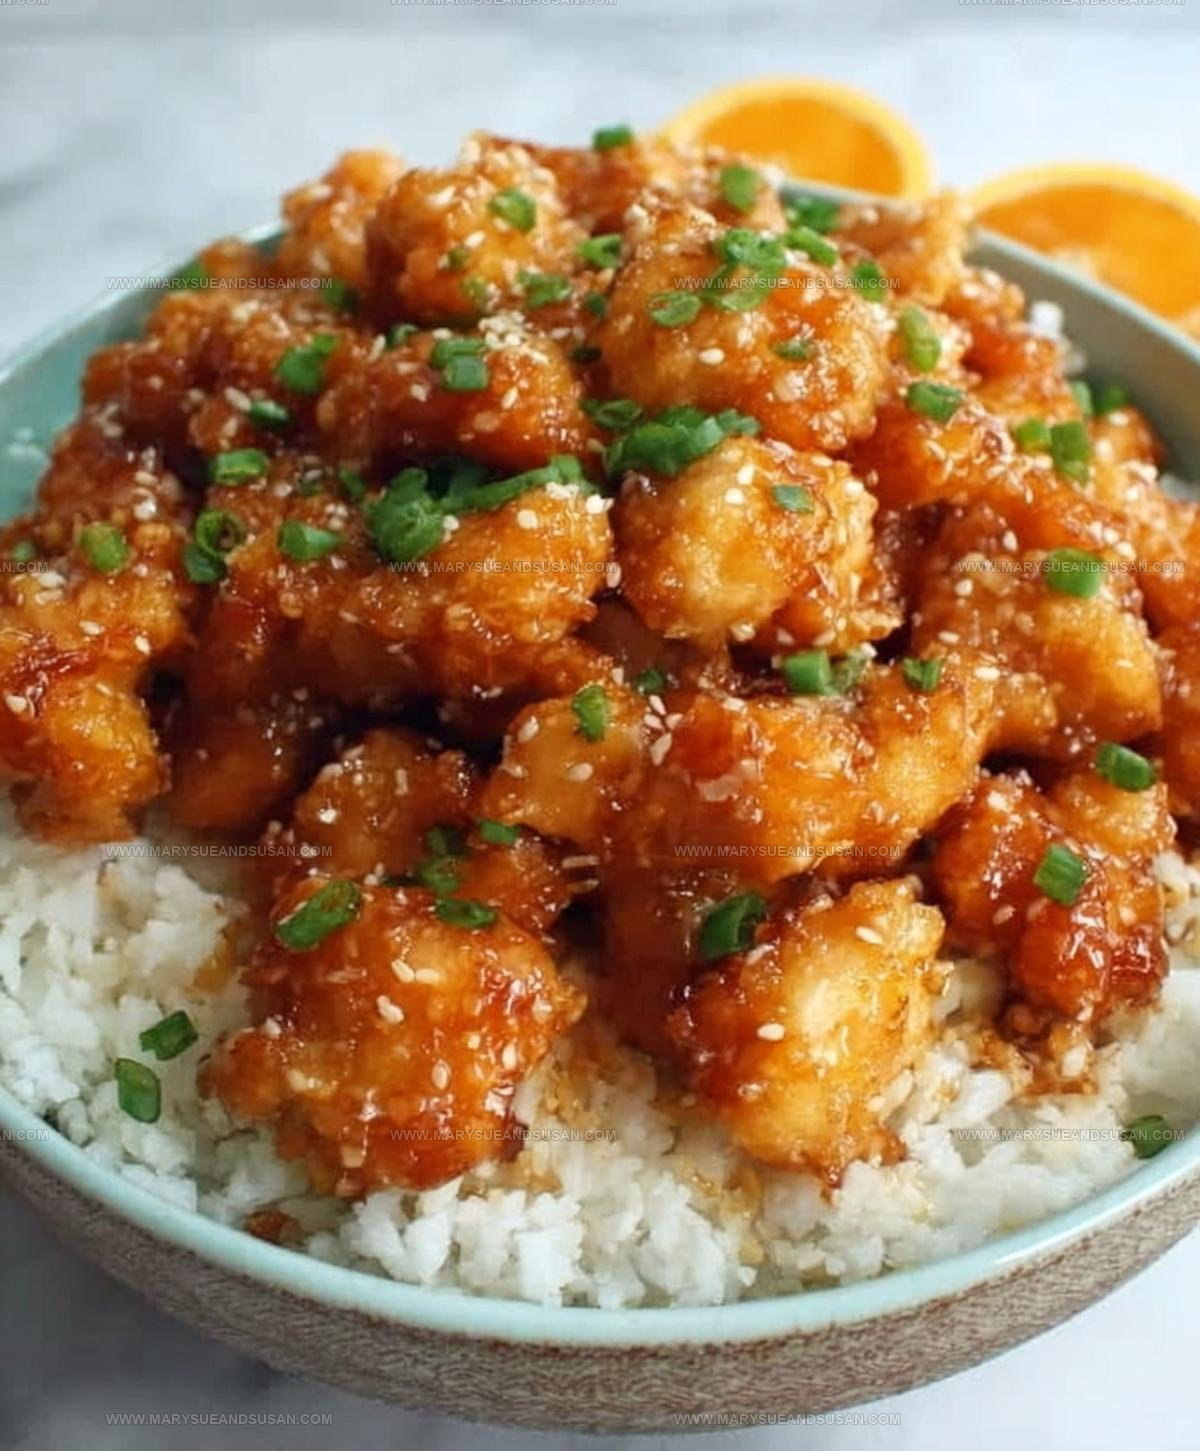
Serve and Garnish
Slide chicken onto a serving plate. Sprinkle chopped green onions on top for a fresh finish. Serve right away with steamed rice.
Technique Notes for Orange Chicken
Orange Chicken with Sauce Thickness Variations
How to Enjoy Homemade Orange Chicken
How To Store Orange Chicken
Homemade Orange Chicken Questions and Answers
Can I use chicken breast instead of thighs?
Chicken breasts work fine, but thighs stay juicier and more tender during frying, giving a better texture and flavor to your orange chicken.
How do I know the oil is hot enough for frying?
Drop a small piece of cornstarch-coated chicken into the oil – if it sizzles immediately and starts floating, the temperature is perfect for crispy chicken.
What if my sauce gets too thick?
Simply add a little water or extra orange juice to thin it out, stirring constantly to maintain the right consistency.
Can I make this recipe less spicy?
Remove the red pepper flakes completely or reduce the amount to create a milder version that suits your taste preferences.
Is it necessary to use fresh orange zest?
Fresh zest provides the most vibrant citrus flavor, but you can substitute with dried zest if fresh isn’t available – just use about half the amount.
How crispy should the chicken be when frying?
Golden brown with a crunchy exterior is ideal – aim for a deep golden color that indicates a perfectly crisp coating.

Homemade Chinese Orange Chicken Recipe
- Total Time: 20-22 minutes
- Yield: 4 1x
Description
Homemade Orange Chicken delivers restaurant-quality flavor right from your kitchen, beating any takeout spot hands down. Crispy chicken pieces glazed with tangy citrus sauce guarantee a delicious meal that feels like a special treat.
Ingredients
Proteins:
- 2 lbs boneless chicken thighs
- 2 eggs
Sauce Components:
- ½ cup orange juice
- ½ cup white sugar
- ¼ cup water
- 2 tablespoons soy sauce
- 3 tablespoons rice vinegar
- 2 tablespoons orange zest
Coating and Aromatics:
- ½ cup cornstarch
- ¼ cup vegetable oil
- 3 cloves garlic
- 1 tablespoon ginger
- ¼ teaspoon red pepper flakes
- 2 green onions
Instructions
- Cut chicken thighs into uniform 1-inch chunks so they cook evenly and look professional.
- Crack 2 eggs into a medium bowl and whisk until smooth and well-blended.
- Create a separate shallow bowl with ½ cup cornstarch for coating your chicken pieces.
- Dunk each chicken chunk into the egg mixture, ensuring complete coverage.
- Roll the egg-coated chicken in cornstarch, gently shaking off any excess powder.
- Heat ¼ cup vegetable oil in a large skillet to 375°F, watching for a shimmering surface.
- Carefully place chicken pieces into hot oil, cooking in batches to maintain temperature.
- Fry each batch for 3-4 minutes, flipping once to achieve a golden, crispy exterior.
- Transfer fried chicken to a paper towel-lined plate to drain excess oil.
- In the same skillet, combine ½ cup orange juice, 2 tbsp soy sauce, and 3 tbsp rice vinegar.
- Add ½ cup white sugar, 2 tbsp orange zest, 3 minced garlic cloves, and 1 tbsp ginger to the liquid.
- Sprinkle ¼ tsp red pepper flakes into the sauce for a subtle kick.
- Whisk ingredients together and simmer for 2-3 minutes until the sauce slightly thickens.
- Pour ¼ cup water into the skillet if sauce becomes too dense, stirring continuously.
- Return crispy chicken to the skillet, gently tossing to coat with the vibrant orange sauce.
- Heat chicken in sauce for 1-2 minutes to ensure thorough warming.
- Transfer to a serving plate and scatter 2 chopped green onions on top for fresh flavor.
- Serve immediately alongside steamed rice for a complete meal.
Notes
- Ensure chicken pieces are cut to exactly the same size for uniform cooking and crispy texture throughout.
- Pat chicken completely dry before coating to help cornstarch adhere and create an extra-crisp exterior.
- Use a thermometer when frying to maintain consistent oil temperature around 375°F, preventing soggy or greasy chicken.
- For a lighter version, bake the cornstarch-coated chicken at 425°F for 20-25 minutes, turning once, instead of deep-frying.
- Prep Time: 10 minutes
- Cook Time: 10-12 minutes
- Category: Chicken
- Method: Frying
- Cuisine: Chinese
Nutrition
- Serving Size: 4
- Calories: 580 kcal
- Sugar: 32 g
- Sodium: 670 mg
- Fat: 28 g
- Saturated Fat: 6 g
- Unsaturated Fat: 20 g
- Trans Fat: 0 g
- Carbohydrates: 40 g
- Fiber: 1 g
- Protein: 45 g
- Cholesterol: 215 mg
Mary Sue
Founder & Creative Recipe Developer
Expertise
Comfort Food Twists, Seasonal Cooking, Creative Flavor Pairings, Easy Weeknight Dinners, Flexible Pantry Cooking
Education
Mary Sue is the playful, creative recipe mind behind Mary Sue & Susan, known for big flavor ideas, warm storytelling, and dishes that feel both comforting and a little unexpected. She has a talent for taking familiar meals and giving them just enough personality to make them memorable.