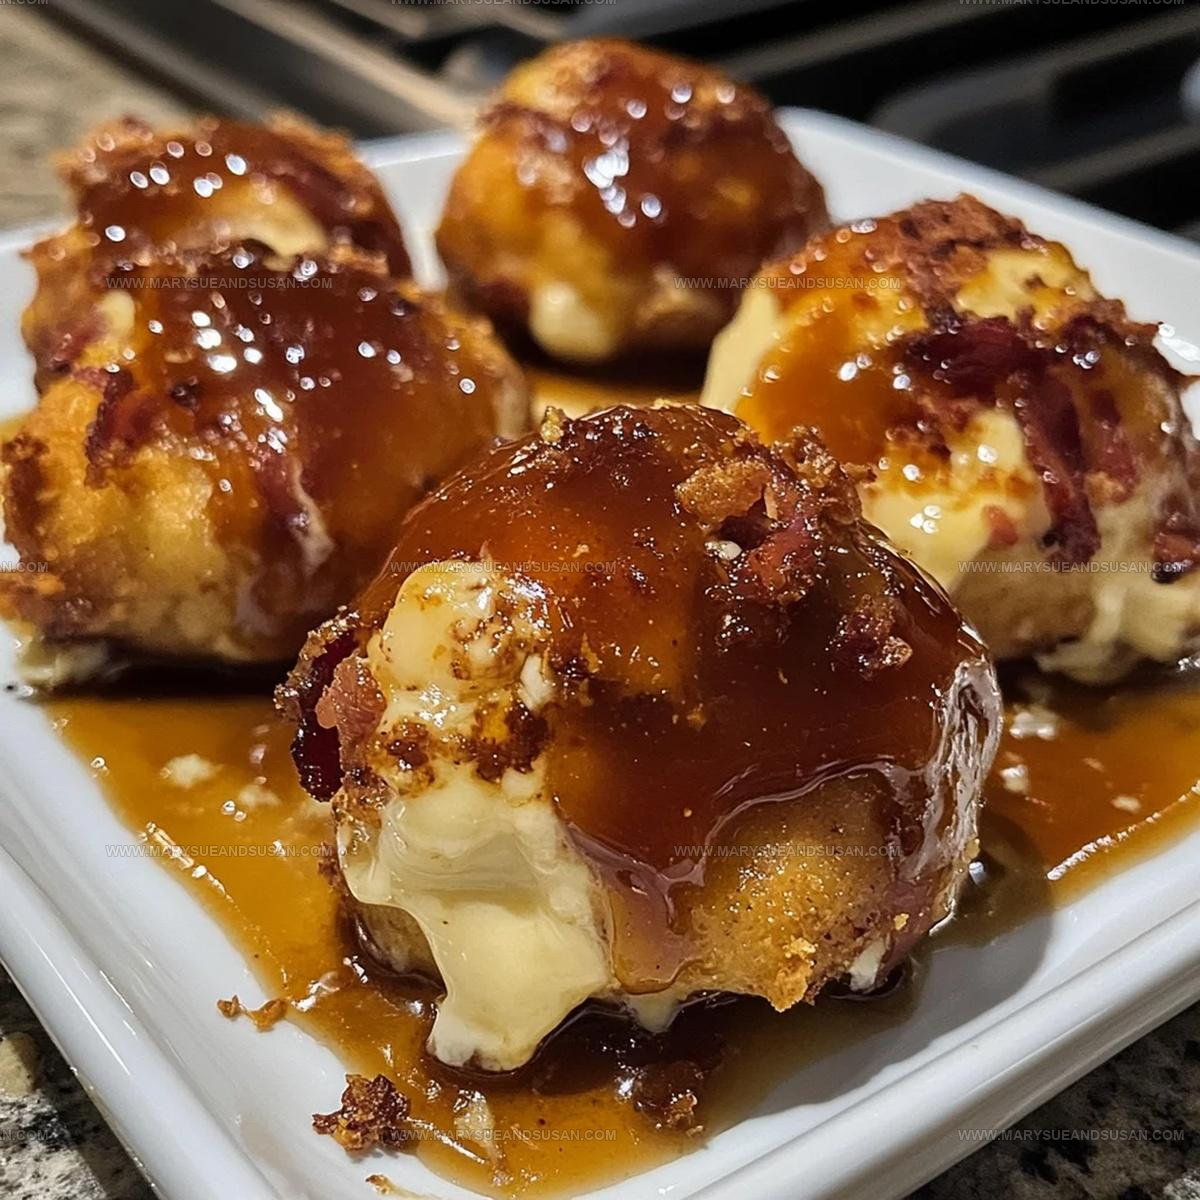
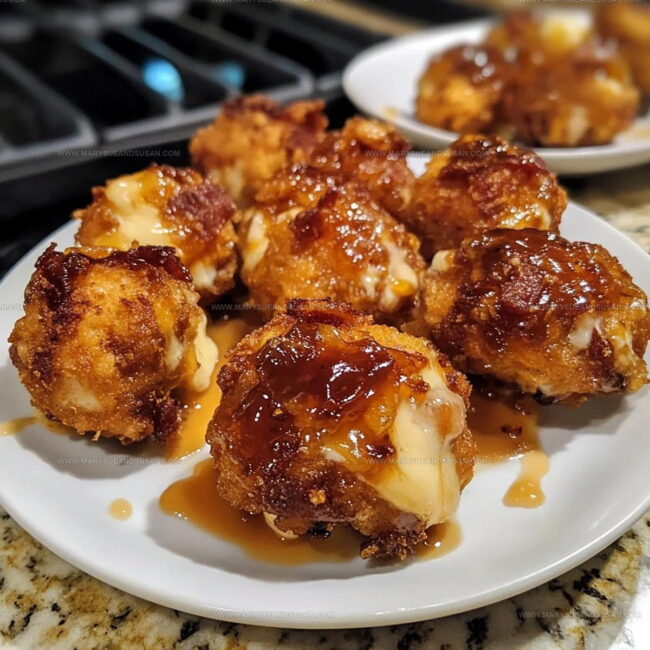
Honey BBQ Bacon Chicken Cheese Bombs Recipe That Delivers Bold Flavor
Savory honey bbq bacon chicken cheese bombs promise an explosion of flavor that will revolutionize your snack game.
Comfort food enthusiasts rejoice as these delectable parcels blend smoky, sweet, and rich profiles into one incredible bite-sized experience.
Perfectly crispy exterior shells hide molten centers waiting to surprise hungry appetites with unexpected deliciousness.
Minimal preparation meets maximum satisfaction in this crowd-pleasing recipe guaranteed to impress friends and family during game nights or casual gatherings.
Weekend cooking becomes an adventure when preparing these mouthwatering morsels that combine multiple beloved flavor elements into single, compact packages.
Party platters and casual dinners suddenly feel more exciting with these irresistible little bundles of joy.
Serious snack lovers understand that sometimes the most memorable meals come in small, unexpected forms – and these bombs absolutely deliver that promise.
Why You’ll Love Honey Bbq Bacon Chicken Cheese Bombs
Full List of Ingredients for Honey BBQ Bacon Chicken Cheese Bombs
Main Ingredients:Garnish:Essential Kitchen Tools for Honey Bbq Bacon Chicken Cheese Bombs
Preparation Steps for Honey BBQ Bacon Chicken Cheese Bombs
Prep Chicken
Cut 1 lb chicken breast into small, bite-sized cubes. Sprinkle chicken with:
Toss the chicken to coat evenly with the seasonings.
Crisp Bacon
Cook 6 slices of bacon in a skillet over medium heat for 6-7 minutes until crispy. Transfer bacon to a paper towel-lined plate and crumble into small pieces once cooled.
Combine Filling
In a mixing bowl, combine:
Mix the ingredients until well combined.
Prepare Dough
Open 1 package of refrigerated biscuit dough. Gently flatten each biscuit with your palm to create a wider circle.
Assemble Bombs
Place a spoonful of chicken and cheese mixture in the center of each biscuit. Carefully fold the edges of the dough over the filling, pinching to seal completely.
Bake Bombs
Preheat oven to 375°F. Arrange the sealed bombs on a baking sheet. Bake for 15-20 minutes until golden brown and puffy. Optional: Brush tops with melted butter before baking for extra crispness.
Garnish and Serve
Sprinkle fresh parsley on top. Let cool for 2-3 minutes before serving. These cheesy bombs are best enjoyed warm and fresh from the oven.
What Helps Honey Bbq Bacon Chicken Cheese Bombs Turn Out Well
What Are Honey BBQ Bacon Chicken Cheese Bombs Variations
How To Serve Honey Bbq Bacon Chicken Cheese Bombs
Smart Storage Tips For Honey BBQ Bacon Chicken Cheese Bombs
Honey Bbq Bacon Chicken Cheese Bombs FAQs
Can I make these ahead of time?
Assemble the bombs up to 24 hours before baking, cover tightly, and refrigerate. Remove from the fridge 30 minutes before baking to help them cook evenly.
What if my cheese starts to leak out?
Pinch the dough edges firmly and make sure there are no gaps. If some cheese escapes, it’s still delicious – those crispy cheese bits are actually tasty!
Do I need fresh bacon or can I use pre-cooked?
Crispy pre-cooked bacon works perfectly. Just crumble it into small pieces for easier stuffing inside the dough.
How do I know when the bombs are fully cooked?
Look for a deep golden brown color and puffy appearance. The dough should look firm and slightly crisp around the edges.
Can I freeze these for later?
Absolutely! Freeze unbaked bombs on a tray, then transfer to a freezer bag. Bake directly from frozen, adding 5-7 extra minutes to cooking time.
What cheese works best for this recipe?
Cheddar melts beautifully and provides great flavor. Monterey Jack or a blend also work wonderfully for gooey results.

Honey BBQ Bacon Chicken Cheese Bombs Recipe
- Total Time: 35 minutes
- Yield: 8 1x
Description
Honey BBQ Bacon Chicken Cheese Bombs explode with flavor in just one bite, delivering a crispy, cheesy surprise that makes your taste buds dance with excitement. Packed with smoky bacon, tender chicken, and melted cheese, these little appetizers are perfect for game day or casual gatherings where you want something seriously delicious.
Ingredients
Main Ingredients:
- 1 lb Chicken Breast
- 1 cup Shredded Mozzarella Cheese
- 6 slices Bacon
Supporting Ingredients:
- ½ cup Honey BBQ Sauce
- 1 package Refrigerated Biscuit Dough
Seasonings and Garnish:
- 1 teaspoon Garlic Powder
- ½ teaspoon Onion Powder
- ¼ teaspoon Black Pepper
- Fresh Parsley
Instructions
- Dice 1 lb chicken breast into small, uniform cubes, ensuring each piece is roughly the same size for even cooking.
- Crumble 6 slices of bacon into bite-sized pieces, rendering them crispy in a skillet over medium heat for 5-6 minutes.
- Mix 1 cup shredded mozzarella cheese with crumbled bacon, 1 tsp garlic powder, ½ tsp onion powder, and ¼ tsp black pepper in a medium bowl.
- Separate each biscuit from the refrigerated package, gently stretching the dough to create a wider surface.
- Place a small spoonful of cheese and bacon mixture in the center of each biscuit round, topping with 1-2 diced chicken pieces.
- Drizzle 1 tablespoon of honey BBQ sauce over the filling, ensuring it’s centered and doesn’t touch the edges.
- Carefully fold the biscuit edges over the filling, pinching and twisting to create a tight seal that prevents leaking.
- Arrange the sealed cheese bombs on a parchment-lined baking sheet, spacing them 1-2 inches apart.
- Bake at 375°F for 13-15 minutes, watching closely until the bombs turn golden brown and puffy.
- Remove from the oven and let cool for 3-4 minutes, then garnish with chopped fresh parsley before serving.
Notes
- Pinch the edges of the biscuit dough tightly to create a secure seal, preventing cheese and bacon from oozing out during baking.
- Experiment with different cheese varieties like cheddar, pepper jack, or Swiss to customize the flavor profile of your chicken bombs.
- Let the bombs cool for a few minutes after baking, as the filling will be extremely hot and can burn your mouth if eaten immediately.
- For a gluten-free version, swap regular biscuit dough with a gluten-free alternative and check that your BBQ sauce is also gluten-free.
- Prep Time: 15 minutes
- Cook Time: 20 minutes
- Category: Chicken
- Method: Baking
- Cuisine: American
Nutrition
- Serving Size: 8
- Calories: 285 kcal
- Sugar: 6 g
- Sodium: 480 mg
- Fat: 15 g
- Saturated Fat: 6 g
- Unsaturated Fat: 7 g
- Trans Fat: 0.2 g
- Carbohydrates: 14 g
- Fiber: 1 g
- Protein: 22 g
- Cholesterol: 70 mg
Susan Whitaker
Content Specialist & Home Cooking Guide
Expertise
Family-friendly Meals, Simple Healthy Cooking, Ingredient Substitutions, Beginner-friendly Recipes, Flexible Meal Prep
Education
Susan is the steady, practical guide at Mary Sue & Susan, bringing clarity, structure, and a warm sense of encouragement to every recipe she touches. Susan joined the site with a simple goal: help people cook with more confidence and less guesswork.