Honey Butter Garlic Chicken Recipe That Melts in Your Mouth
Honey butter garlic chicken recipe has become a weeknight favorite in homes everywhere, and it's easy to see why.
The combination creates a glossy, flavorful coating that makes dinner feel special without requiring advanced cooking skills.
Sweet notes balance beautifully with savory undertones, resulting in a dish that works for casual family meals and slightly more dressed-up occasions alike.
The preparation comes together quickly, making it perfect for busy evenings when time is limited but nobody wants to compromise on taste.
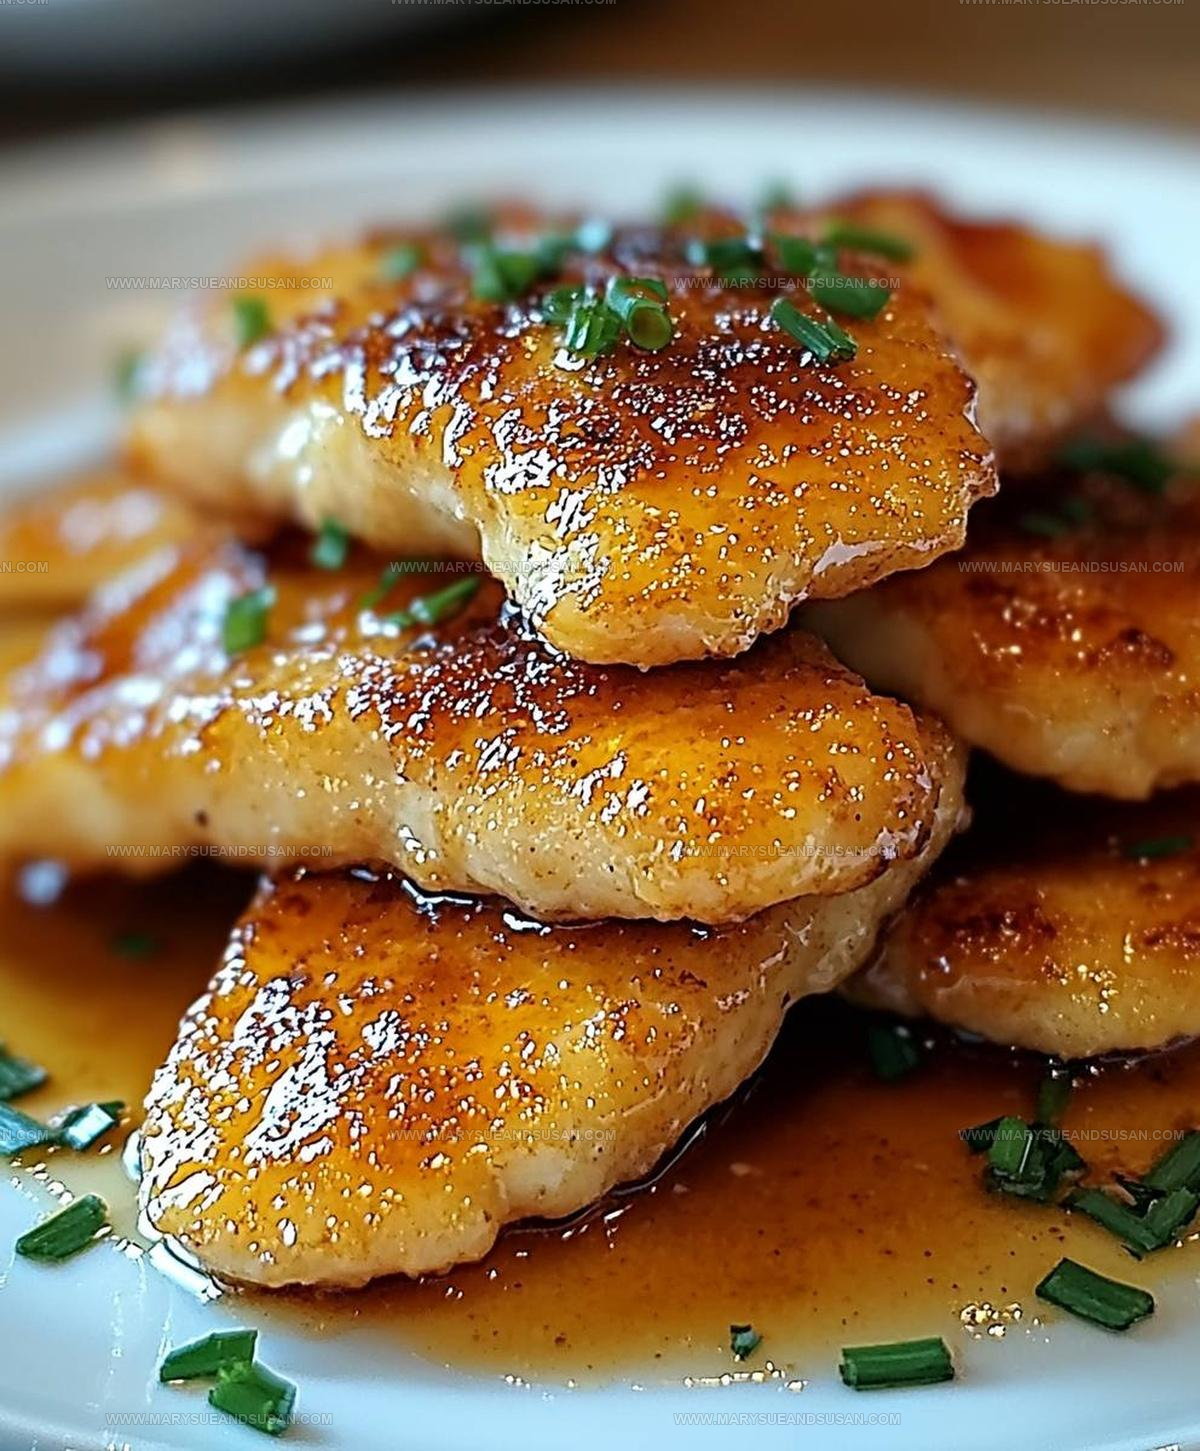
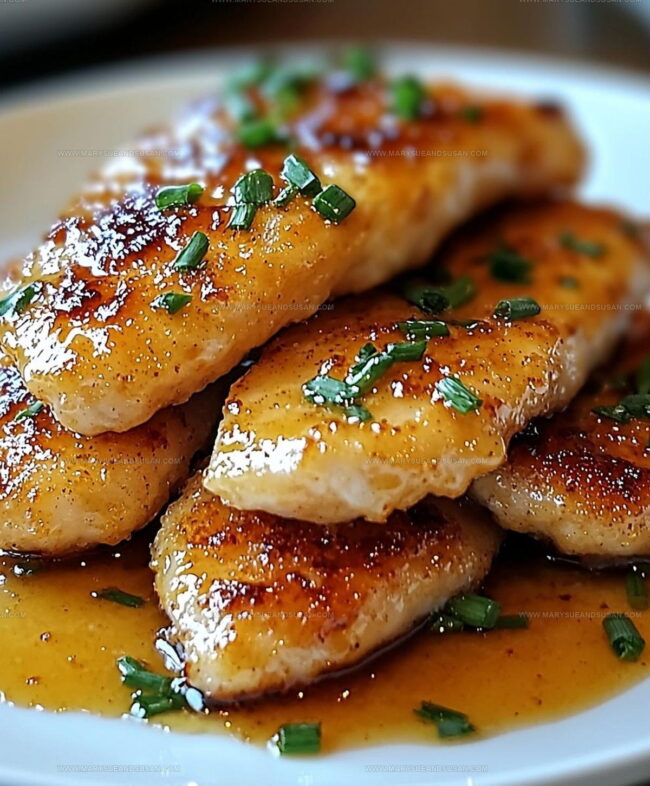
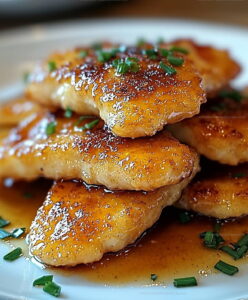
Tender poultry pieces emerge from the pan with a golden finish that looks as impressive as it tastes.
Serving it alongside rice, vegetables, or a simple salad turns the meal into something memorable without adding extra stress to the cooking process.
Why Honey Butter Garlic Chicken Is a Must-Try
What You’ll Be Using for Honey Butter Garlic Chicken
Main Protein:Coating Ingredients:Sauce and Flavor Builders:Garnish Options:Serving Suggestions:What Tools Cook Honey Butter Garlic Chicken
Step by Step Instructions for Honey Butter Garlic Chicken
Prep the Chicken
Grab those chicken breasts and chop them into neat 1-inch cubes. Use paper towels to pat each piece completely dry – this helps get that perfect crispy coating.
Create the Coating Mix
Grab a medium bowl and whisk together these ingredients:
Toss the chicken cubes into this mix, making sure each piece gets totally covered.
Heat the Skillet
Pour 2 tablespoons vegetable oil into a large skillet and heat it to medium-high heat. Your pan should be hot and ready for the chicken.
Cook the Chicken
Spread those coated chicken pieces in a single layer across the skillet. Cook for 5-7 minutes, flipping occasionally, until they turn a gorgeous golden brown. Check that the internal temperature hits 165°F (74°C) to ensure they’re fully cooked.
Drain the Chicken
Move the cooked chicken to a paper towel-lined plate to drain any extra oil.
Make the Sauce
In the same skillet, melt 6 tablespoons butter over medium heat. Toss in 6 minced garlic cloves and cook for 1-2 minutes until they smell amazing.
Create Sauce Magic
Add these ingredients to the butter and garlic:
Stir everything together and let it simmer for 2-3 minutes until it starts to thicken.
Combine Chicken and Sauce
Drop the cooked chicken into the sauce, stirring to coat every single piece. Let it simmer for another 1-2 minutes so the flavors can mingle.
Serve and Garnish
Plate the chicken over white rice or next to some steamed broccoli. Sprinkle 1 tablespoon chopped parsley and 1 tablespoon sesame seeds on top. For an extra pop of color, add some thinly sliced green onions.
What Improves Honey Butter Garlic Chicken
Popular Honey Butter Garlic Chicken Variations
How Can Honey Butter Chicken Be Served
How to Store Honey Butter Garlic Chicken Juicy?
Honey Butter Garlic Chicken Common Questions
Can I use chicken thighs instead of chicken breasts?
Absolutely! Chicken thighs work great and tend to be more flavorful and juicy. Just trim any excess fat and cut them into similar-sized cubes.
How spicy are the red pepper flakes?
The red pepper flakes add a mild heat that doesn’t overpower the dish. If you prefer less spice, reduce the amount or skip them completely.
What if I don’t have rice vinegar?
White wine vinegar or apple cider vinegar make excellent substitutes. They’ll provide a similar tangy brightness to the sauce.
Is cornstarch necessary for this recipe?
Cornstarch helps create a crispy coating and thickens the sauce. Without it, your chicken might not get the same golden, crunchy exterior.
Can I make this dish gluten-free?
Replace the all-purpose flour with a gluten-free flour blend and use tamari instead of traditional soy sauce to keep the recipe gluten-free.
What should the chicken look like when it’s fully cooked?
The chicken cubes should be golden brown on the outside and have no pink inside. An internal temperature of 165F confirms it’s safe to eat.
Honey Butter Garlic Chicken Recipe
- Total Time: 22-24 minutes
- Yield: 4 1x
Description
Honey Butter Garlic Chicken delivers succulent chicken thighs glazed with a sweet and savory sauce that melts in your mouth. Sizzling straight from your skillet to your plate, this crowd-pleasing dinner comes together faster than you can order takeout.
Ingredients
Main Ingredients:
- 2 lbs boneless, skinless chicken breasts
- 6 tablespoons unsalted butter
- ¼ cup honey
- 2 tablespoons soy sauce
Coating Ingredients:
- ¼ cup cornstarch
- ¼ cup all-purpose flour
- 1 teaspoon garlic powder
- ½ teaspoon onion powder
- ½ teaspoon paprika
- ¼ teaspoon black pepper
- ¼ teaspoon salt
Flavor and Garnish Ingredients:
- 2 tablespoons vegetable oil
- 6 cloves garlic
- 1 tablespoon rice vinegar
- 1 teaspoon red pepper flakes
- 1 tablespoon chopped fresh parsley
- 1 tablespoon sesame seeds
- Cooked white rice
- Steamed broccoli
- Green onions
Instructions
- Dice 2 lbs of chicken breasts into precise 1-inch cubes. Thoroughly pat each piece dry using paper towels to ensure crispy coating.
- Blend ¼ cup cornstarch, ¼ cup flour, 1 teaspoon garlic powder, ½ teaspoon onion powder, ½ teaspoon paprika, ¼ teaspoon black pepper, and ¼ teaspoon salt in a medium bowl.
- Tumble chicken pieces into seasoned flour mixture. Coat every cube completely, shaking off excess powder.
- Heat 2 tablespoons vegetable oil in a large skillet over medium-high heat until shimmering.
- Arrange chicken cubes in a single layer without overcrowding. Sear for 5-7 minutes, rotating periodically until golden brown and internal temperature reaches 165°F.
- Transfer cooked chicken to a paper towel-lined plate to absorb extra oil.
- Wipe skillet clean, then melt 6 tablespoons butter over medium heat.
- Saute 6 minced garlic cloves in melted butter for 1-2 minutes until aromatic.
- Incorporate ¼ cup honey, 2 tablespoons soy sauce, 1 tablespoon rice vinegar, and 1 teaspoon red pepper flakes. Mix thoroughly.
- Simmer sauce for 2-3 minutes until slightly thickened.
- Return chicken to skillet, coating each piece generously with sauce.
- Allow chicken to absorb sauce flavors for 1-2 minutes.
- Plate chicken over steamed white rice or broccoli.
- Sprinkle 1 tablespoon chopped parsley, 1 tablespoon sesame seeds, and sliced green onions as final garnish.
Notes
- Pat the chicken completely dry before coating to ensure a crispy exterior that helps the seasoning stick perfectly.
- Use a heavy-bottomed skillet or cast-iron pan to get an even, golden-brown sear on the chicken cubes without burning.
- For a gluten-free version, swap all-purpose flour with cornstarch or a gluten-free flour blend and use tamari instead of soy sauce.
- Adjust the red pepper flakes to control the heat level, or skip them entirely for a milder sauce that kids will enjoy.
- Prep Time: 10 minutes
- Cook Time: 12-14 minutes
- Category: Chicken
- Method: Frying
- Cuisine: American
Nutrition
- Serving Size: 4
- Calories: 455 kcal
- Sugar: 12 g
- Sodium: 370 mg
- Fat: 28 g
- Saturated Fat: 14 g
- Unsaturated Fat: 13 g
- Trans Fat: 0.1 g
- Carbohydrates: 18 g
- Fiber: 1 g
- Protein: 38 g
- Cholesterol: 115 mg
Susan Whitaker
Content Specialist & Home Cooking Guide
Expertise
Family-friendly Meals, Simple Healthy Cooking, Ingredient Substitutions, Beginner-friendly Recipes, Flexible Meal Prep
Education
Susan is the steady, practical guide at Mary Sue & Susan, bringing clarity, structure, and a warm sense of encouragement to every recipe she touches. Susan joined the site with a simple goal: help people cook with more confidence and less guesswork.