Korean-Inspired Tuna Cakes Recipe for a Crispy Treat
Craving korean style tuna cakes that burst with bold flavors and exciting textures? Seafood enthusiasts and home cooks constantly seek delicious alternatives to traditional protein dishes.
Packed with vibrant seasonings and simple ingredients, these savory cakes provide an incredible meal solution for busy weeknights.
Korean cuisine offers remarkable techniques that transform humble pantry staples into something extraordinary.
Crispy exterior and tender interior make these tuna cakes an irresistible choice for anyone wanting quick yet satisfying protein options.
Minimal preparation time means you can enjoy restaurant-worthy results without complicated cooking methods.
Serve these delectable cakes alongside your favorite side dishes for a complete and memorable dining experience that will have everyone asking for seconds.
What Makes Korean Style Tuna Cakes Stand Out
Core Ingredients of Korean Style Tuna Cakes
Main Protein:Vegetables:Binding Ingredients:Seasoning:Cooking Fat:Optional Flavor Boosters:Everyday Kitchen Equipment Korean Tuna Cakes
Steps to Prepare Korean Style Tuna Cakes
Prep Vegetables
Grab a sharp knife and finely chop your carrots, onions, and green onions. This helps everything blend smoothly in the tuna cakes. Make sure each veggie piece is tiny and uniform.
Drain and Flake Tuna
Open the 2 cans of tuna and drain them completely. Use a fork to break the tuna into small, loose pieces so it mixes well with other ingredients.
Combine Cake Ingredients
Grab a medium mixing bowl and add your tuna and chopped vegetables. Then add the following:
Mix everything until it forms a sticky, cohesive batter.
Optional Flavor Boosters
If you want extra kick, stir in these optional ingredients:
Shape Tuna Cakes
Use a tablespoon to scoop out portions and shape them into small patties. Press each cake to about 1/2-inch thickness.
Fry Tuna Cakes
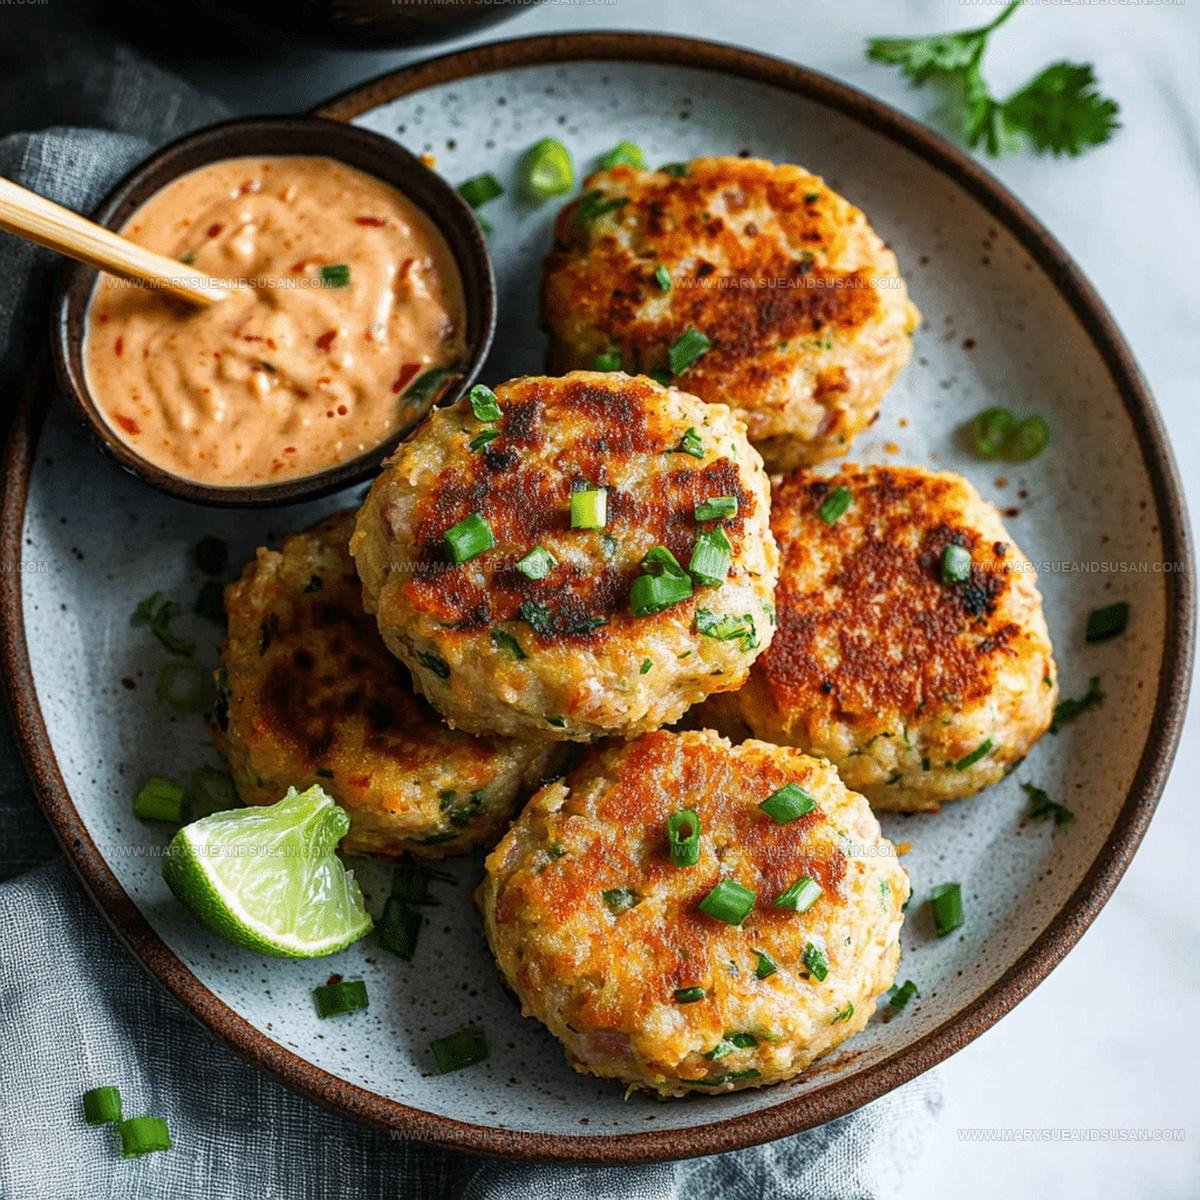
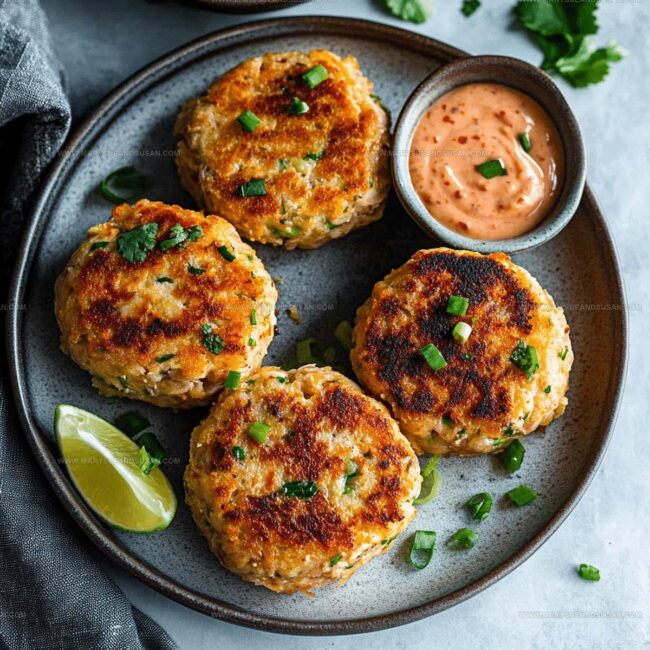
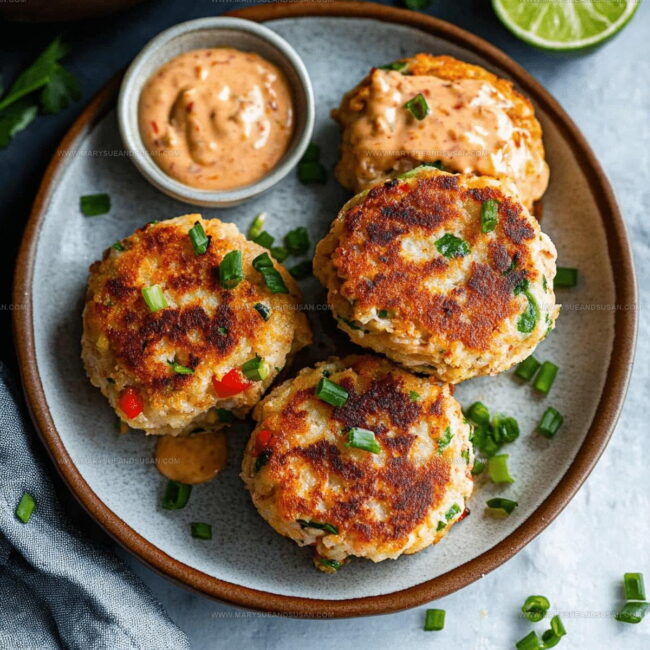
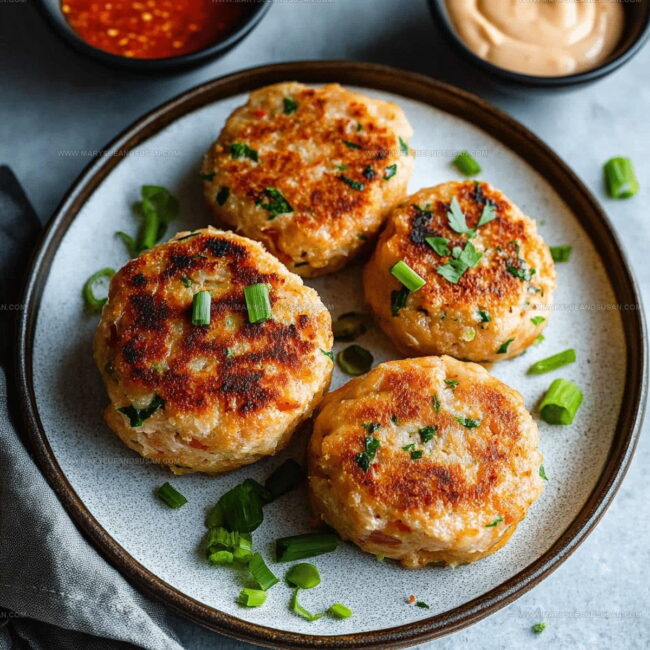
Heat a skillet with neutral oil over medium heat (around 350°F). Carefully place tuna cakes in the pan. Cook for 2-3 minutes per side until golden brown and crispy.
Drain and Serve
Transfer the hot tuna cakes onto paper towels to remove excess oil. Serve immediately with rice or your favorite dipping sauce.
Helpful Cooking Notes For Korean Style Tuna Cakes
Different Takes On Korean Style Tuna Cakes
Best Dipping And Serving Ideas For Korean Style Tuna Cakes
Best Storage Method For Korean Style Tuna Cakes
Questions And Answers For Korean Style Tuna Cakes
Can I use canned salmon instead of tuna?
Absolutely! Salmon works great and provides a similar texture. Just drain it thoroughly and flake it exactly like you would with tuna.
Do these tuna cakes freeze well?
Yes, they freeze perfectly. Let them cool completely, then place in a freezer-safe container with parchment between layers. They’ll stay fresh for up to 2 months.
What if my mixture seems too wet?
Sprinkle in a bit more flour to help bind the ingredients. The batter should hold together when you form patties without being too dry or crumbly.
Are these tuna cakes gluten-free?
Not as written. To make them gluten-free, swap regular flour for almond flour or a gluten-free blend. The texture will be slightly different but still delicious.
Can kids enjoy these tuna cakes?
Definitely! They’re bite-sized, crispy, and packed with protein. Most children find them tasty, especially when served with a fun dipping sauce.
What vegetables work best in this recipe?
Green onions, bell peppers, and finely diced carrots blend perfectly. Choose fresh, crisp vegetables for the best flavor and texture.

Korean Style Tuna Cakes Recipe
- Total Time: 16-18 minutes
- Yield: 2 1x
Description
Whipping up Korean Style Tuna Cakes brings pure comfort right to your dinner table with zesty Asian-inspired flavors packed into crispy little patties. Seasoned with green onions, garlic, and a splash of soy sauce, these quick cakes turn simple canned tuna into something seriously delicious that makes your taste buds dance.
Ingredients
Protein:
- 2 cans (5 oz each) tuna in water
- 1 egg
Vegetables:
- 1 medium carrot
- ¼ onion
- 1 green onion
- 1 tablespoon chopped kimchi (optional)
Supporting Ingredients:
- 1 tablespoon flour
- 1 tablespoon mayonnaise
- 1 teaspoon gochujang (optional)
- ½ teaspoon sesame oil (optional)
- Salt
- Black pepper
- Oil for frying
Instructions
- Drain 2 cans of tuna thoroughly, ensuring no excess water remains. Use a fork to break tuna into small, uniform flakes.
- Mince 1 medium carrot, ¼ onion, and 1 green onion into tiny, consistent pieces for even distribution.
- Grab a medium mixing bowl and combine 2 cans of flaked tuna, chopped vegetables, 1 whole egg, 1 tablespoon flour, 1 tablespoon mayonnaise, and a pinch of salt and pepper.
- Stir ingredients until they create a cohesive, slightly sticky mixture that holds together easily when pressed.
- Measure out ½ tablespoon portions and shape into round, flat cakes approximately ½ inch thick with gentle pressure.
- Place a skillet over medium heat and add enough neutral oil to cover the bottom, about 2 tablespoons.
- Once oil reaches 350°F, carefully slide tuna cakes into the pan, leaving space between each cake.
- Cook for 2-3 minutes per side, watching for a golden-brown crust that signals perfect crispiness.
- Transfer cakes to a paper towel-lined plate to absorb excess oil and maintain crunchiness.
- Serve immediately while warm, accompanied by your favorite dipping sauce or steamed rice.
Notes
- Drain tuna thoroughly to prevent soggy cakes that fall apart during cooking.
- Use fresh green onions and grated garlic for maximum flavor depth in the patties.
- Chilling the mixture for 15 minutes before shaping helps cakes hold together better during frying.
- For a gluten-free version, swap wheat flour with almond or rice flour and use gluten-free mayo.
- Prep Time: 10 minutes
- Cook Time: 6-8 minutes
- Category: Tuna
- Method: Frying
- Cuisine: Korean
Nutrition
- Serving Size: 2
- Calories: 240 kcal
- Sugar: 2 g
- Sodium: 400 mg
- Fat: 14 g
- Saturated Fat: 3 g
- Unsaturated Fat: 10 g
- Trans Fat: 0 g
- Carbohydrates: 10 g
- Fiber: 2 g
- Protein: 25 g
- Cholesterol: 110 mg
Susan Whitaker
Content Specialist & Home Cooking Guide
Expertise
Family-friendly Meals, Simple Healthy Cooking, Ingredient Substitutions, Beginner-friendly Recipes, Flexible Meal Prep
Education
Susan is the steady, practical guide at Mary Sue & Susan, bringing clarity, structure, and a warm sense of encouragement to every recipe she touches. Susan joined the site with a simple goal: help people cook with more confidence and less guesswork.