
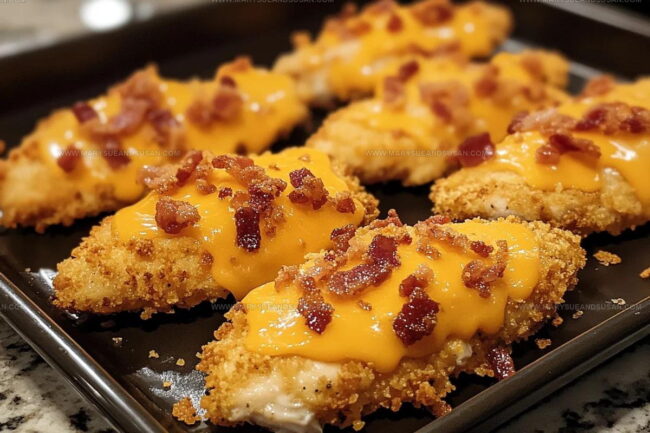
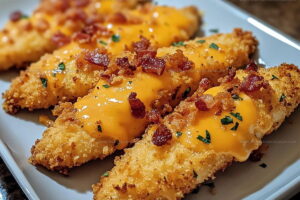
Cheddar Bacon Chicken Fingers Recipe for Hungry Weeknights
Succulent loaded cheddar bacon chicken fingers promise a flavor explosion that will revolutionize your meal experience.
Comfort food enthusiasts and savory snack lovers unite around this mouthwatering dish that defies ordinary appetizer expectations.
Crispy exterior meets rich, melted cheese and smoky bacon for a seriously addictive combination that screams indulgence.
Southern-style cooking meets gourmet sensibilities in this crowd-pleasing recipe designed to satisfy serious hunger pangs.
Protein-packed and intensely satisfying, these chicken fingers represent the ultimate crowd-pleaser for casual gatherings or weekend game nights.
Forget bland protein options and embrace a seriously delectable protein experience that transforms mundane meals into memorable moments.
One bite guarantees an instant connection with pure deliciousness that will have everyone requesting seconds.
What Makes Loaded Cheddar Bacon Chicken Fingers So Popular
Loaded Cheddar Bacon Chicken Fingers Ingredient List
Protein Base:Cheese and Bacon Topping:Coating Ingredients:Handy Kitchen Tools for Loaded Cheddar Bacon Chicken Fingers
Directions For Loaded Cheddar Bacon Chicken Fingers
Warm Up the Oven
Crank the oven to a toasty 400°F. Grab a baking sheet and line it with parchment paper or give it a quick spray of cooking oil so nothing sticks.
Create the Crispy Coating
Time to mix up a seriously delicious breading. In a shallow bowl, combine these ingredients:
Stir everything together until it looks like a magical crunchy mixture.
Egg Bath for Chicken
Crack 2 large eggs into a separate bowl and beat them until they’re smooth and uniform.
Dress the Chicken
Take each chicken tender and give it a quick dip in the beaten eggs. Let the excess drip off, then roll it around in the cheesy bacon coating. Press gently so the breading really sticks to your chicken.
Arrange on the Baking Sheet
Line up your coated chicken tenders on the prepared baking sheet. Make sure they’re not touching each other. Give the tops a light spray with cooking oil to help them get extra crispy.
Bake to Perfection
Slide the baking sheet into the 400°F oven. Bake for 15-20 minutes. They’re done when the coating turns a gorgeous golden brown and the chicken reaches an internal temperature of 165°F.
Serve and Enjoy
Pull those gorgeous chicken fingers out of the oven. Grab your favorite dipping sauce and get ready for a seriously tasty meal that’ll make everyone at the table happy.
Useful Kitchen Notes For Loaded Cheddar Bacon Chicken Fingers
What Are Loaded Cheddar Bacon Chicken Fingers Variations
Best Serving Options For Loaded Cheddar Bacon Chicken Fingers A Must Try Appetizer
Recommended Storage Method For Loaded Cheddar Bacon Chicken Fingers
Loaded Cheddar Bacon Chicken Fingers Questions About
Can I use chicken breasts instead of tenders?
Absolutely! Simply slice chicken breasts into strips about the same thickness as chicken tenders for even cooking.
How do I know the chicken is fully cooked?
Use a meat thermometer to check that the internal temperature reaches 165°F. The chicken should look golden brown and feel firm when touched.
Can these be made ahead of time?
Prepare the chicken fingers up to the coating stage, then refrigerate for a few hours before baking. This helps the coating stick better and keeps the chicken fresh.
What if I don’t have panko breadcrumbs?
Regular breadcrumbs work fine, though panko creates a crispier texture. In a pinch, crushed crackers can also substitute nicely.
Are these chicken fingers freezer-friendly?
Yes! After baking, let them cool completely, then freeze in a single layer. Reheat in the oven at 375°F for about 10-12 minutes to maintain crispiness.
Can I make these gluten-free?
Replace panko with gluten-free breadcrumbs or crushed gluten-free crackers, and ensure all other ingredients are certified gluten-free.
Loaded Cheddar Bacon Chicken Fingers Recipe
- Total Time: 30-35 minutes
- Yield: 4 1x
Description
Loaded Cheddar Bacon Chicken Fingers deliver crispy comfort with a cheesy upgrade. Bacon bits and melted cheddar make every bite extra satisfying.
Ingredients
Main Ingredients:
- 1 lb chicken tenders
- 1 cup shredded cheddar cheese
- 6 slices bacon
Supporting Ingredients:
- ½ cup panko breadcrumbs
- ¼ cup all-purpose flour
- 2 large eggs
Seasoning Ingredients:
- ½ teaspoon garlic powder
- ½ teaspoon onion powder
- ½ teaspoon paprika
- ¼ teaspoon salt
- ¼ teaspoon black pepper
- Cooking spray or oil
Instructions
- Crank your oven to 400°F and position a rack in the center. Spritz a baking sheet with cooking spray or line with parchment paper.
- Crumble 6 slices of bacon until finely chopped. Mix these bacon bits with 1 cup shredded cheddar, ½ cup panko breadcrumbs, and all your dry spices in a shallow bowl.
- Crack 2 large eggs into a separate bowl and whisk until completely blended.
- Take each chicken tender and dunk it into the beaten eggs, letting excess liquid drip away.
- Roll the egg-coated chicken directly into the cheese-bacon mixture, pressing firmly so the coating adheres completely.
- Transfer each breaded chicken tender onto the prepared baking sheet, ensuring they do not touch each other.
- Lightly mist the chicken tenders with cooking spray to help them turn golden and crisp.
- Slide the baking sheet into the 400°F oven and bake for 18 minutes, checking that internal temperature reaches 165°F.
- Remove the tenders from the oven and let them rest for 3 minutes to retain their juiciness.
- Plate your crispy chicken fingers and serve immediately with your preferred dipping sauce.
Notes
- Check the chicken’s internal temperature with a meat thermometer to ensure it’s fully cooked without drying out.
- Use thick-cut bacon for maximum flavor and crisp texture when crumbling into the coating mixture.
- For gluten-free options, swap panko breadcrumbs with almond flour or gluten-free breadcrumbs to maintain the crispy exterior.
- Prep the bacon and cheese coating ahead of time to make the final assembly quick and easy during busy weeknights.
- Prep Time: 15 minutes
- Cook Time: 15-20 minutes
- Category: Chicken
- Method: Baking
- Cuisine: American
Nutrition
- Serving Size: 4
- Calories: 390 kcal
- Sugar: 1 g
- Sodium: 650 mg
- Fat: 26 g
- Saturated Fat: 9 g
- Unsaturated Fat: 15 g
- Trans Fat: 0.3 g
- Carbohydrates: 12 g
- Fiber: 1 g
- Protein: 32 g
- Cholesterol: 180 mg
Mary Sue
Founder & Creative Recipe Developer
Expertise
Comfort Food Twists, Seasonal Cooking, Creative Flavor Pairings, Easy Weeknight Dinners, Flexible Pantry Cooking
Education
Mary Sue is the playful, creative recipe mind behind Mary Sue & Susan, known for big flavor ideas, warm storytelling, and dishes that feel both comforting and a little unexpected. She has a talent for taking familiar meals and giving them just enough personality to make them memorable.