Mexican Chicken Pinwheels Recipe That Disappears Fast
Mexican Chicken Pinwheels evokes a fun twist to party snacks and casual dinners that everyone seems to love.
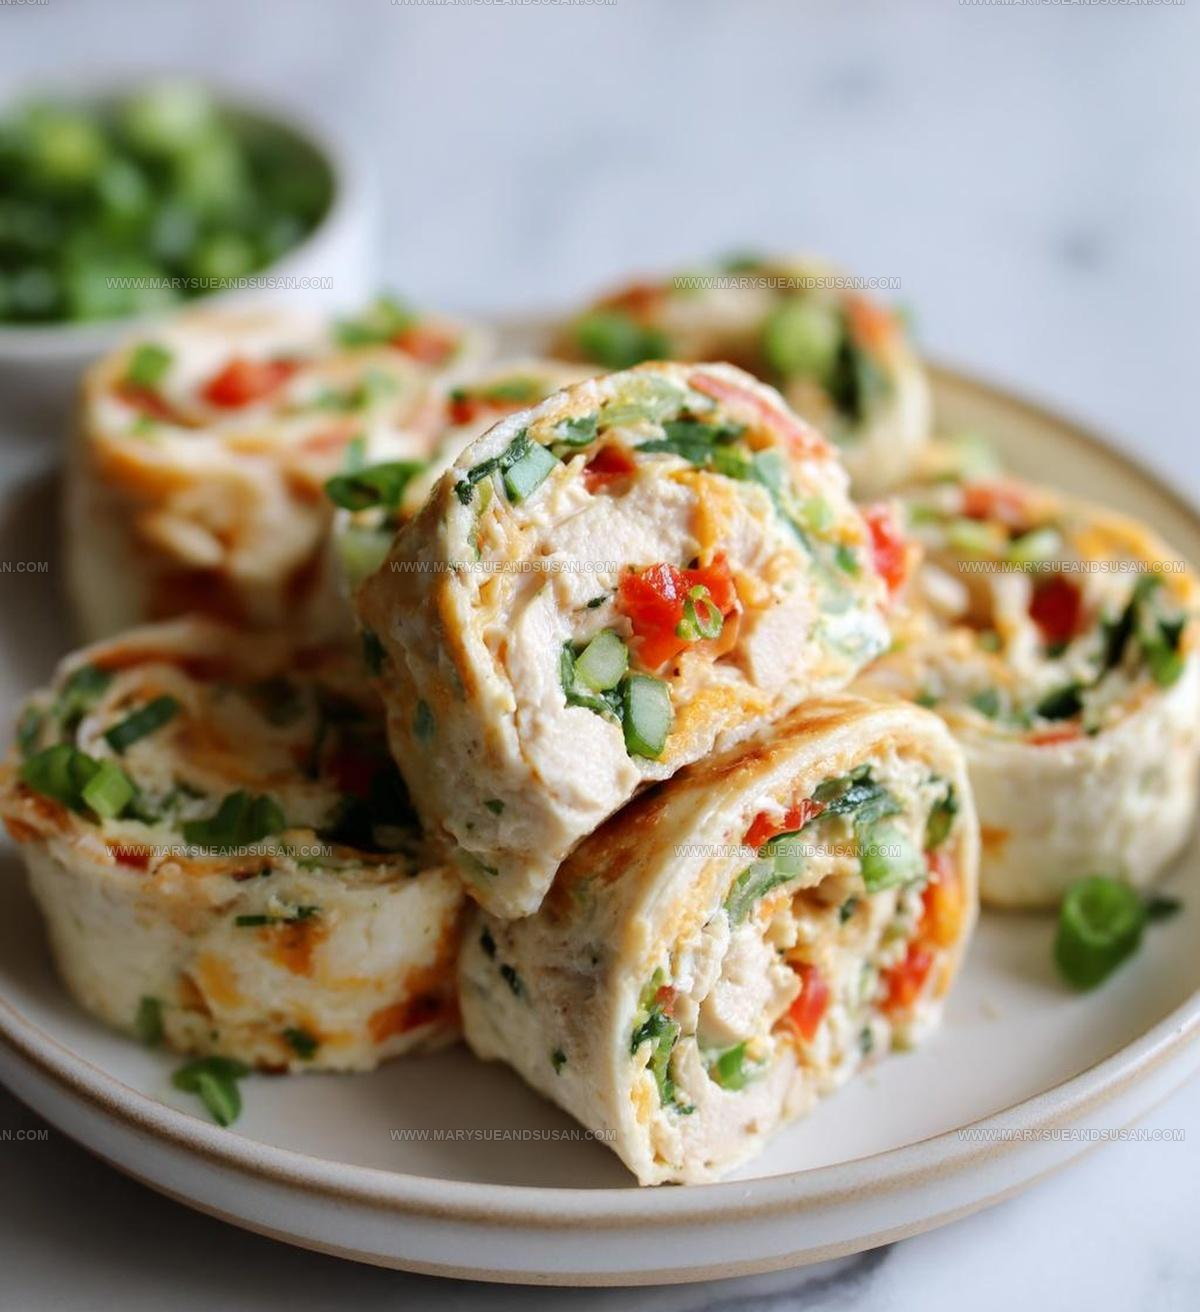
Rolled tortillas packed with bold south-of-the-border flavors make gatherings feel more festive without demanding hours in the kitchen.
Whether hosting friends or just looking for something different on a weeknight, pinwheels deliver big taste in a small, shareable package.
The spiral presentation looks impressive on any platter, yet the preparation stays refreshingly simple.
Serving something that disappears quickly always feels rewarding when you watch people enjoy what came from such minimal effort.
Pull out that tortilla stash and see how quickly a crowd gathers around.
Why Mexican Chicken Pinwheels Are Always Loved
Ingredient Lineup for Mexican Chicken Pinwheels
Protein Base:Creamy Binders:Flavor Enhancers:Wrap Component:Prep Tools for Mexican Chicken Pinwheels
Mexican Chicken Pinwheels Assembly Instructions
Mix the Filling
Grab a mixing bowl and toss in 2 cups of cooked shredded chicken. You’ll want to add these ingredients carefully:
Stir everything together until the mixture looks smooth and well combined.
Spread and Roll
Lay out your 4 large flour tortillas on a clean work surface. Spread the chicken mixture evenly across each tortilla, making sure to cover almost to the edges. Start rolling each tortilla tightly from one end to the other, creating a neat log shape.
Chill the Rolls
Wrap each rolled tortilla in plastic wrap. Slide them into the refrigerator and let them chill for at least 1 hour. This helps the pinwheels set and makes them easier to slice.
Slice and Serve
After chilling, take the rolls out of the refrigerator. Use a sharp knife to slice each roll into bite-sized pinwheels about 1 inch thick. Arrange on a serving plate and watch them disappear at your next gathering.
What Tips Help Roll Mexican Chicken Pinwheels
Easy Variations for Mexican Chicken Pinwheels
Serving Ideas for Mexican Chicken Pinwheels
How to Store Mexican Chicken Pinwheels
Mexican Chicken Pinwheels FAQs
Can I use rotisserie chicken for this recipe?
Rotisserie chicken works perfectly and saves time prepping the filling. Just shred it finely and mix with other ingredients.
How do I keep my pinwheels from unrolling?
Wrap them tightly in plastic wrap and chill for at least an hour. The cold helps them hold their shape when you slice them.
Are these pinwheels good for meal prep?
Absolutely! You can make them ahead and store in the refrigerator for 2-3 days before serving. Great for quick snacks or party appetizers.
What tortillas work best for pinwheels?
Soft flour tortillas are ideal. Look for medium-sized tortillas that are fresh and pliable so they roll easily without cracking.
Can I make these pinwheels spicy?
Add diced jalapeños or use a hot salsa to kick up the heat. Adjust the spice level to match your preference.
Are these pinwheels gluten-free?
Not automatically. Check that your tortillas and salsa are gluten-free if you need a gluten-free version.
Mexican Style Chicken Pinwheel Recipe
- Total Time: 1 hour 15 minutes
- Yield: 4 to 6 1x
Description
These Mexican chicken pinwheels bring together tender rotisserie chicken, cream cheese, salsa, and melted cheddar wrapped in soft tortillas for the ultimate party appetizer. They’re quick to make, packed with zesty flavor, and slice up perfectly for sharing.
Ingredients
Main Ingredients:
- 2 cups shredded chicken
- 4 large flour tortillas
- 1 cup shredded cheddar cheese
Creamy Components:
- 1 cup cream cheese, softened
- 1 cup salsa
Supporting Ingredients:
- ½ cup chopped green onions
Instructions
- Combine 2 cups shredded chicken, 1 cup softened cream cheese, 1 cup salsa, 1 cup cheddar cheese, and ½ cup green onions in a mixing bowl until thoroughly blended.
- Lay out a large flour tortilla on a clean surface and spread the chicken mixture evenly, leaving a small border around the edges.
- Carefully roll the tortilla tightly from one end to the other, ensuring the filling stays compact and contained.
- Wrap each rolled tortilla in plastic wrap, creating a secure seal to maintain shape.
- Chill the wrapped tortillas in the refrigerator for at least 1 hour to help them set and make slicing easier.
- Remove the plastic wrap and slice each roll into 1-inch thick pinwheels using a sharp knife.
- Arrange the pinwheels on a serving platter, presenting them with the swirled filling facing upward for an appealing presentation.
Notes
- Refrigerating the rolled tortillas helps them hold their shape and makes slicing easier, so don’t skip this chilling step.
- For a lighter version, swap regular cream cheese for reduced-fat and use whole wheat tortillas to boost nutrition.
- Spice lovers can add diced jalapeños or a dash of hot sauce to the chicken mixture for extra kick.
- These pinwheels are perfect for make-ahead appetizers and stay fresh in the refrigerator for up to two days when wrapped tightly.
- Prep Time: 15 minutes
- Cook Time: 0 minutes
- Category: Chicken
- Method: Rolling
- Cuisine: Mexican
Nutrition
- Serving Size: 4 to 6
- Calories: 320 kcal
- Sugar: 3 g
- Sodium: 520 mg
- Fat: 18 g
- Saturated Fat: 9 g
- Unsaturated Fat: 7 g
- Trans Fat: 0.5 g
- Carbohydrates: 22 g
- Fiber: 2 g
- Protein: 20 g
- Cholesterol: 55 mg
Susan Whitaker
Content Specialist & Home Cooking Guide
Expertise
Family-friendly Meals, Simple Healthy Cooking, Ingredient Substitutions, Beginner-friendly Recipes, Flexible Meal Prep
Education
Susan is the steady, practical guide at Mary Sue & Susan, bringing clarity, structure, and a warm sense of encouragement to every recipe she touches. Susan joined the site with a simple goal: help people cook with more confidence and less guesswork.