One Pan Chicken Recipe Ready in Minutes
One pan chicken makes dinnertime feel effortless while delivering comfort food that satisfies everyone around the table.
Busy weeknights call for meals that come together without hassle, and having everything cook in a single dish means less cleanup and more time to relax.
The beauty of simple cooking lies in how flavors meld together naturally, creating something warm and wholesome that feels homemade in the best possible way.
When life gets hectic, having a reliable meal option that doesn't compromise on taste becomes invaluable.
Families appreciate how quickly the kitchen returns to normal after dinner, while the delicious results make it feel like real effort went into the meal.
Sheet pan suppers have earned their popularity for good reason, they solve the eternal question of what to make when time is short but appetites are big.
You can count on this approach to produce consistently satisfying results that work for casual weeknights or when company stops by unexpectedly.
Get cooking and see how simple dinners can become favorites that rotate into regular meal plans.
What Sets One Pan Chicken Apart
Required Ingredients for One Pan Chicken
Main Proteins:Fruit Component:Cooking Fats:Seasoning Blend:Common Cooking Tools for One Pan Chicken
Classic Way To Make One Pan Chicken
Prepare Chicken
Grab those 4 bone-in chicken thighs and give them a good pat down with paper towels. Season each side generously with the following:
Let the seasonings really hug the chicken.
Heat the Skillet
Warm up a skillet over medium-high heat and drizzle in 1 tablespoon olive oil. Wait until the oil gets that perfect shimmer that tells you it’s ready to cook.
Sear Chicken Skin
Carefully place your seasoned chicken thighs skin-side down in the hot skillet. Press them gently so the skin makes full contact with the pan. Listen for that satisfying sizzle as the skin starts to turn golden. Cook for 5-7 minutes until the skin looks crispy and delicious.
Flip and Continue Cooking
Flip the chicken and cook the other side for another 5 minutes. You’re looking for a beautiful golden color that screams flavor.
Prepare Apples
While the chicken is doing its thing, grab those 2 large apples. Core them and slice into chunks or wedges – whatever shape makes you happy.
Remove Chicken
Take the chicken out of the skillet and set it on a plate. Keep all those delicious browned bits and fat in the pan – that’s where the magic happens.
Caramelize Apples
Toss the apple pieces into the same skillet. Cook over medium heat for 8-10 minutes, stirring now and then. Watch as they soften and get those gorgeous caramelized edges.
Combine and Simmer
Nestle the chicken back into the skillet right on top of the apples. If you’re feeling indulgent, add 1 tablespoon of butter for extra richness. Cover the skillet loosely and let everything cook together on medium-low heat for 10-15 minutes.
Check Doneness
Make sure the chicken reaches an internal temperature of 165°F. The apples should be tender and the chicken perfectly cooked.
Crisp the Skin
Uncover the skillet and bump up the heat slightly. This will re-crisp that chicken skin for a couple of minutes. Listen for the sizzle and look for that perfect crispiness.
Final Touch
Pull the skillet off the heat. Give everything a taste and adjust the seasoning if needed. Sprinkle some extra sage on top for a fresh finish.
Serve and Enjoy
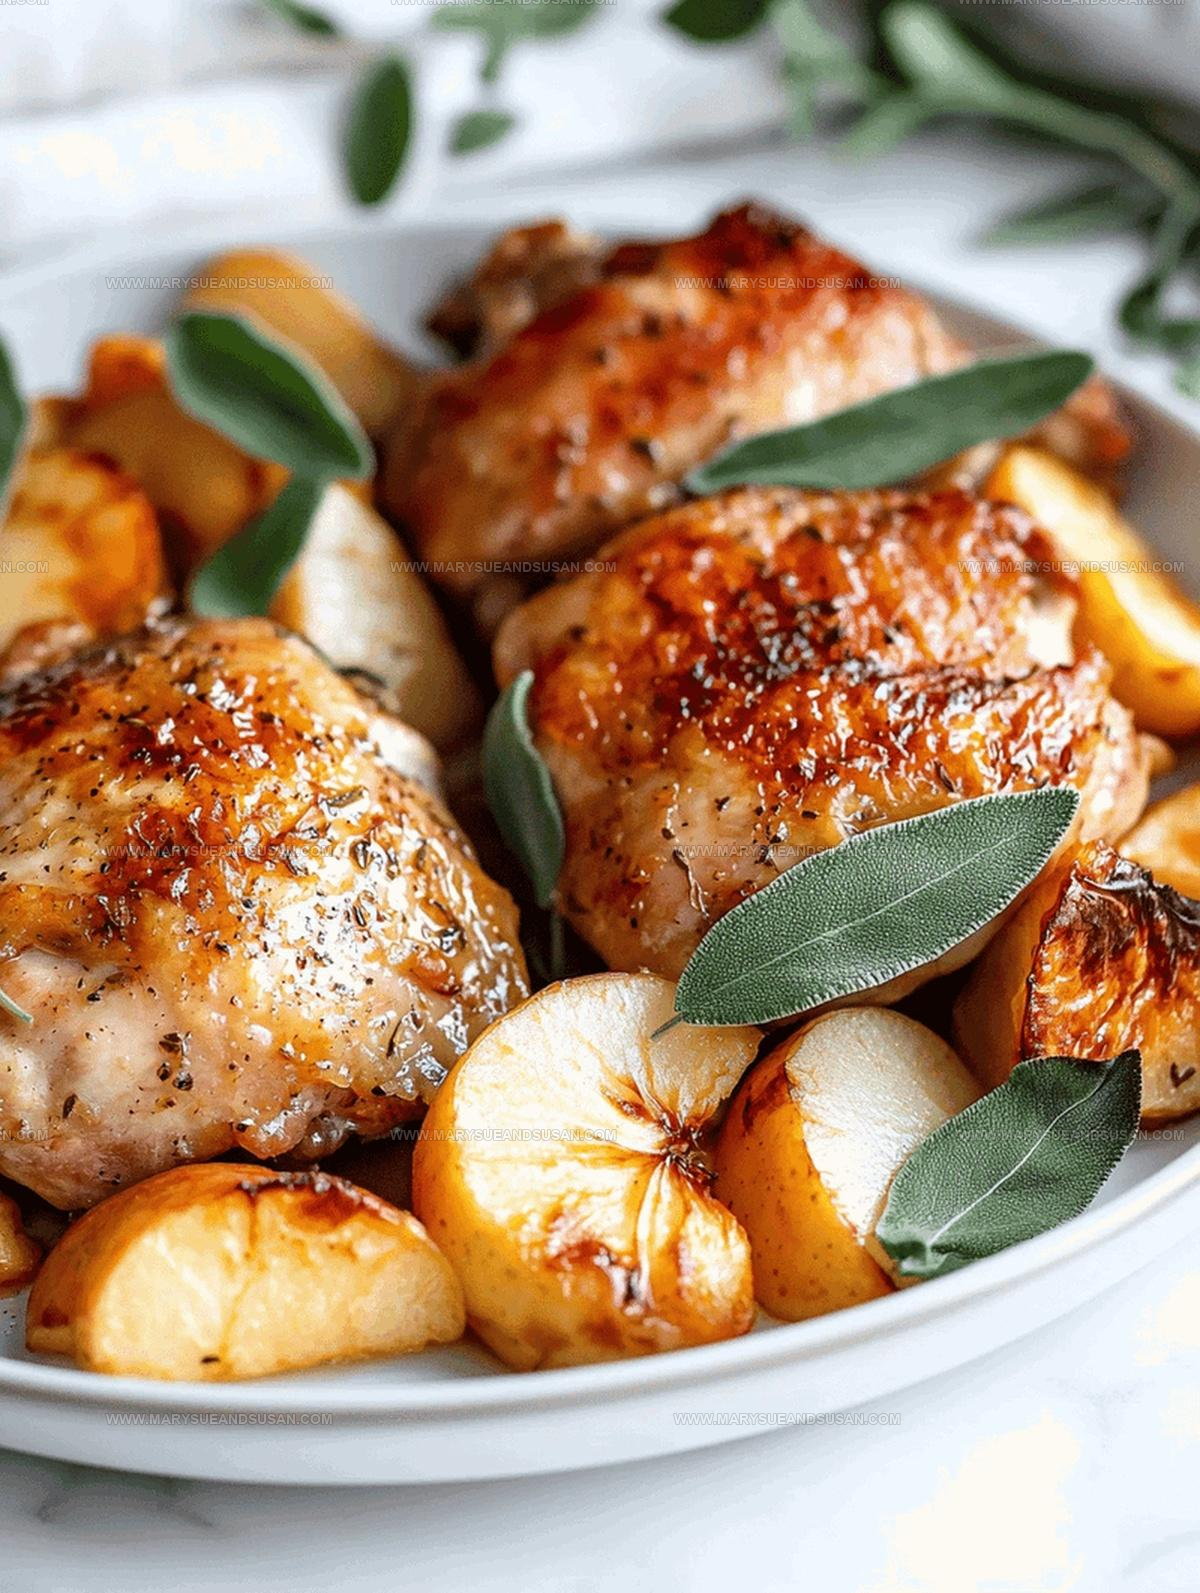
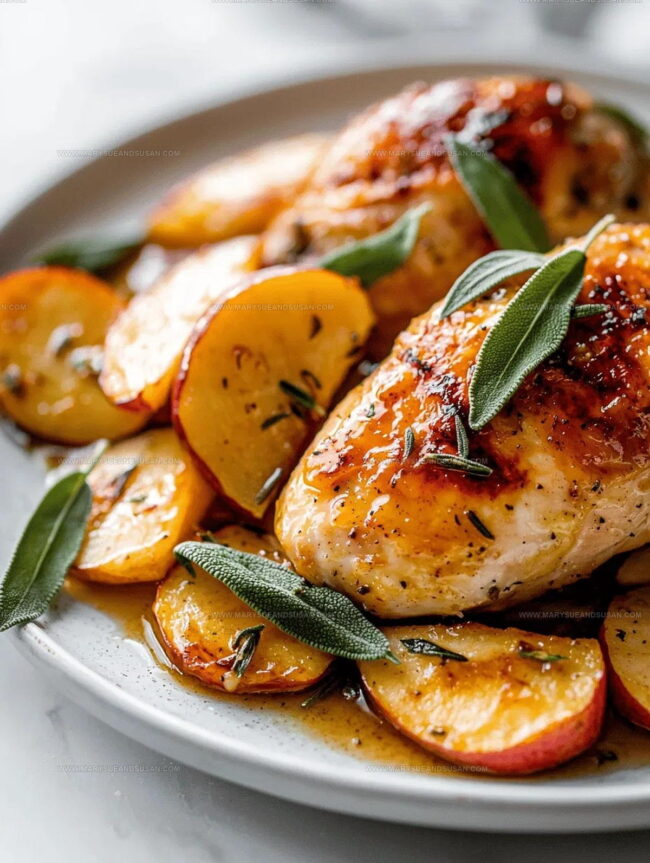
Plate up those chicken thighs with a generous helping of caramelized apples. Drizzle the pan juices over the top for an extra burst of flavor. Dinner is served!
Helpful Notes for One Pan Chicken
Different Takes on One Pan Chicken
Simple Serving Ideas for One Pan Chicken
Best Storage Practices For One Pan Chicken
One Pan Chicken Answers To Common Questions
Can I use boneless chicken thighs instead of bone-in?
Boneless thighs work fine, but bone-in provides more flavor and keeps the meat juicier during cooking. Just adjust cooking time slightly since boneless thighs cook faster.
What type of apples work best for this recipe?
Firm, tart apples like Granny Smith or Honeycrisp hold their shape and provide a nice balance to the rich chicken. Avoid softer varieties that might turn mushy during cooking.
Do I need a cast-iron skillet for this recipe?
While cast-iron is ideal for even heating and developing a crispy chicken skin, a regular heavy-bottomed skillet will also work perfectly. The key is maintaining consistent medium-high heat.
How can I tell if the chicken is fully cooked?
Use a meat thermometer to check that the internal temperature reaches 165°F at the thickest part of the thigh. The juices should run clear, and the meat should no longer look pink.
Can I make this recipe ahead of time?
Prepare the chicken and apples just before serving for the best texture and crispiest skin. If needed, you can reheat gently in a covered skillet to prevent drying out.

One Pan Chicken Recipe
- Total Time: 49 minutes
- Yield: 4 1x
Description
Autumn chicken brings warmth and comfort straight to your dinner table, with simple ingredients and minimal cleanup. Roasted seasonal vegetables join tender chicken pieces in one delightful pan that makes weeknight cooking surprisingly easy.
Ingredients
Main Ingredients:
- 4 bone-in chicken thighs
- 2 apples
Seasonings:
- 2 teaspoons fresh sage
- 1 teaspoon salt
- ½ teaspoon black pepper
Supporting Ingredients:
- 2 tablespoons olive oil
- 1 tablespoon butter
Instructions
- Thoroughly dry 4 bone-in chicken thighs using paper towels, then generously coat both sides with 1 teaspoon salt, ½ teaspoon black pepper, and 2 teaspoons chopped sage.
- Pour 1 tablespoon olive oil into a skillet, heating over medium-high until the surface shimmers with heat.
- Position chicken thighs skin-side down in the hot skillet, pressing gently to ensure maximum contact. Sear for 6 minutes at 375°F, creating a golden, crispy exterior.
- Flip chicken thighs and cook the opposite side for an additional 5 minutes until edges turn golden brown.
- Core 2 large firm apples and slice into ½-inch thick chunks, preparing them for caramelization.
- Transfer chicken to a separate plate, leaving behind the delicious rendered fat in the skillet.
- Drop apple chunks into the same skillet, cooking at 350°F for 9 minutes and stirring occasionally to develop caramelized edges.
- Return chicken thighs to the skillet, nestling them among the softened apple pieces. Add 1 tablespoon butter if desired.
- Reduce heat to 325°F, covering the skillet loosely and allowing everything to simmer for 12 minutes until chicken reaches 165°F internal temperature.
- Uncover and increase heat to 400°F for 2 minutes, re-crisping the chicken skin until it sounds softly sizzling.
- Remove from heat, taste the sauce, and adjust seasoning as needed. Garnish with additional fresh sage if you prefer.
Notes
- Pat the chicken thighs completely dry to ensure extra crispy skin that develops a beautiful golden-brown color during searing.
- Choose firm baking apples like Granny Smith or Honeycrisp that hold their shape and provide a nice balance of tartness to the rich chicken.
- Consider swapping chicken thighs with chicken breasts, but reduce cooking time to prevent drying out the meat and maintain tenderness.
- For a gluten-free version, verify all ingredients are certified gluten-free and use alternative herbs or seasonings as needed.
- Prep Time: 15 minutes
- Cook Time: 34 minutes
- Category: Chicken
- Method: Sautéing
- Cuisine: American
Nutrition
- Serving Size: 4
- Calories: 365 kcal
- Sugar: 6 g
- Sodium: 600 mg
- Fat: 24 g
- Saturated Fat: 6 g
- Unsaturated Fat: 15 g
- Trans Fat: 0.1 g
- Carbohydrates: 14 g
- Fiber: 3 g
- Protein: 28 g
- Cholesterol: 110 mg
Susan Whitaker
Content Specialist & Home Cooking Guide
Expertise
Family-friendly Meals, Simple Healthy Cooking, Ingredient Substitutions, Beginner-friendly Recipes, Flexible Meal Prep
Education
Susan is the steady, practical guide at Mary Sue & Susan, bringing clarity, structure, and a warm sense of encouragement to every recipe she touches. Susan joined the site with a simple goal: help people cook with more confidence and less guesswork.