
Crispy Chicken Drumsticks Recipe for Juicy Golden Bites
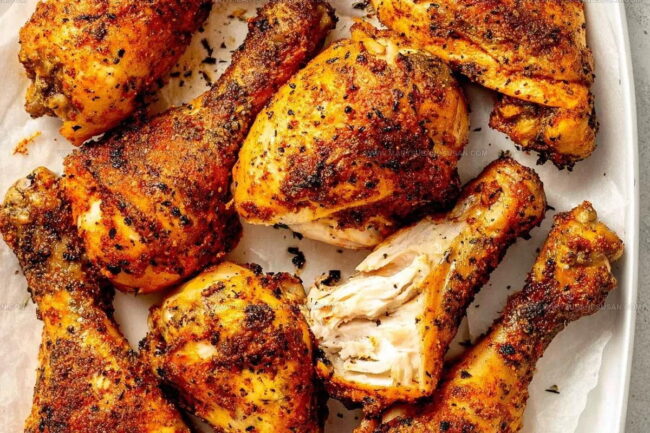
Crispy chicken drumsticks reign supreme in comfort food circles, promising a mouthwatering experience that satisfies deep cravings.
Perfectly seasoned drumsticks represent the ultimate crowd-pleasing meal for family gatherings and casual dinner nights.
Crunchy exterior and juicy meat create an irresistible combination that never fails to impress hungry diners.
Home cooks adore how simple yet spectacular these drumsticks can be when prepared with the right techniques.
Seasoning techniques transform ordinary chicken into a memorable dining adventure that sparks conversation around the table.
Professional chefs and home cooking enthusiasts alike appreciate the delightful balance between crispy texture and rich flavor profiles.
Mastering this recipe guarantees a delicious meal that will become a treasured favorite in your cooking repertoire.
What Makes Seasoned Crispy Chicken Drumsticks So Satisfying
Core Ingredients For Seasoned Crispy Chicken Drumsticks
Chicken Base:Coating Oil:Seasoning Blend:Simple Kitchen Equipment for Seasoned Crispy Chicken Drumsticks
Preparing Seasoned Crispy Chicken Drumsticks Step by Step
Preheat the Oven
Set your oven to exactly 420°F. Grab a baking sheet and a wire rack that fits perfectly on top.
Prepare the Chicken
Grab those 2 pounds of drumsticks and use paper towels to blot them completely dry. Check that the skin is smooth and not bunched up on any pieces.
Season the Drumsticks
Toss the drumsticks into a large mixing bowl. Drizzle with the olive oil, making sure each piece gets coated. Now add your seasonings:
Massage those seasonings into every nook and cranny of the chicken.
Prepare for Baking
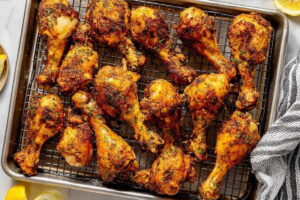
Spray your wire rack with a light coating of oil to prevent sticking. Arrange the drumsticks in a single layer, making sure they aren’t touching each other.
First Bake
Slide the baking sheet into the preheated oven. Bake for exactly 35 minutes.
Flip and Finish
Pull the drumsticks out and carefully turn each piece over. Return to the oven for another 15 minutes.
Check for Doneness
The chicken is ready when it turns a beautiful golden brown and reaches an internal temperature of 165°F. A meat thermometer works best for checking this.
Serve and Enjoy
Transfer those crispy drumsticks to a serving plate. They’re best enjoyed hot and straight from the oven.
Chef’s Notes For Crispy Chicken Drumsticks
What New Spins Enhance Crispy Chicken Drumsticks
How To Plate Crispy Seasoned Chicken Drumsticks
Best Storage Practices For Crispy Chicken Drumsticks
Seasoned Crispy Chicken Drumsticks Common Questions
Can I use chicken thighs instead of drumsticks?
Absolutely! Chicken thighs work perfectly with this recipe. Just adjust cooking time slightly based on their size and thickness to ensure they reach the correct internal temperature.
Do I need a wire rack for baking?
A wire rack helps air circulate around the drumsticks, creating that awesome crispy skin. If you don’t have one, you can use a rimmed baking sheet, but the skin might not get as crisp.
How do I know the seasonings are well mixed?
Toss the drumsticks in a large bowl and use your hands to ensure every inch gets coated. Wear food-safe gloves if touching raw chicken makes you uncomfortable.
What if my drumsticks have extra skin?
Smooth out any folded or bunched skin before seasoning. This helps create an even, crispy exterior that looks and tastes amazing.
Can I prep these ahead of time?
Season the drumsticks up to 24 hours before baking. Cover and refrigerate, then pull them out about 30 minutes before cooking to take the chill off.
Oven-Crispy Seasoned Chicken Drumsticks Recipe
- Total Time: 1 hour
- Yield: 4 1x
Description
Seasoned crispy chicken drumsticks deliver a crunch that’ll make your dinner table come alive with flavor. Perfectly spiced and golden brown, these drumsticks turn an ordinary meal into a memorable feast for your hungry family.
Ingredients
Main Ingredients:
- 2 lbs pasture-raised chicken drumsticks
Seasoning:
- 1 tsp sea salt
- 1 tsp garlic powder
- 1 tsp chili powder
- 1 tsp oregano
- 1 tsp paprika
- ½ tsp ground black pepper
Supporting Ingredients:
- 2 tablespoons extra virgin olive oil
Instructions
- Warm your oven to a toasty 420°F, ensuring your rack sits in the middle position for even cooking.
- Take your chicken drumsticks and firmly pat them completely dry with paper towels, removing every trace of moisture.
- Transfer drumsticks into a spacious mixing bowl, carefully spreading each piece’s skin so it’s smoothly covering the entire meat surface.
- Drizzle 2 tablespoons of extra virgin olive oil directly over the drumsticks, then sprinkle 1 teaspoon each of sea salt, garlic powder, chili powder, oregano, and paprika, plus ½ teaspoon ground black pepper.
- Gently massage the seasonings into each drumstick, guaranteeing every inch gets a perfect, even coating.
- Prepare a baking sheet with a wire rack, giving it a light spray of cooking oil to prevent sticking.
- Position your seasoned drumsticks across the rack, ensuring they’re not touching and have breathing room between them.
- Slide the baking sheet into the preheated oven and roast for 35 minutes, allowing the skin to start transforming into a gorgeous golden color.
- Carefully remove the sheet and flip each drumstick to ensure balanced browning, then return to the oven for another 15 minutes.
- Check that your drumsticks have reached a perfect internal temperature of 165°F and display a crispy, amber-brown exterior.
- Let the chicken rest for 5 minutes before serving to allow juices to redistribute and maintain maximum tenderness.
Notes
- Ensure drumsticks are completely dry before seasoning to achieve maximum crispiness and help the skin brown beautifully.
- Let the chicken sit at room temperature for 15-20 minutes before cooking to promote even heating and prevent tough meat.
- For extra crispy skin, pat the drumsticks with baking powder before adding oil and seasonings to help draw out moisture.
- Experiment with different spice blends like Cajun, Mediterranean, or herb-based mixes to customize the flavor profile to your taste.
- Prep Time: 10 minutes
- Cook Time: 50 minutes
- Category: Chicken
- Method: Baking
- Cuisine: American
Nutrition
- Serving Size: 4
- Calories: 320 kcal
- Sugar: 0 g
- Sodium: 550 mg
- Fat: 20 g
- Saturated Fat: 4.5 g
- Unsaturated Fat: 14 g
- Trans Fat: 0 g
- Carbohydrates: 1 g
- Fiber: 1 g
- Protein: 29 g
- Cholesterol: 120 mg
Susan Whitaker
Content Specialist & Home Cooking Guide
Expertise
Family-friendly Meals, Simple Healthy Cooking, Ingredient Substitutions, Beginner-friendly Recipes, Flexible Meal Prep
Education
Susan is the steady, practical guide at Mary Sue & Susan, bringing clarity, structure, and a warm sense of encouragement to every recipe she touches. Susan joined the site with a simple goal: help people cook with more confidence and less guesswork.