
Ranch Chicken Tenders Recipe That Stay Crispy & Juicy
Crispy ranch chicken tenders deliver the perfect weeknight solution when hunger strikes and time is short.
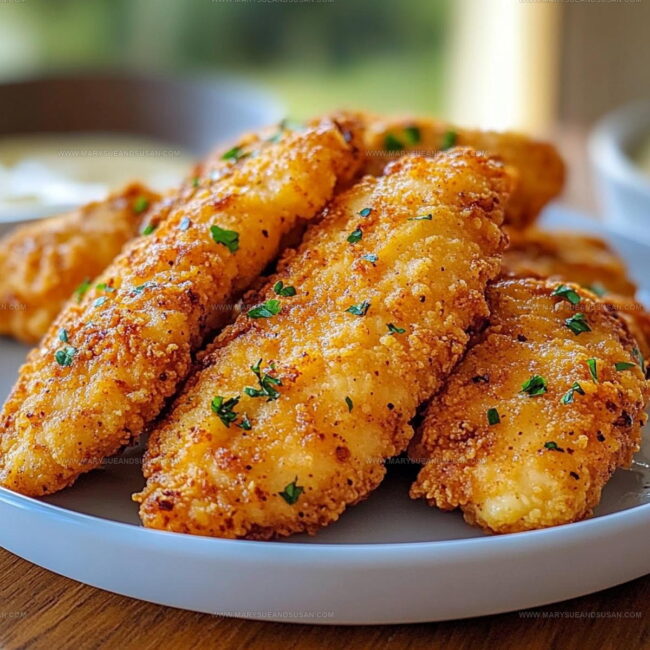
The savory ranch flavor combined with an ultra-crunchy coating makes every bite satisfying for everyone at the table.
Kids gobble them up happily while adults appreciate how simple they are to prepare.
Serve them alongside your favorite dipping sauces for a meal that feels like a treat without requiring hours in the kitchen.
The golden-brown exterior stays wonderfully crisp, making them ideal for dinner or game-day snacking.
Pair them with fresh vegetables or a simple salad to round out the plate.
Once you taste how much better homemade can be than anything from a freezer bag, there's no turning back.
What Makes Crispy Ranch Chicken Tenders So Flavorful
What Makes Crispy Ranch Chicken Tenders
Chicken:Breading Components:Seasoning and Flavor:Cooking Medium:Gear Required for Crispy Ranch Chicken Tenders
How Ranch-Seasoned Chicken Tenders Are Prepared

Prep Work
Set up three shallow dishes on your countertop. In the first dish, mix 1/2 cup (60g) all-purpose flour with a pinch of salt and pepper. In the second dish, crack and whisk 2 large eggs until smooth. In the third dish, combine 1 cup (120g) panko breadcrumbs with the entire packet of ranch seasoning mix.
Coat the Chicken
Take your 34 boneless, skinless chicken breasts and transform them into tenders by cutting into strips if needed. Roll each tender first through the seasoned flour, ensuring a light, even coating. Next, dunk the floured chicken into the egg wash, letting excess drip off. Finally, press the chicken into the ranch-panko mixture, making sure every inch gets a crispy coating.
Heat the Oil
Pour enough vegetable or canola oil into a large skillet to reach about 1/2 inch deep. Heat the oil to exactly 350°F using a kitchen thermometer. The right temperature ensures a crispy exterior without burning.
Fry to Golden Perfection
Carefully place the coated chicken tenders into the hot oil. Cook for 4-5 minutes on the first side until deep golden brown. Flip and cook the other side for another 4-5 minutes. The chicken should reach an internal temperature of 165°F for safe eating.
Drain and Season
Transfer the hot tenders onto a plate lined with paper towels to absorb extra oil. Sprinkle a little salt over the tenders while they’re still steaming. This final touch enhances their flavor and crunch.
Serve and Enjoy
Plate your crispy ranch chicken tenders alongside fresh vegetables or hot french fries. Set out a small bowl of extra ranch dressing for dipping. Dinner is ready in about 25 minutes from start to finish!
Crunch-Focused Cooking Tips for Crispy Ranch Chicken Tenders
Flavor Adjustments for Crispy Ranch Chicken Tenders
Serving Crispy Ranch Chicken Tenders Hot and Fresh
How to Store Crispy Ranch Chicken Tenders
Crispy Ranch Chicken Tenders: What Readers Ask
Can I make these chicken tenders ahead of time?
You can prepare the tenders up to the breading stage and refrigerate them, covered, for up to 2 hours before frying. This helps the coating stick better and ensures crispy results.
What if I don’t have a meat thermometer?
Look for golden brown color and crisp exterior. Chicken should reach 165°F internal temperature. Cut into the thickest piece to check no pink remains.
How do I keep the breading from falling off?
Pat chicken dry before starting, use a light touch when dredging, and let each coating set briefly before moving to the next bowl. This helps the layers adhere perfectly.
Can these be baked instead of fried?
Definitely! Spray breaded tenders with cooking spray, place on a wire rack over a baking sheet, and bake at 425°F for 15-20 minutes, flipping halfway through.
What brand of ranch seasoning works best?
Hidden Valley ranch mix provides the most consistent flavor. However, any dry ranch seasoning packet from the spice aisle will work great.

Ranch Chicken Tenders Recipe
- Total Time: 20 minutes
- Yield: 3 to 4 1x
Description
Crispy Ranch Chicken Tenders bring serious flavor to your dinner table with a perfectly seasoned crunch that makes weeknight meals super satisfying. Coating tender chicken strips in ranch seasoning and crispy breadcrumbs guarantees a meal everyone at the table will devour.
Ingredients
Proteins:
- 3 to 4 boneless, skinless chicken breasts
Dry Ingredients:
- 1 cup panko breadcrumbs
- ½ cup all-purpose flour
- 1 packet ranch seasoning mix
Wet Ingredients and Seasonings:
- 2 large eggs
- Salt and pepper to taste
- Cooking oil (vegetable or canola)
Instructions
- Arrange three wide, shallow dishes on your countertop: first with ½ cup all-purpose flour seasoned with salt and pepper, second with 2 large eggs whisked thoroughly, third with 1 cup panko breadcrumbs mixed with entire packet of ranch seasoning mix.
- Take each chicken tender and thoroughly coat it in seasoned flour, shaking off excess. Immediately dunk the floured piece into beaten eggs, ensuring complete coverage.
- Transfer egg-coated tender directly into ranch-seasoned breadcrumb mixture, pressing firmly to create a thick, even coating that adheres completely to the chicken.
- Pour 2 inches of vegetable oil into a large skillet, heating to precisely 350°F. Use a digital thermometer to confirm accurate temperature for consistent cooking.
- Carefully lower breaded tenders into hot oil, cooking 4-5 minutes per side until exterior reaches a deep golden-brown color and internal temperature reaches 165°F.
- Remove tenders using metal tongs, placing them on a paper towel-lined plate to absorb excess oil. Immediately sprinkle with pinch of salt while still sizzling hot.
- Let tenders rest 2-3 minutes before serving to allow coating to set and maintain maximum crispiness. Pair with ranch dressing for delicious dipping.
Notes
- Use fresh chicken tenders for the best texture and flavor, and pat them completely dry before coating.
- Make sure the oil reaches the right temperature before adding chicken, which prevents soggy breading and ensures a crisp exterior.
- Crush the ranch seasoning packet finely so it distributes evenly through the panko breadcrumbs for consistent flavor in every bite.
- Let the coated chicken rest for 10 minutes before frying to help the breading adhere better and create a crunchier crust.
- Prep Time: 10 minutes
- Cook Time: 10 minutes
- Category: Chicken
- Method: Frying
- Cuisine: American
Nutrition
- Serving Size: 3 to 4
- Calories: 328 kcal
- Sugar: 1 g
- Sodium: 560 mg
- Fat: 15 g
- Saturated Fat: 3 g
- Unsaturated Fat: 10 g
- Trans Fat: 0 g
- Carbohydrates: 18 g
- Fiber: 1.5 g
- Protein: 35 g
- Cholesterol: 120 mg
Susan Whitaker
Content Specialist & Home Cooking Guide
Expertise
Family-friendly Meals, Simple Healthy Cooking, Ingredient Substitutions, Beginner-friendly Recipes, Flexible Meal Prep
Education
Susan is the steady, practical guide at Mary Sue & Susan, bringing clarity, structure, and a warm sense of encouragement to every recipe she touches. Susan joined the site with a simple goal: help people cook with more confidence and less guesswork.