
Crispy Chicken Chimichangas Recipe for Authentic Mexican Flavor
Craving chicken chimichangas that pack a serious flavor punch? These golden, crispy delights represent pure Mexican-inspired comfort food at its finest.
Street food enthusiasts and home cooks alike adore the satisfying crunch and robust seasoning of this popular dish.
Perfectly balanced between hearty and indulgent, chicken chimichangas offer an exciting culinary experience for anyone seeking bold taste sensations.
Mexican cuisine fans understand how these rolled and fried treasures can transform an ordinary meal into something extraordinary.
Preparing chicken chimichangas requires minimal skill but delivers maximum satisfaction for hungry friends and family.
Dive into this mouthwatering recipe and experience a delicious adventure that will become your new favorite dinner solution.
What Makes Chicken Chimichangas So Satisfying
Core Ingredients For Chicken Chimichangas
Main Ingredients:Supporting Ingredients:Assembly Ingredients:Required Kitchen Tools for Chicken Chimichangas
Complete Instructions for Chicken Chimichangas
Prepare Chicken Filling
Mix the ingredients in a spacious mixing bowl until everything blends smoothly:
Stir until the mixture looks consistent and well combined.
Warm Tortillas
Microwave the 4 large flour tortillas for 10 seconds to soften them, making folding easier. This trick helps prevent cracking when you wrap the filling.
Fill Tortilla Centers
Scoop 1/2 cup of the chicken mixture right into the center of each tortilla. Position it so you have plenty of room to fold and roll.
Wrap Chimichangas
Fold the sides of each tortilla over the filling, then roll tightly from bottom to top. Make sure the edges are sealed to keep the filling inside during cooking.
Heat Cooking Oil
Pour 1 inch of vegetable oil into a skillet and heat to 350°F over medium heat. Use a thermometer to check the temperature for perfect frying.
First Side Frying
Carefully place the chimichangas seam-side down in the hot oil. Keep them separated so they cook evenly and don’t stick together.
Golden Brown First Side
Fry for exactly 3 minutes until the bottom turns a deep golden brown. Watch closely to prevent burning.
Flip and Finish
Turn the chimichangas over and cook the other side for another 3 minutes until crispy and evenly colored.
Drain Excess Oil
Move the chimichangas to a paper towel-lined plate to absorb extra oil and help them stay crisp.
Serve and Enjoy
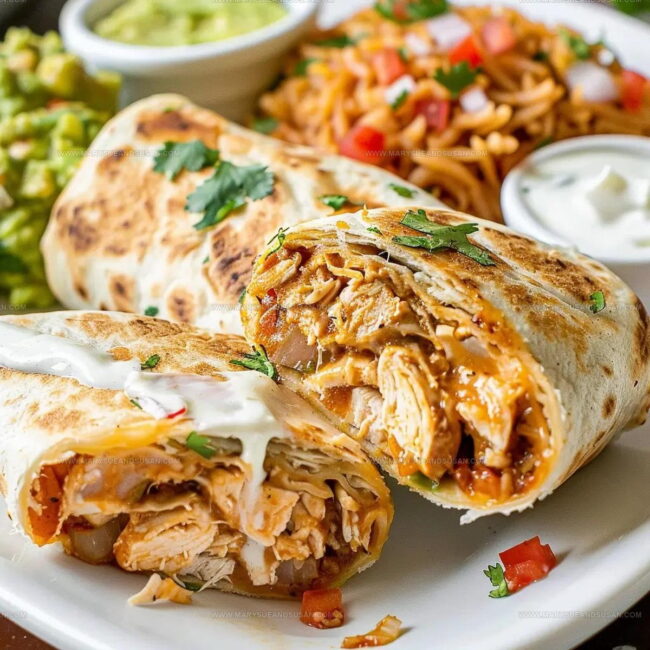
Plate the hot chimichangas and serve immediately with your favorite toppings like sour cream or fresh guacamole.
Cook Smarter With Chicken Chimichangas
What New Spins Enhance Chicken Chimichangas
How To Plate Chicken Chimichangas
Storing Chicken Chimichangas Properly
Chicken Chimichangas Common Questions
Can I use different meats instead of chicken?
Absolutely! Shredded beef, pulled pork, or even ground turkey work wonderfully in chimichangas. Just ensure the meat is cooked and seasoned well before mixing with other ingredients.
Is there a baked version for those avoiding deep frying?
Baking works great! Brush the rolled chimichangas with oil and place them on a baking sheet. Bake at 425°F for about 20-25 minutes until they turn golden and crispy.
How do I prevent the tortillas from breaking while rolling?
Warm tortillas are key – microwave them briefly to increase flexibility. When filling, don’t overstuff, and fold the sides in first before rolling tightly to create a secure packet.
What cheese alternatives can work in this recipe?
Monterey Jack, pepper jack, or Mexican blend cheese are excellent substitutes for cheddar. Each will add a slightly different flavor profile to your chimichanga.
How can I tell when the oil is the right temperature?
Use a cooking thermometer to check 350°F, or drop a small piece of tortilla in the oil – if it sizzles immediately and turns golden within seconds, the temperature is perfect.

Refried Bean Chicken Chimichangas Recipe
- Total Time: 18 minutes
- Yield: 4 1x
Description
Sizzling chicken chimichangas bring crispy tortillas packed with tender, seasoned chicken that’ll make your taste buds dance with excitement. Grab some salsa, sour cream, and get ready to enjoy a Mexican-inspired feast that comes together faster than you can say “delicious dinner”!
Ingredients
Main Ingredients:
- 2 cups chicken
- 1 cup cheese
- 1 cup refried beans
Supporting Ingredients:
- ½ cup salsa
Assembly Ingredients:
- 4 large flour tortillas
- 2 tablespoons vegetable oil
Instructions
- Grab a large mixing bowl and blend 2 cups of shredded rotisserie chicken with 1 cup of cheddar cheese, 1 cup of refried beans, and ½ cup of salsa until thoroughly combined.
- Microwave 4 large flour tortillas for 10 seconds to make them pliable and easy to fold.
- Distribute ½ cup of the chicken mixture directly in the center of each tortilla.
- Carefully fold the sides of the tortilla over the filling, then roll tightly from bottom to top, creating a secure packet.
- Pour 1 inch of vegetable oil into a skillet and heat to 350°F over medium heat.
- Gently place the chimichangas seam-side down in the hot oil, ensuring they do not touch each other.
- Fry for exactly 3 minutes until the bottom turns a deep golden brown.
- Flip the chimichangas and cook the opposite side for another 3 minutes until evenly crispy.
- Transfer the chimichangas to a paper towel-lined plate to drain excess oil.
- Serve immediately with your favorite toppings like sour cream or fresh guacamole.
Notes
- Always use room temperature tortillas to prevent cracking when rolling.
- Keep the filling tight and compact to prevent leaks during frying.
- Pat chicken dry before mixing to ensure the filling isn’t watery.
- For a healthier version, bake chimichangas at 400°F for 20-25 minutes instead of deep-frying.
- Prep Time: 10 minutes
- Cook Time: 8 minutes
- Category: Chicken
- Method: Frying
- Cuisine: Mexican-American
Nutrition
- Serving Size: 4
- Calories: 480 kcal
- Sugar: 3 g
- Sodium: 680 mg
- Fat: 22 g
- Saturated Fat: 8 g
- Unsaturated Fat: 12 g
- Trans Fat: 0.5 g
- Carbohydrates: 38 g
- Fiber: 6 g
- Protein: 32 g
- Cholesterol: 65 mg
Susan Whitaker
Content Specialist & Home Cooking Guide
Expertise
Family-friendly Meals, Simple Healthy Cooking, Ingredient Substitutions, Beginner-friendly Recipes, Flexible Meal Prep
Education
Susan is the steady, practical guide at Mary Sue & Susan, bringing clarity, structure, and a warm sense of encouragement to every recipe she touches. Susan joined the site with a simple goal: help people cook with more confidence and less guesswork.