
Rotisserie Chicken Enchilada Recipe That’s Smoky and Easy
A rotisserie chicken enchilada recipe gives comfort food that feels both indulgent and surprisingly easy to pull together on busy evenings.
The warm, satisfying flavors appeal to anyone craving something hearty without spending hours in the kitchen.
Weeknight dinners become less stressful when you have a reliable go-to option that everyone enjoys.
The beauty lies in how quickly a delicious meal comes together while still tasting homemade and special.
You can feed a crowd or prep ahead for several meals throughout the week.
Each bite offers that perfect combination of savory, slightly spicy, and wonderfully cheesy goodness that makes everyone reach for seconds.
Roll up your sleeves and start cooking this satisfying dish tonight.
Secrets Behind The Fast And Flavorful Success Of These Enchiladas
Secrets To The Fast And Flavorful Appeal Of This Chicken Enchilada
Rotisserie Chicken Enchilada Setup Tools
How to Enhance the Warmth of Rotisserie Chicken Enchiladas
Build the Flavor Base
Heat 1 tablespoon olive oil in a small skillet over medium heat (375°F). Drop in the finely diced small onion and minced garlic clove, sautéing until they turn soft and release their amazing aroma – about 3-4 minutes. Sprinkle in 1 teaspoon ground cumin and 1 teaspoon chili powder, stirring to wake up those spices. Transfer this fragrant mixture to a large mixing bowl.
Create the Filling
Grab your filling ingredients and add them to the bowl:
Mix everything until the filling looks creamy and well-blended.
Warm the Tortillas
Grab your 8 flour or corn tortillas and warm them gently. For corn tortillas, heat them briefly on a skillet or wrap in a damp paper towel and microwave for 30 seconds. This keeps them flexible and prevents cracking when rolling.
Prepare the Baking Dish
Preheat your oven to 350°F (175°C). Grease a 9×13 inch baking dish and spread 2-3 tablespoons of enchilada sauce across the bottom.
Roll the Enchiladas
Lay out a tortilla and spoon about ⅓ cup of chicken filling along the center. Roll it tightly and place seam-side down in the prepared dish. Keep going until all tortillas are filled.
Top and Sauce
Pour the remaining enchilada sauce evenly over the rolled tortillas. Sprinkle the rest of your cheeses:
Make sure the enchiladas are completely covered.
Bake to Golden Perfection
Slide the dish into the preheated oven and bake uncovered for 20-25 minutes. Watch for the cheese to melt completely and turn slightly golden around the edges.
Final Touches
Let the enchiladas rest for 5-10 minutes after removing from the oven. Sprinkle 2 tablespoons chopped fresh cilantro on top if desired. Serve with a side of sour cream or a crisp salad.
Layering Flavor in Rotisserie Chicken Enchiladas

Effortless Filling And Cheese Swaps For Quick Enchiladas

Serving Rotisserie Chicken Enchiladas Melty and Complete
Storing Rotisserie Enchiladas Without Sogginess

Rotisserie Chicken Enchilada FAQs
Can I use another type of meat instead of rotisserie chicken?
Absolutely! Shredded beef, turkey, or even black beans work great as alternative protein options for these enchiladas.
Are corn or flour tortillas better for this recipe?
Corn tortillas provide a more authentic Mexican flavor and texture, but flour tortillas work well too. Just warm them slightly to prevent cracking.
How spicy are these enchiladas?
The recipe has mild spice from cumin and chili powder. If your heat tolerance is low, reduce the chili powder. For more kick, add diced green chiles or jalapeños to the filling.
Can these enchiladas be made ahead of time?
Definitely! Assemble the enchiladas, cover with foil, and refrigerate up to 24 hours before baking. Add a few extra minutes to the cooking time if baking directly from the refrigerator.
What cheese alternatives work best?
Monterey Jack and cheddar are ideal, but pepper jack adds extra zest. For dairy-free options, use vegan cheese alternatives that melt well.
Do these freeze well?
Yes! Cool completely, wrap tightly in plastic and foil, and freeze for up to 3 months. Thaw overnight in the refrigerator before reheating.

Rotisserie Chicken Enchilada Recipe
- Total Time: 35 minutes
- Yield: 4 1x
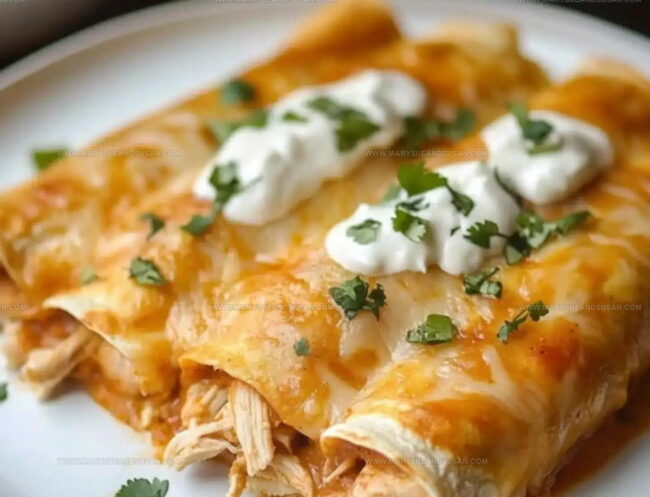
Description
Rotisserie chicken enchiladas deliver a quick weeknight dinner solution that brings Mexican-inspired comfort right to your table. Shredding store-bought rotisserie chicken and rolling it into warm tortillas with melty cheese creates a delicious meal your family will devour in minutes.
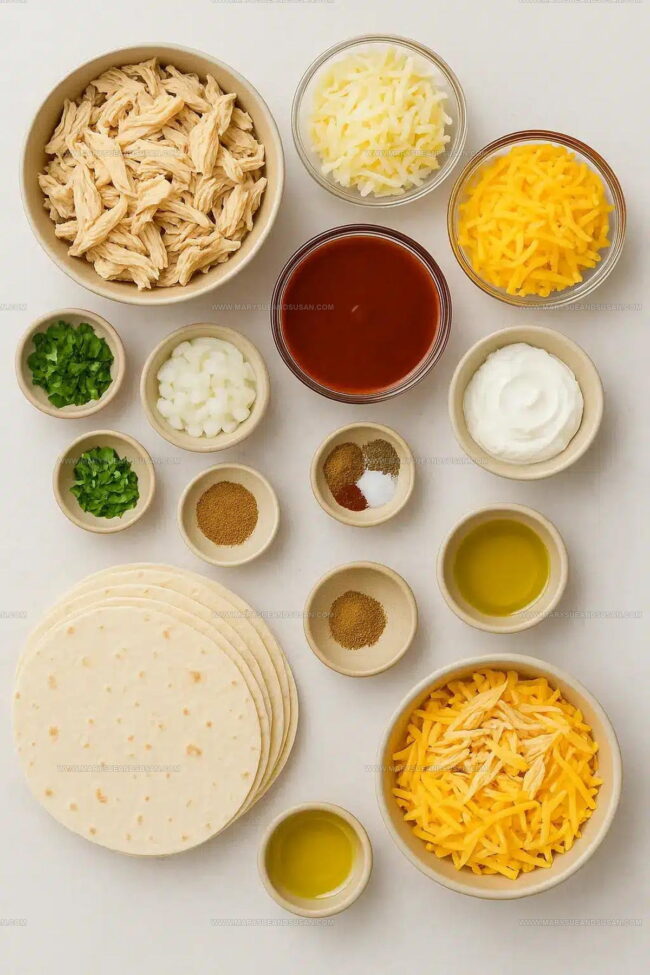
Ingredients
Protein:
- 2 cups shredded rotisserie chicken
Cheese:
- 1 cup shredded cheddar cheese
- 1 cup shredded Monterey Jack cheese
Base and Seasoning:
- 1 (10 ounces / 283 grams) can red enchilada sauce
- 8 flour or corn tortillas
- 1 teaspoon ground cumin
- 1 teaspoon chili powder
- Salt and black pepper, to taste
Supporting Ingredients:
- ½ cup sour cream
- 1 small onion, finely diced
- 1 clove garlic, minced
- 2 tablespoons chopped fresh cilantro
- 1 tablespoon olive oil
Instructions
- Warm olive oil in a small skillet over medium heat for 3-4 minutes. Sauté 1 finely diced small onion and 1 minced garlic clove until soft and fragrant.
- Stir 1 teaspoon ground cumin and 1 teaspoon chili powder into the onion mixture, releasing their aromatic essence.
- Transfer the spiced onion base to a large mixing bowl. Fold in 2 cups shredded rotisserie chicken, ½ cup cheddar cheese, ½ cup Monterey Jack cheese, ½ cup sour cream, and ¼ cup enchilada sauce until thoroughly combined.
- Preheat oven to 350°F (175°C). Gently warm 8 tortillas on a skillet or microwave wrapped in a damp paper towel for 30 seconds to prevent cracking.
- Grease a 9×13 inch baking dish. Spread 2–3 tablespoons of enchilada sauce across the bottom.
- Place ⅓ cup chicken filling along the center of each tortilla. Roll tightly and position seam-side down in the prepared dish.
- Pour remaining enchilada sauce evenly over the rolled tortillas. Sprinkle the rest of the cheddar and Monterey Jack cheese to completely cover the enchiladas.
- Bake uncovered at 350°F (175°C) for 20–25 minutes, until cheese melts and turns golden around the edges.
- Allow enchiladas to rest for 5–10 minutes after removing from the oven.
- Garnish with 2 tablespoons chopped fresh cilantro before serving alongside sour cream or a crisp salad.
Notes
- Swap store-bought rotisserie chicken for freshly roasted or shredded chicken breast to customize flavor and control sodium levels.
- Warm tortillas briefly in a skillet before filling to prevent cracking and make them more pliable for rolling.
- Choose corn tortillas for a gluten-free version, or use whole wheat tortillas for added fiber and nutrition.
- Add extra heat with diced jalapeños or a sprinkle of cayenne pepper if your family enjoys spicier enchiladas.
- Prep Time: 10 minutes
- Cook Time: 25 minutes
- Category: Chicken
- Method: Baking
- Cuisine: Mexican
Nutrition
- Serving Size: 4
- Calories: 320 kcal
- Sugar: 3 g
- Sodium: 520 mg
- Fat: 18 g
- Saturated Fat: 7 g
- Unsaturated Fat: 9 g
- Trans Fat: 0.1 g
- Carbohydrates: 22 g
- Fiber: 2 g
- Protein: 23 g
- Cholesterol: 60 mg
Susan Whitaker
Content Specialist & Home Cooking Guide
Expertise
Family-friendly Meals, Simple Healthy Cooking, Ingredient Substitutions, Beginner-friendly Recipes, Flexible Meal Prep
Education
Susan is the steady, practical guide at Mary Sue & Susan, bringing clarity, structure, and a warm sense of encouragement to every recipe she touches. Susan joined the site with a simple goal: help people cook with more confidence and less guesswork.