Simple Pantry Crispy Tuna Patties Recipe

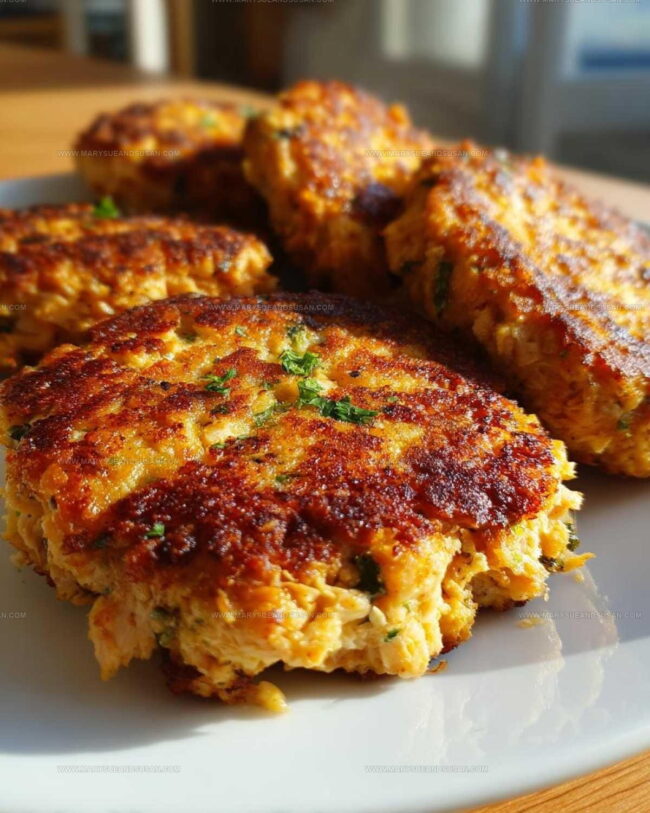
Crispy Tuna Patties Recipe for Golden Weeknight Bites

Crispy tuna patties are one of those wonderfully reliable meals that works for busy weeknights and lazy weekends.

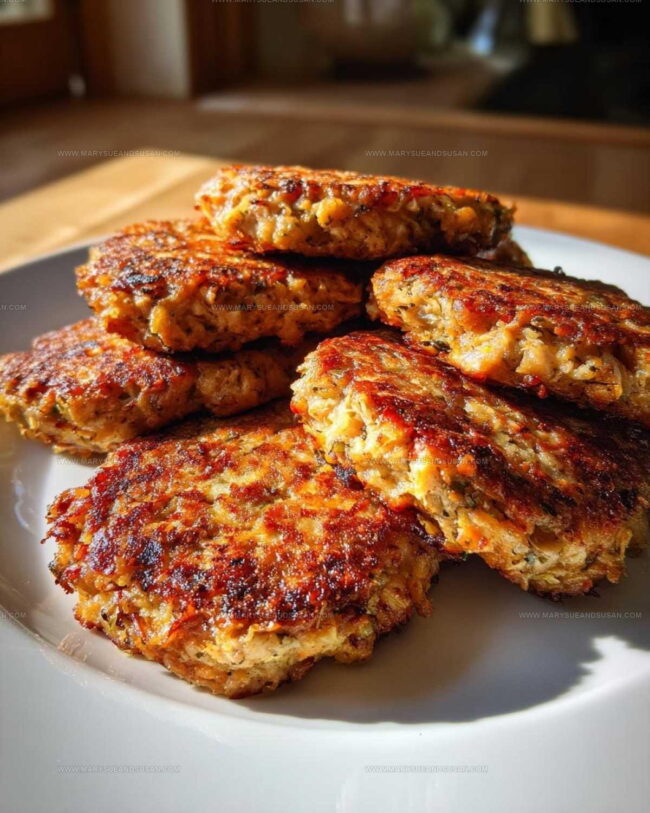
They're budget-friendly, quick to put together, and deliver satisfying comfort with every bite.

The golden, crunchy exterior gives way to a tender center that feels both homey and special at once.

Everyone at the table tends to reach for seconds because they hit that perfect spot between filling and light.

Plus, they make excellent use of pantry staples when the fridge looks a bit bare.

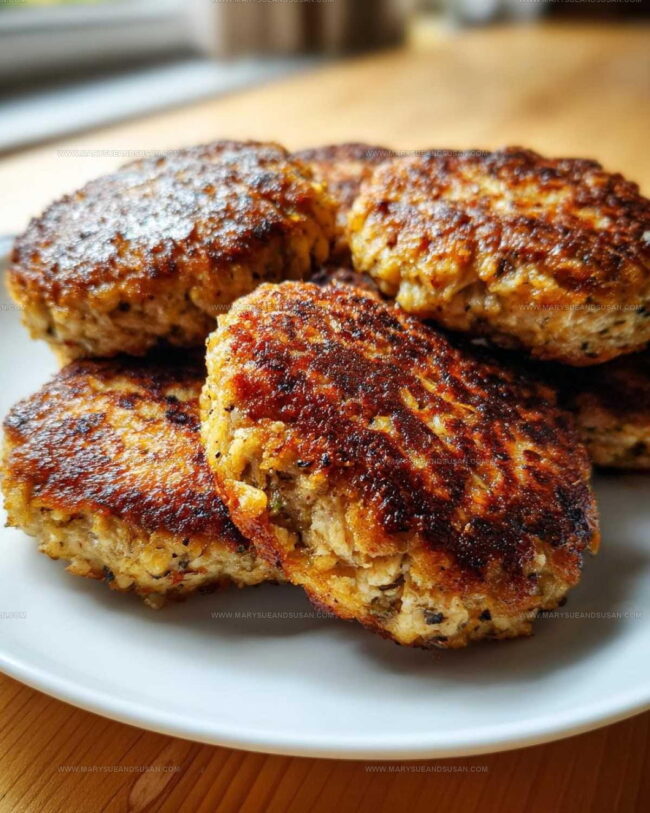
Each patty packs protein and flavor without any fuss or fancy techniques required.

The best part is how adaptable they are to whatever mood strikes, casual lunch, simple dinner, or even a fun appetizer spread.

What Makes Crispy Tuna Patties Such a Lightning-Fast Flavor Win

What Makes Crispy Tuna Patties Such a Lightning-Fast Flavor Win
  • Quick Protein Fix: These tuna patties deliver a serious protein punch without complicated steps, perfect for busy weeknights when dinner needs to happen fast.
  • Budget-Friendly Meal: Canned tuna transforms into a delicious main course that saves money and reduces food waste, making your wallet and taste buds happy.
  • Super Simple Ingredients: Chances are good everything needed is already sitting in your pantry or refrigerator, so no extra shopping required.
  • Crowd-Pleaser Dinner: Kids and adults alike enjoy these crispy golden patties, making them a fantastic family meal that requires minimal cooking skills.

Crunchy Components Of Crispy Tuna Patties

Protein Base:
  • 1 (5 ounce) Can Tuna: The star of our patties, packed with lean protein and ready to transform into a delicious meal.
Main Binding Ingredients:
  • 1 Large Egg: Helps hold everything together and adds richness to the patties.
  • ¼ Cup Breadcrumbs: Creates a crispy exterior and helps bind the ingredients.
  • 2 Tablespoons Mayonnaise: Adds moisture and subtle creaminess to the mixture.
Flavor Enhancers:
  • 1 Tablespoon Minced Onion, 1 Teaspoon Dijon Mustard: Bring a sharp, tangy punch to wake up the mild tuna flavor.
  • ¼ Teaspoon Salt, ⅛ Teaspoon Black Pepper: Season the patties to bring out their best taste.
Cooking Fat:
  • 2 Tablespoons Olive Oil: Creates that perfect golden, crispy exterior when frying the patties.

Quick Mix Tools for Tuna Patties

  • Large Mixing Bowl (medium-sized): Perfect for combining and mixing all your tuna patty ingredients without making a mess. Ceramic or stainless steel works great.
  • Skillet (12-inch): A sturdy, non-stick pan that helps create those gorgeous golden-brown crispy edges on your tuna patties.
  • Spatula (silicone or metal): Essential for flipping the patties gently without breaking them apart.
  • Measuring Cups and Spoons: Helpful for getting the right proportions of breadcrumbs, mayo, and seasonings.
  • Cutting Board: A clean surface for chopping onions and preparing ingredients.
  • Mixing Spoon or Fork: Great for thoroughly blending all the tuna patty ingredients until they’re perfectly combined.
  • Paper Towels: Optional for draining excess oil after cooking, keeping your patties crisp and not greasy.

Quick Method For Crispy Tuna Patties

Quick Method For Crispy Tuna Patties
1

Prep the Tuna Mixture

Grab a medium bowl and toss in the drained tuna. Your patties will start taking shape right now.

  • 1 (5 ounce) can tuna
  • 1 large egg
  • ¼ cup breadcrumbs
  • 2 tablespoons mayonnaise
  • 1 tablespoon minced onion
  • 1 teaspoon Dijon mustard
  • ¼ teaspoon salt
  • ⅛ teaspoon black pepper

Crack the egg and sprinkle in the breadcrumbs. This combo helps bind everything together perfectly.

2

Blend the Ingredients

Stir all the ingredients until they’re smoothly combined. Your wooden spoon will help mix everything evenly. Make sure no dry spots remain in the mixture.

3

Shape the Patties

Divide the tuna mixture into four equal portions. Use your hands to gently shape them into round, flat patties about 3 inches across. Press them firmly so they hold together.

4

Heat the Skillet

Pour 2 tablespoons olive oil into a large skillet. Set the heat to medium, letting the pan warm for about 2 minutes. The oil should shimmer slightly when it’s ready.

5

Fry the Patties

Carefully slide the patties into the hot skillet. Listen for that satisfying sizzle as they start cooking. Let them develop a goldebrown crust for 3-4 minutes.

6

Flip and Finish

Gently turn the patties with a spatula. Cook the second side for another 3-4 minutes until crispy and heated through. Your kitchen will smell amazing right now.

7

Serve Immediately

Transfer the hot, crispy tuna patties to a serving plate. They’re best enjoyed right away while the edges are still crunchy and warm.

Smart Tips for Making Tuna Patties Even Crunchier

Smart Tips for Making Tuna Patties Even Crunchier
  • Pat the tuna super dry with paper towels to make sure extra liquid won’t ruin your patty texture. Moisture is the enemy of crispy!
  • Eggs and breadcrumbs are your best friends for holding these patties together. Mix them thoroughly so the patties won’t fall apart when cooking.
  • Let your skillet get nice and hot before adding patties. This helps create that beautiful golden-brown crust everyone loves.
  • Press your patties gently but firmly when forming them. Make them compact and even so they cook consistently and look professional.
  • Add fresh herbs like chopped parsley or dill to give your tuna patties an extra flavor punch. A little zest makes a big difference.

Creative Patty Ideas for Tuna Lovers

  • Gluten-Free Crunch: Swap breadcrumbs with crushed gluten-free crackers or almond flour. This swap keeps your patties crispy and safe for those avoiding gluten. Season carefully and press the mixture firmly to help hold the patties together.
  • Protein Power Upgrade: Replace tuna with canned salmon or shredded chicken for a different protein boost. The technique stays exactly the same, and you’ll get a delicious protein-packed meal that works with whatever protein you have on hand.
  • Herb Garden Version: Fold in fresh chopped herbs like parsley, dill, or chives to bring bright flavor. Experiment with different herb combinations to match your taste preferences. A sprinkle of fresh herbs transforms the basic recipe into something that feels more gourmet and fresh.
  • Low-Carb Transformation: Skip breadcrumbs entirely and use grated zucchini or cauliflower rice as a binder. These veggie alternatives reduce carbs while keeping the patties moist and satisfying. Press out extra moisture from the vegetables before mixing to ensure your patties hold together perfectly.

Serving Pairings That Shine Beside Crispy Tuna Patties

  • Serve Alongside Salad: Pair these crispy tuna patties with a fresh mixed green salad dressed in a light vinaigrette to balance the richness of the patties.
  • Sauce It Up: Whip together a quick dipping sauce using mayo, chopped dill pickles, and a dash of hot sauce to give your patties an extra flavor kick.
  • Perfect Plating: Nestle the patties on a warm plate with a wedge of lemon for squeezing, which brightens the seafood’s natural taste.
  • Quick Side Choice: Roasted asparagus or steamed broccoli make excellent vegetable companions that complement the tuna’s savory profile.

Keeping Tuna Patties Crispy After Cooking

Keeping Tuna Patties Crispy After Cooking
  • Keep leftover tuna patties in an airtight container for up to 3 days. Their crisp coating softens slightly, so gentle reheating is key to restoring texture.
  • Warm patties in a skillet with a thin layer of olive oil over medium heat. Cook 2 – 3 minutes per side to bring back their golden edges without drying them out.
  • Wrap patties individually in plastic wrap and store in a freezer bag. Thaw overnight before reheating in a hot skillet to keep the exterior crisp.
  • Crumble chilled patties over a green salad for a satisfying, protein-packed lunch without any reheating.

Crispy Tuna Patty Questions Home Cooks Ask When No One’s Looking

FAQ

Can I use canned salmon instead of tuna?

Absolutely! Salmon works perfectly as a substitute. Simply drain the salmon and follow the exact same recipe steps. The texture and flavor will be similar, giving your patties a delicious alternative.

FAQ

Do these patties freeze well?

These patties freeze great! After cooking, let them cool completely, then wrap each patty individually in plastic wrap. Store in a freezer bag for up to 3 months. Reheat in a skillet or oven until warmed through.

FAQ

What if I don’t have Dijon mustard?

No worries! Regular yellow mustard works fine. If you prefer, you can skip mustard entirely. The patties will still taste fantastic and hold together nicely.

FAQ

Are these patties gluten-free?

To make them gluten-free, swap regular breadcrumbs for gluten-free breadcrumbs or crushed gluten-free crackers. Everything else in the recipe remains the same.

FAQ

Can kids enjoy these tuna patties?

Definitely! Kids typically love these crispy patties. Cut them into smaller pieces or bite-sized portions to make them easier for little hands to eat.

Print
clock clock iconcutlery cutlery iconflag flag iconfolder folder iconinstagram instagram iconpinterest pinterest iconfacebook facebook iconprint print iconsquares squares iconheart heart iconheart solid heart solid icon
Simple Pantry Crispy Tuna Patties Recipe

Simple Pantry Crispy Tuna Patties Recipe


5 Stars 4 Stars 3 Stars 2 Stars 1 Star

4.6 from 24 reviews

  • Total Time: 13 minutes
  • Yield: 2 1x

Description

Crispy Tuna Patties become your go-to weeknight dinner hero, blending pantry staples into a delightful meal ready faster than ordering takeout. Packed with protein and flavor, these golden patties deliver serious satisfaction without complicated ingredients or endless prep time.


Ingredients

Scale

Main Ingredients:

  • 1 (5 ounces / 142 grams) can tuna, drained
  • 1 large egg

Binding Ingredients:

  • ¼ cup breadcrumbs
  • 2 tablespoons mayonnaise

Seasoning Ingredients:

  • 1 tablespoon minced onion
  • 1 teaspoon Dijon mustard
  • ¼ teaspoon salt
  • ⅛ teaspoon black pepper
  • 2 tablespoons olive oil for frying

Instructions

  1. Drain the 5-ounce can of tuna completely, ensuring no liquid remains.
  2. Crack one large egg into a medium mixing bowl.
  3. Add the drained tuna to the egg, breaking up any large chunks with a fork.
  4. Mix in ¼ cup breadcrumbs, 2 tablespoons mayonnaise, and 1 tablespoon minced onion.
  5. Stir 1 teaspoon Dijon mustard, ¼ teaspoon salt, and 1/8 teaspoon black pepper into the mixture.
  6. Blend all ingredients until they form a cohesive, moist mixture that holds together easily.
  7. Shape the mixture into 4 evenly sized patties, pressing them firmly to ensure they stay compact.
  8. Heat 2 tablespoons olive oil in a large skillet over medium heat for 2 minutes.
  9. Gently place the patties in the hot oil, making sure they do not touch each other.
  10. Cook the patties for 3-4 minutes until the bottom turns golden and crisp.
  11. Carefully flip the patties and cook the other side for an additional 3-4 minutes.
  12. Remove the patties from the skillet when both sides are evenly browned and crispy.
  13. Transfer to a plate lined with paper towels to absorb excess oil before serving.

Notes

  • Drain tuna completely to prevent soggy patties and ensure a crisp exterior.
  • Add extra breadcrumbs if the mixture feels too wet, which helps hold the patties together during cooking.
  • For a gluten-free version, substitute breadcrumbs with almond flour or crushed gluten-free crackers.
  • Experiment with fresh herbs like chopped parsley or dill to add brightness and depth to the patties’ flavor profile.
  • Prep Time: 5 minutes
  • Cook Time: 8 minutes
  • Category: Tuna
  • Method: Frying
  • Cuisine: American

Nutrition

  • Serving Size: 2
  • Calories: 420 kcal
  • Sugar: 1 g
  • Sodium: 620 mg
  • Fat: 32 g
  • Saturated Fat: 5 g
  • Unsaturated Fat: 26 g
  • Trans Fat: 0 g
  • Carbohydrates: 12 g
  • Fiber: 1 g
  • Protein: 28 g
  • Cholesterol: 165 mg
Susan Whitaker

Susan Whitaker

Content Specialist & Home Cooking Guide

Expertise

Family-friendly Meals, Simple Healthy Cooking, Ingredient Substitutions, Beginner-friendly Recipes, Flexible Meal Prep

Education

Saint Paul College
  • Program: Culinary Arts Diploma
  • Focus: Trained in a hands-on professional kitchen environment with coursework spanning core culinary technique, pastry, butchery, charcuterie, food safety, sanitation, restaurant operations, and the nutritional side of healthy cooking, with real-world practice tied to the college’s student-run restaurant.

Susan is the steady, practical guide at Mary Sue & Susan, bringing clarity, structure, and a warm sense of encouragement to every recipe she touches. Susan joined the site with a simple goal: help people cook with more confidence and less guesswork.

Leave a Reply

Your email address will not be published. Required fields are marked *

Recipe rating 5 Stars 4 Stars 3 Stars 2 Stars 1 Star