Sticky Honey Chicken Recipe With Glossy Glaze
Sticky Honey Chicken Recipe makes weeknight dinners feel special without any fuss.
The sweet and savory combination creates a dish that appeals to everyone at the table, whether you serve it for a casual meal or when company drops by.
Busy evenings become simpler when you can prepare something this satisfying in minimal time.
The glossy coating and tender texture deliver comfort food at its finest, making this one of those recipes you'll return to again and again.
Every single bite offers the perfect balance of flavors that somehow tastes both familiar and exciting.
Kids ask for seconds, adults appreciate how quickly it comes together, and everyone leaves the table happy.
What Makes Sticky Honey Chicken a Glistening, Sweet-and-Savory Success
Chicken Cuts Glaze Components and Aromatics in Honey Chicken
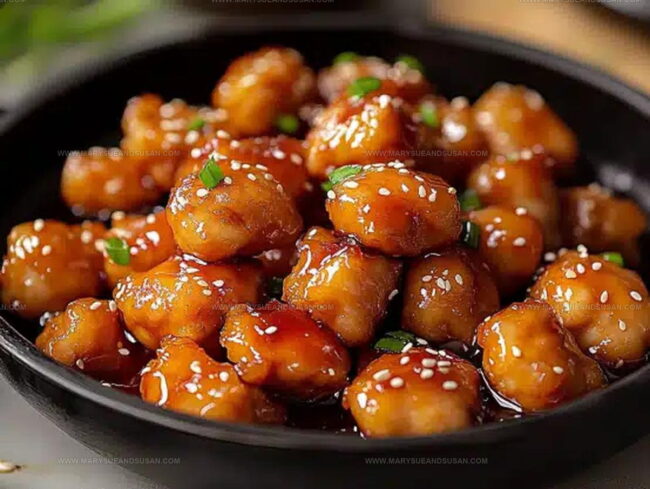
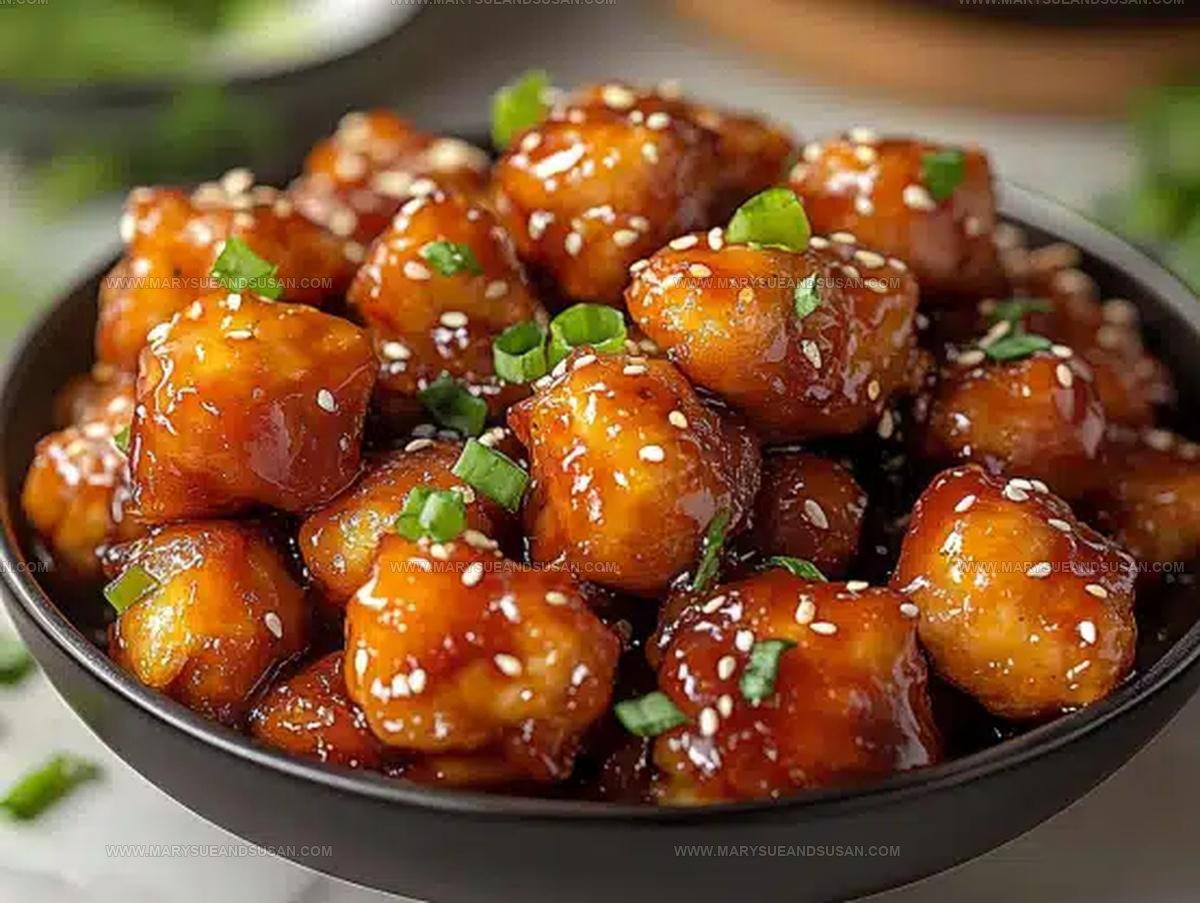
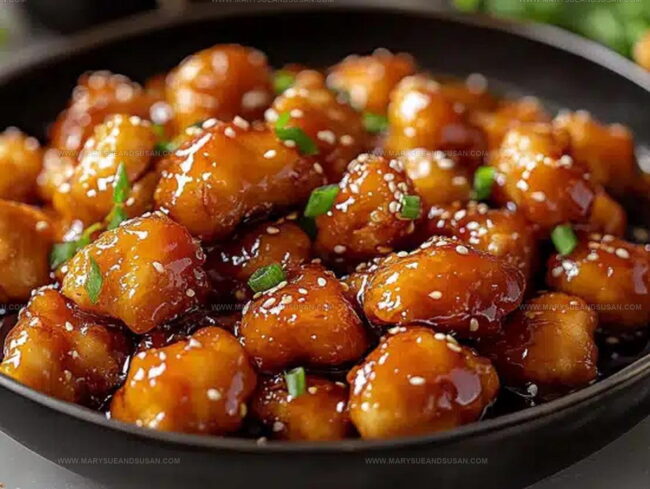
Garnish with sliced green onions and sesame seeds for a fresh, flavorful finish.
Skillets Tongs and Tools for Sticky Honey Chicken
Method for the Sear, Glaze, and Finish Sticky Honey Chicken Flow
Coat the Chicken
Grab a mixing bowl and toss together the cornstarch, salt, and black pepper.
Drop in your 1 1/2 pounds of chicken pieces and tumble them around until each piece gets a complete coating of the powdery mixture.
Sear the Chicken
Heat 2 tablespoons of vegetable oil in a large skillet over medium-high heat at 375°F.
Spread the chicken pieces in a single layer so they can get crispy and golden.
Cook for exactly 3-4 minutes on each side until the exterior turns a beautiful brown color. Transfer the cooked chicken to a separate plate.
Create the Sticky Sauce
In the same skillet, reduce the heat to medium. Add the following ingredients:
Stir everything together and let it simmer for 2 minutes to blend the flavors.
Thicken the Sauce
Whisk 1 teaspoon cornstarch with 1 tablespoon water in a small bowl. Pour this mixture into the simmering sauce while stirring constantly. Cook for 1-2 minutes until the sauce becomes thick and glossy.
Combine Chicken and Sauce
Return the cooked chicken to the skillet and toss gently to coat each piece completely with the sticky sauce.
Let it cook for another 1-2 minutes so the flavors can meld together.
Final Touch and Serving
Remove the skillet from heat and sprinkle with sesame seeds and sliced green onions.
Serve this delicious chicken over steamed rice, soft noodles, or your favorite vegetables.
Caramelization Tips Without Burning the Honey
Saucy Poultry Versions Of Sticky Honey Chicken
Glistening Poultry Plating Maneuvers For Honey Chicken
Glistening Glazed Poultry Longevity Protocols For Honey Chicken
Sticky Honey Chicken Q&A for the Best Glaze and Texture
Can I use chicken breasts instead of thighs?
Absolutely! Chicken breasts work perfectly. Just cut them into similar-sized pieces to ensure even cooking. Watch the cooking time carefully since chicken breasts can dry out faster.
What if I don’t have oyster sauce?
No problem. You can substitute with hoisin sauce or extra soy sauce. The flavor will be slightly different, but still delicious.
How spicy is this dish?
The red pepper flakes add a mild kick. If you prefer less heat, reduce the amount or skip them entirely. For more spice, increase the quantity or add sriracha.
Are there gluten-free options for this recipe?
Replace regular soy sauce with tamari or gluten-free soy sauce. Check your oyster sauce label to ensure it’s gluten-free, or use a gluten-free alternative.
Can I make this ahead of time?
Prepare the chicken and sauce separately, then combine just before serving. This helps keep the crispy texture and prevents soggy chicken.
What protein alternatives work well?
Tofu, shrimp, or pork can replace chicken. Adjust cooking times based on your chosen protein to ensure it’s fully cooked.

Sticky Asian Honey Chicken Recipe
- Total Time: 22-24 minutes
- Yield: 4 1x
Description
Sticky Honey Chicken delivers serious flavor that makes dinner feel like a celebration right in your kitchen. Tender chicken pieces glazed with a sweet-tangy sauce will have your family racing to the table for seconds.
Ingredients
Protein:
- 1.5 pounds boneless, skinless chicken breasts or thighs
Coating:
- 0.5 cup cornstarch
- 0.5 teaspoon salt
- 0.5 teaspoon black pepper
Sauce and Seasoning:
- 0.33 cup honey
- 0.25 cup soy sauce
- 2 tablespoons vegetable oil
- 2 tablespoons rice vinegar
- 1 tablespoon oyster sauce
- 2 teaspoons garlic, minced
- 1 teaspoon fresh ginger, minced
- 1 teaspoon sesame oil
- 1 teaspoon cornstarch
- 1 tablespoon water
- 0.5 teaspoon red pepper flakes
Garnish:
- Sesame seeds
- Sliced green onions
Instructions
- Blend ½ cup cornstarch, ½ teaspoon salt, and ½ teaspoon black pepper in a medium mixing bowl. Thoroughly coat 1.5 pounds chicken pieces in this dry mixture.
- Warm 2 tablespoons vegetable oil in a large skillet over medium-high heat at 375°F. Place chicken pieces in a single layer, ensuring they do not overlap. Cook for 3-4 minutes per side until exterior turns golden brown and crisp.
- Transfer golden chicken onto a clean plate. Reduce skillet heat to medium at 325°F. Pour ⅓ cup honey, ¼ cup soy sauce, 2 tablespoons vinegar, 1 tablespoon oyster sauce, 1 teaspoon sesame oil, 2 teaspoons minced garlic, and 1 teaspoon minced ginger into the pan.
- Whisk sauce ingredients together and simmer for 2 minutes. Mix 1 teaspoon cornstarch with 1 tablespoon water in a separate small bowl. Stir cornstarch mixture into the sauce to help it thicken.
- Return chicken pieces to the skillet. Gently toss each piece to ensure complete sauce coverage. Cook for additional 1-2 minutes at medium heat.
- Remove skillet from heat. Scatter 1 tablespoon sesame seeds and 2 tablespoons sliced green onions over the chicken. Plate alongside steamed rice or vegetables.
Notes
- Cornstarch creates a crispy coating that helps the chicken stay golden and crunchy during cooking.
- Ensure chicken pieces are similar in size for even cooking and consistent texture throughout the dish.
- Use low-sodium soy sauce to control salt levels, especially if watching sodium intake.
- For a gluten-free version, substitute regular soy sauce with tamari and use cornstarch carefully to avoid cross-contamination.
- Prep Time: 10 minutes
- Cook Time: 12-14 minutes
- Category: Chicken
- Method: Frying
- Cuisine: Chinese
Nutrition
- Serving Size: 4
- Calories: 310 kcal
- Sugar: 18 g
- Sodium: 550 mg
- Fat: 10 g
- Saturated Fat: 1.5 g
- Unsaturated Fat: 8 g
- Trans Fat: 0 g
- Carbohydrates: 30 g
- Fiber: 1 g
- Protein: 28 g
- Cholesterol: 75 mg
Susan Whitaker
Content Specialist & Home Cooking Guide
Expertise
Family-friendly Meals, Simple Healthy Cooking, Ingredient Substitutions, Beginner-friendly Recipes, Flexible Meal Prep
Education
Susan is the steady, practical guide at Mary Sue & Susan, bringing clarity, structure, and a warm sense of encouragement to every recipe she touches. Susan joined the site with a simple goal: help people cook with more confidence and less guesswork.