
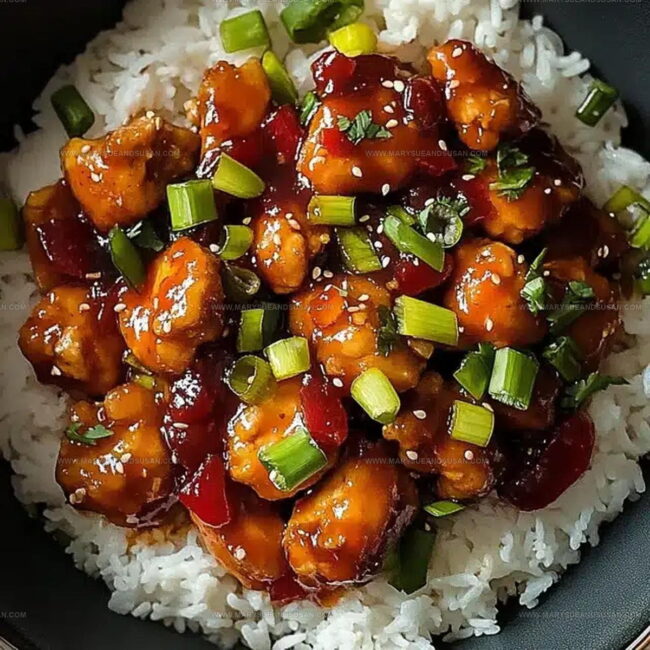
Glazed Sweet Chili Chicken Recipe for Sticky Flavor Nights
Sticky sweet chili chicken brings restaurant-worthy flavor that makes weeknight dinners feel special and satisfying.
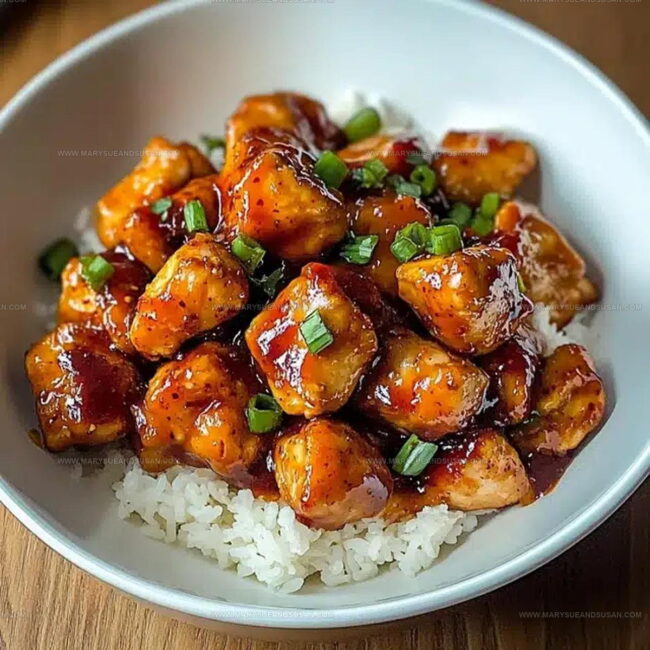
The balance of heat and sweetness creates an addictive glaze that clings to tender pieces, offering comfort with just enough excitement to keep things interesting.
This dish works beautifully whether you need a quick meal after work or want to impress guests without spending hours in the kitchen.
The glossy coating and bold flavors appeal to anyone who loves Asian-inspired cuisine with minimal fuss.
Every bite offers that perfect contrast between spicy warmth and sugary notes that keeps you coming back for more.
Simple enough for busy evenings yet impressive enough for entertaining, this recipe fits seamlessly into any dinner rotation.
Ready to create a meal that disappears from plates in minutes?
Reasons Why Sweet Chili Chicken Is A Global Weeknight Hero
Sticky Ingredients For This Sweet Chili Chicken
Tools Helping Prepare Sweet Chili Chicken
Steps Creating A Balanced Sweet Chili Chicken Dish
Prepare Chicken
Get your 2 boneless, skinless chicken breasts and chop them into bite-sized pieces. Sprinkle the chicken with ½ teaspoon salt and ¼ teaspoon black pepper, making sure each piece gets seasoned evenly. Set up two separate bowls: one with the beaten egg and another with ½ cup cornstarch.
Coat Chicken
Dunk each chicken piece first into the egg, letting excess drip off, then roll it around in the cornstarch. Press gently to help the coating stick well. This technique creates a super crispy exterior that’ll make your chicken extra delicious.
Fry Chicken
Heat 2 tablespoons oil in a large pan at medium heat (350°F). Carefully place chicken pieces in a single layer, giving them room to crisp up. Cook for 3-4 minutes per side until they turn golden brown and look perfectly crunchy. Transfer the cooked chicken to a plate.
Build Sauce Base
In the same pan, add 1 teaspoon minced garlic and 1 teaspoon grated ginger. Sizzle for about 30 seconds until the kitchen smells amazing and the aromatics become fragrant.
Create Sauce
Pour in the sauce ingredients:
Stir everything together and bring to a gentle simmer.
Thicken Sauce
Mix the thickening agent:
Stir this into the simmering sauce. Let it cook for 1-2 minutes until the sauce becomes glossy and slightly thickened.
Combine Chicken and Sauce
Return the crispy chicken to the pan. Toss each piece until completely coated in the sauce. Cook for another 1-2 minutes to help the flavors blend together.
Garnish and Serve
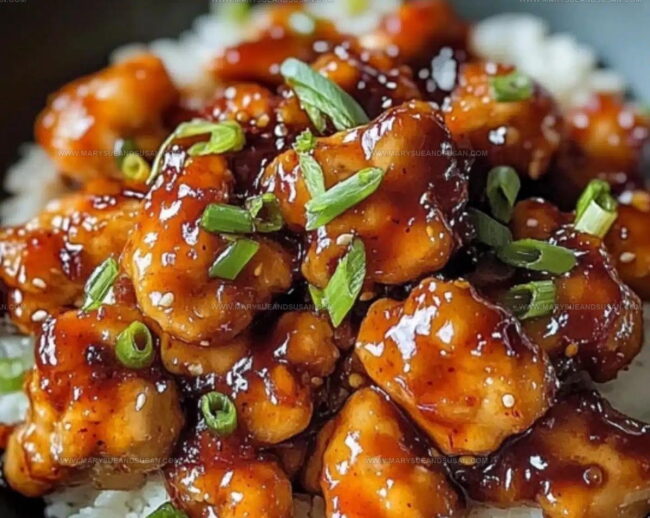
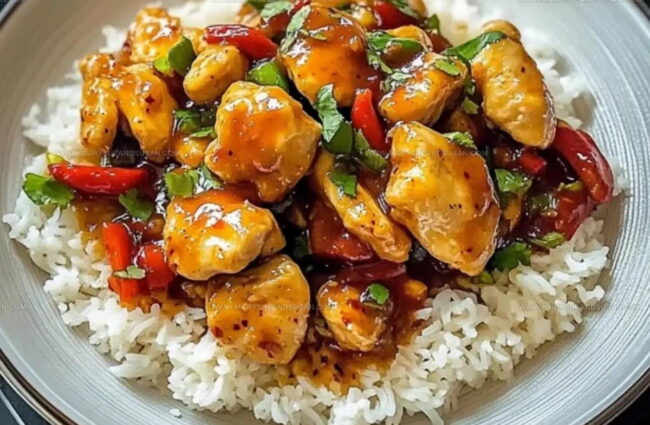
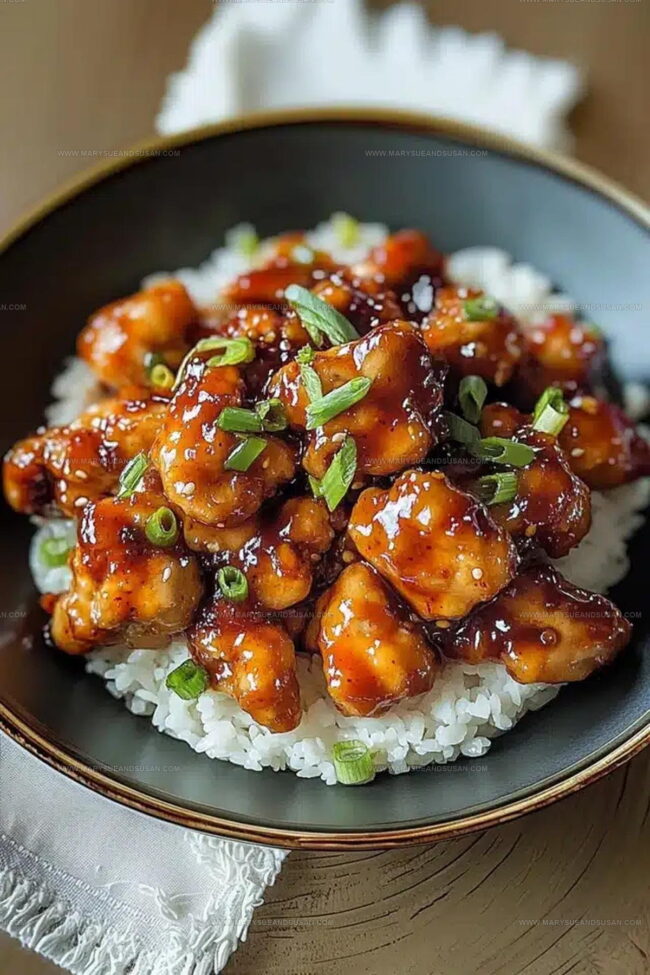
Sprinkle 1 teaspoon sesame seeds and some chopped green onions over the top. If your taste buds enjoy extra heat, add ½ teaspoon red pepper flakes. Serve hot with rice or noodles and enjoy your delicious creation!
Enhancers Strengthening Sweet Chili Flavor
Spice Intensity And Glaze Tweaks For Sweet Chili Chicken
Ways to Serve Zesty And Crispy Sweet Chili Chicken
How to Keep Sweet Chili Chicken Fresh
Sweet Chili Chicken Questions People Ask
Can I use chicken breasts instead of thighs?
Absolutely! Chicken breasts work perfectly. Just ensure they’re cut into similar-sized pieces for even cooking and slice them a bit thicker to prevent drying out.
What if I don’t have sweet chili sauce?
No worries! Create a quick substitute by mixing hot sauce, ketchup, and honey. This will give similar sweet and tangy flavors that complement the chicken.
Is it okay to bake the chicken instead of frying?
Definitely. Arrange chicken pieces on a baking sheet, spray with cooking oil, and bake at 425°F for 15-20 minutes, turning halfway through to ensure crispiness.
How do I know the chicken is fully cooked?
Check the internal temperature reaches 165°F with a meat thermometer. The chicken should look golden brown and feel firm when pressed.
Can this recipe be made gluten-free?
Yes! Replace regular soy sauce with tamari or coconut aminos, and use a gluten-free cornstarch for coating. The rest of the recipe remains the same.
What side dishes pair best with this chicken?
Rice, quinoa, or steamed vegetables are fantastic options that soak up the delicious sauce perfectly.

Sticky Skillet Sweet Chili Chicken Recipe
- Total Time: 17-20 minutes
- Yield: 2 1x
Description
Sweet chili chicken brings zesty Southeast Asian flavors right to your dinner table, turning an ordinary meal into a super satisfying experience with minimal kitchen effort. Tender chicken pieces glazed in a tangy-sweet sauce deliver restaurant-quality results that will make your family ask for seconds.
Ingredients
Main Ingredients:
- 2 chicken breasts
- ½ cup cornstarch
- 1 egg
Coating and Seasoning:
- ½ teaspoon salt
- ¼ teaspoon black pepper
- 1 teaspoon garlic
- 1 teaspoon ginger
Sauce and Garnish:
- ⅓ cup sweet chili sauce
- 2 tablespoons soy sauce
- 1 tablespoon honey
- 2 tablespoons oil
- 1 teaspoon sesame oil
- 1 teaspoon cornstarch
- 1 tablespoon water
- ½ teaspoon red pepper flakes
- Sesame seeds
- Chopped green onions
Instructions
- Season 2 chicken breasts with ½ teaspoon salt and ¼ teaspoon black pepper. Create two shallow dishes: one with 1 beaten egg, another with ½ cup cornstarch.
- Dunk each chicken piece into the egg, then thoroughly coat with cornstarch, ensuring complete coverage for a crisp exterior.
- Warm 2 tablespoons oil in a large skillet at medium heat (350°F). Carefully arrange chicken pieces in a single layer, cooking 3-4 minutes per side until golden brown and internal temperature reaches 165°F.
- Remove chicken from pan. In the same skillet, sauté 1 teaspoon minced garlic and 1 teaspoon grated ginger for 30 seconds until aromatic.
- Pour ⅓ cup sweet chili sauce, 2 tablespoons soy sauce, 1 tablespoon honey, and 1 teaspoon sesame oil into the pan. Stir ingredients together and bring to a gentle simmer.
- Whisk 1 teaspoon cornstarch with 1 tablespoon water, then blend into the sauce. Simmer 1-2 minutes until the mixture thickens and becomes glossy.
- Return chicken to the skillet, coating each piece thoroughly with sauce. Cook an additional 1-2 minutes to integrate flavors.
- Garnish with sesame seeds and chopped green onions. Add red pepper flakes for extra heat if desired. Serve hot over steamed rice.
Notes
- Marinate chicken for at least 30 minutes to enhance flavor absorption and tenderness.
- Use a meat thermometer to ensure chicken reaches 165°F for safe cooking without drying out.
- Adjust sweet chili sauce heat level by selecting mild or spicy brands based on personal preference.
- For gluten-free version, replace regular soy sauce with tamari and check sweet chili sauce ingredients carefully.
- Prep Time: 5 minutes
- Cook Time: 12-15 minutes
- Category: Chicken
- Method: Frying
- Cuisine: Asian
Nutrition
- Serving Size: 2
- Calories: 420 kcal
- Sugar: 20 g
- Sodium: 900 mg
- Fat: 15 g
- Saturated Fat: 2.5 g
- Unsaturated Fat: 11 g
- Trans Fat: 0 g
- Carbohydrates: 35 g
- Fiber: 1.5 g
- Protein: 35 g
- Cholesterol: 110 mg
Mary Sue
Founder & Creative Recipe Developer
Expertise
Comfort Food Twists, Seasonal Cooking, Creative Flavor Pairings, Easy Weeknight Dinners, Flexible Pantry Cooking
Education
Mary Sue is the playful, creative recipe mind behind Mary Sue & Susan, known for big flavor ideas, warm storytelling, and dishes that feel both comforting and a little unexpected. She has a talent for taking familiar meals and giving them just enough personality to make them memorable.